How to Use a Wireless Door Lock
Connect a wireless door lock to CoreStation and use it as an entry door.
This document explains how to connect and set up a wireless door lock.
Wireless Door Lock is available for CoreStation v1.7.1 or later and BioStar 2 v2.9.4 or later.
Activating a Wireless Door Lock Device License
Enrolling and using the wireless door lock requires a separate device license.
Contact the place of purchase to issue a device license.
-
Wireless Door Lock device licenses can be activated on CoreStation through BioStar 2.
-
The device license file is an encrypted file and cannot be modified arbitrarily.
-
Device licenses are issued based on the device ID. If the device ID is changed in an unusual way, the warranty service for the license is not provided.
-
You can issue a device license for up to 12 devices, equal to the number of wireless door locks you want to connect.
-
The maximum number of wireless door locks that can be connected with a device license is 12. Even if you activate multiple device licenses, you cannot exceed 12 devices.
-
Click Settings → License.
-
Click Browse to load the Device License file from the path where the device license is saved.
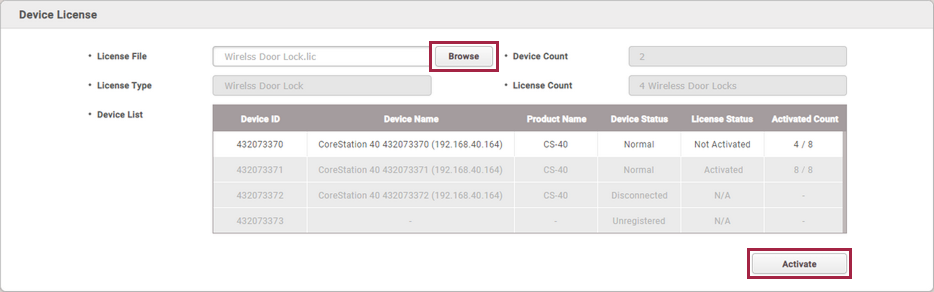
The image above is an example screen and may differ from the actual screen. -
After checking the device list, click Activate to activate the device license. If the license activation fails, an activation failed message is displayed, and you can try to activate the license again.
Enrolling a Wireless Door Lock with Corestation
Add a wireless door lock to a CoreStation enrolled in BioStar 2.
-
Supported OSDP antenna and wireless door lock are as below:
-
U&Z OSDP Antenna: CX8936
-
U&Z Wireless Door Lock: CX217x (Handle), CX212x (Knob)
-
-
To connect the Wireless Door Lock, the wireless antenna module must be connected to the CoreStation. Only two wireless antenna modules can be connected.
-
6 wireless door locks can be connected to one wireless antenna module, and the maximum number of wireless door locks that can be connected to one CoreStation is 12.
-
Click DEVICE.
-
Right-click on the name of a CoreStation and click Add OSDP Device.
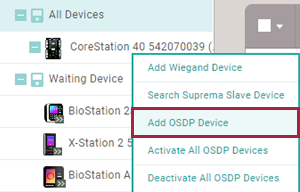
The image above is an example screen and may differ from the actual screen. -
The Select OSDP Device Type window appears. Select OSDP Antenna and then click Ok.
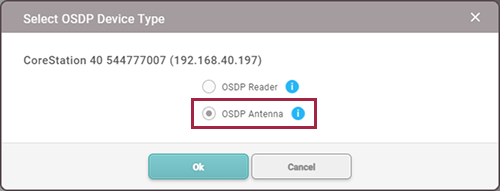
The image above is an example screen and may differ from the actual screen. -
A list of ports appears. Among the ports whose Port Status is Available, select the port to add the OSDP antenna.
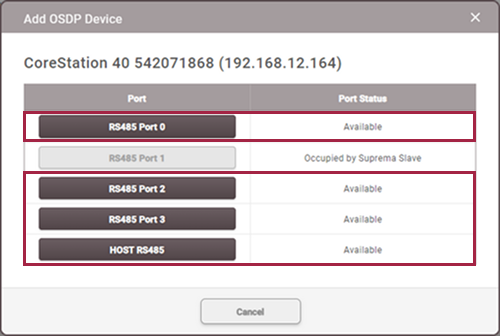
The image above is an example screen and may differ from the actual screen. -
Set the Information, Network (RS-485), and click Apply.
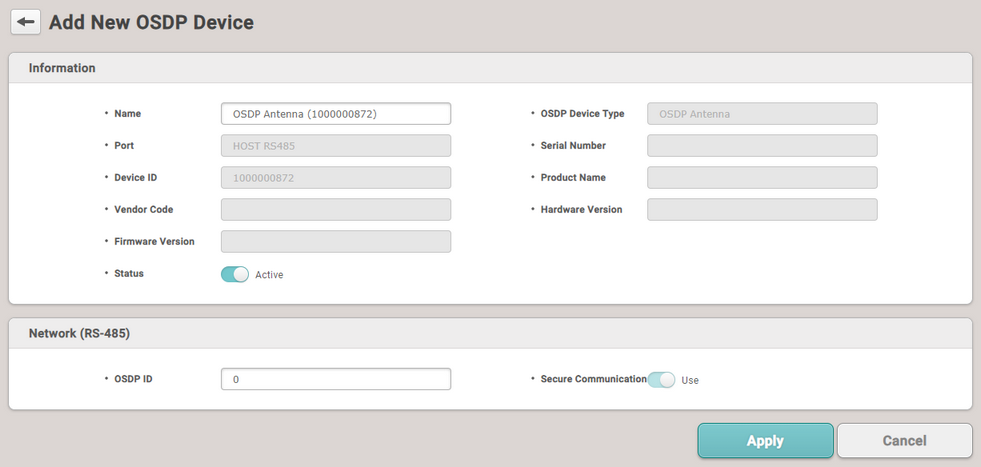
The image above is an example screen and may differ from the actual screen. InfoOSDP ID defaults to 0. Enter the OSDP ID set on the OSDP antenna.
-
Right-click the added OSDP antenna and click Auto Add Wireless Door Lock.
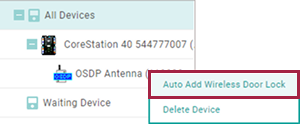
The image above is an example screen and may differ from the actual screen. -
Tag the provided SERVICEKEY card on the wireless door lock.
-
The OSDP antenna connects to the wireless door lock. Set the door to a connected wireless door lock and use it.
Setting a Wireless Door Lock
You can set the Name, Status, and Authentication of the enrolled wireless door lock.
-
Click DEVICE.
-
Click a wireless door lock on the device list to edit.
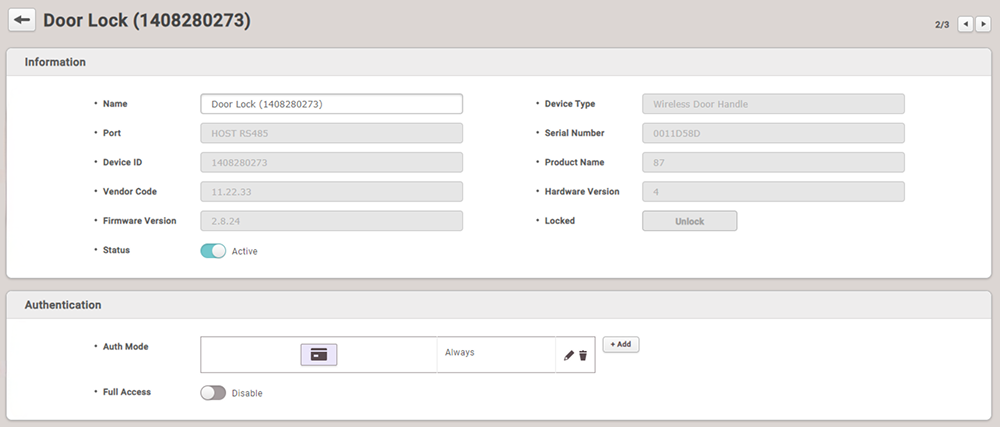
The image above is an example screen and may differ from the actual screen. -
Name: Enter a device name. If not entered, it will be assigned automatically.
-
Status: Set the device status. If set to Inactive, CoreStation will not communicate with the wireless door lock.
-
Auth Mode: The wireless door lock can only use a CSN card as an authentication mode.
InfoClick + Add, then drag and drop the Card. Select a schedule and click OK to register the authentication mode. If no desired schedule is available, click + Add Schedule to create one.
-
Full Access: Full access can be granted to users registered in the CoreStation to which the wireless door lock is connected without setting an access group.
-
-
Click Apply to save the settings.
View a Wireless Door Lock Status
Check the battery status of the wireless door lock in use.
-
Click MONITORING.
-
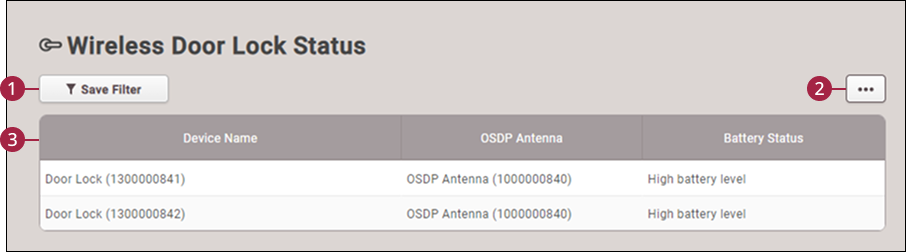
Click Wireless Door Lock Status in the List View.
-
Save Filter Button: Saves the set filter.
-
Function Buttons (Column Setting): Changes the column setting of the log.
-
Status List: Check the battery status of the wireless door lock in use.
-
High battery level: The battery level is sufficient.
-
Low battery level / Critical battery level: The battery level is low, it is recommended to replace the battery for smooth operation.
-
Empty battery: The battery level is almost empty. Please replace the battery.
-
In the Settings → Alert menu, you can set alarms to occur at Low battery level, Critical battery level, and Empty battery.