Suprema Integration with Gallagher
-
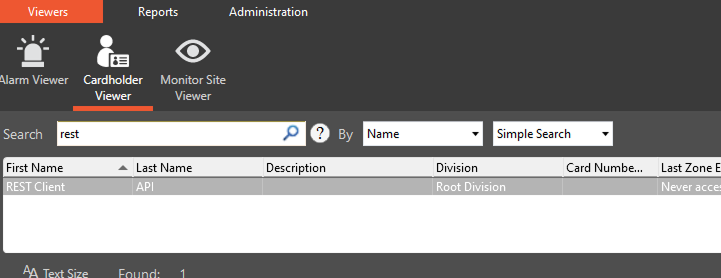
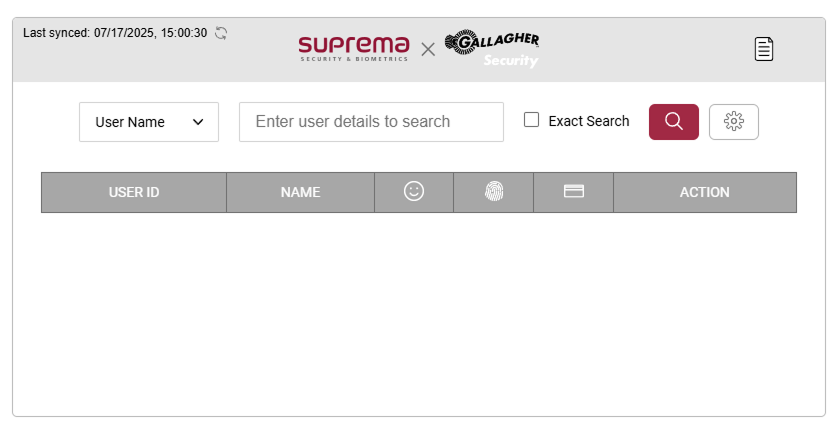
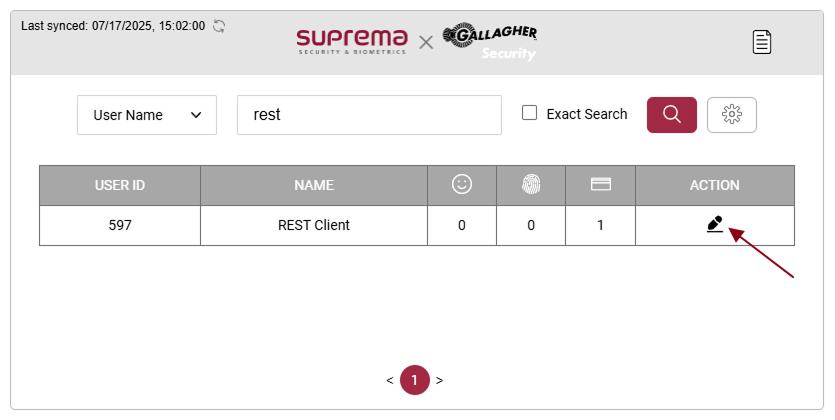
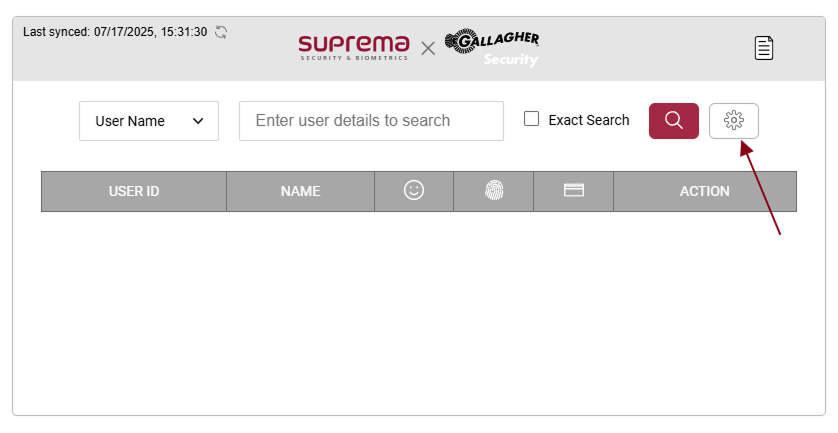
In Cardholder Viewer search rest and it will load all the windows.
-
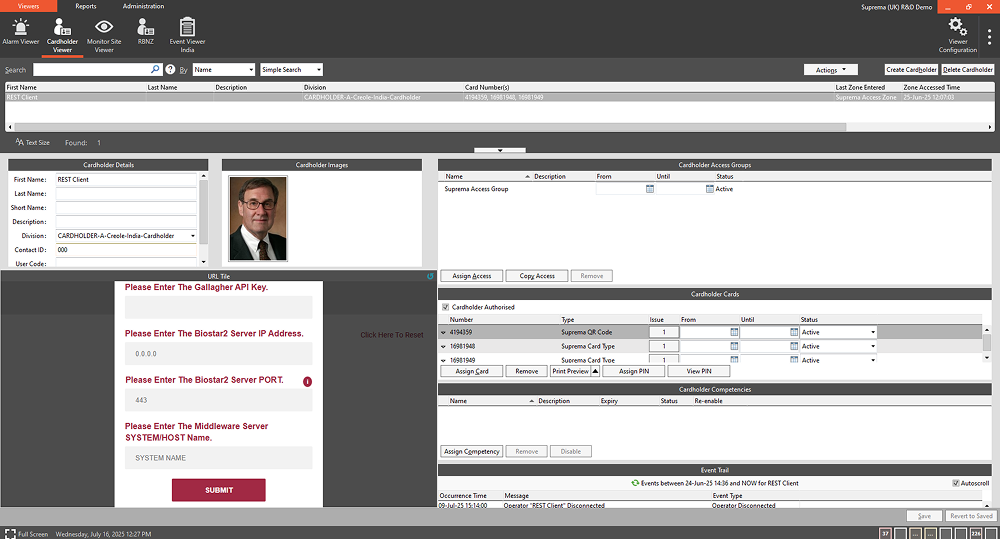
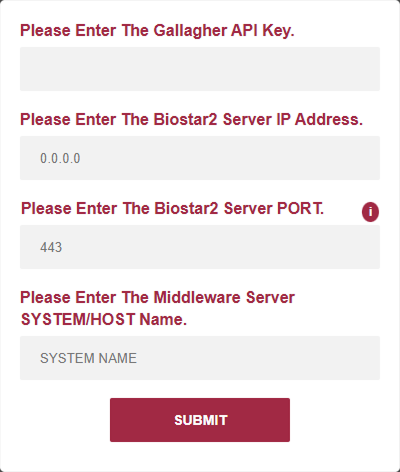
First, the screen below appears, and you need to enter the Gallagher API Key, BioStar 2 server IP, BioStar 2 server PORT, and SYSTEM/HOST name of the middleware address to move forward.
InfoIf you are running the middleware on a specific port on two different servers with particular IP addresses, kindly refer to: Configure the inbound rules for the middleware.
-
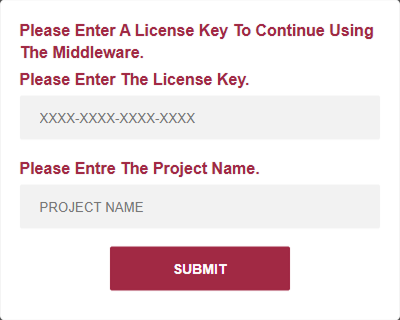
On the License screen, enter the License key and the exact project name that you get from the admin.
-
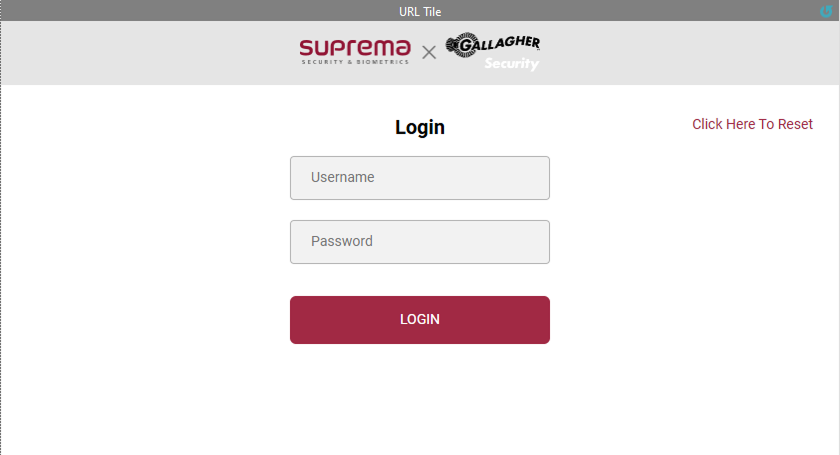
On the login screen, enter the credentials of suprema BioStar 2.
InfoOn the Login screen if you get an error for LAN is disconnected or IP is changed for (IP Address). Kindly refer to: Troubleshoot login page error.
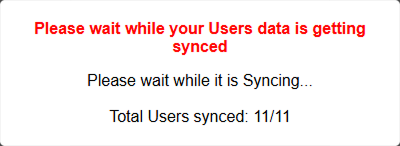
After entering the correct credentials the below user sync screen will open for initial sync.
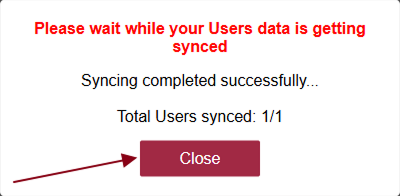
After successfully syncing the users, the close button will appear on the screen, and pressing the Close button to move further.
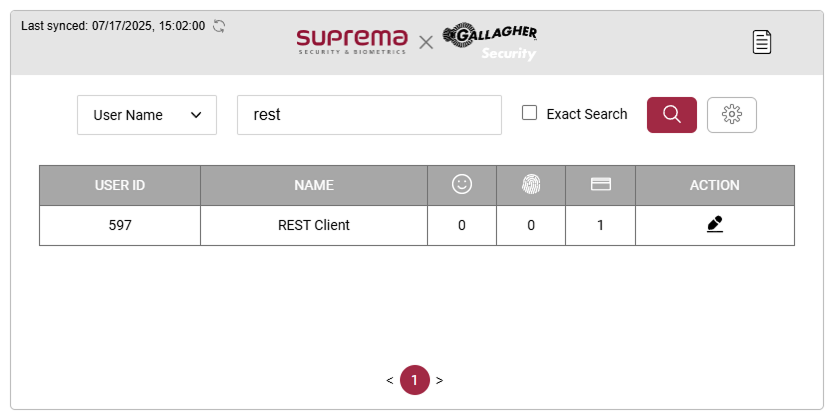
After successfully syncing the users, the user search screen will appear.
-
Search rest and press the search button and the search user will appear in the table.
-
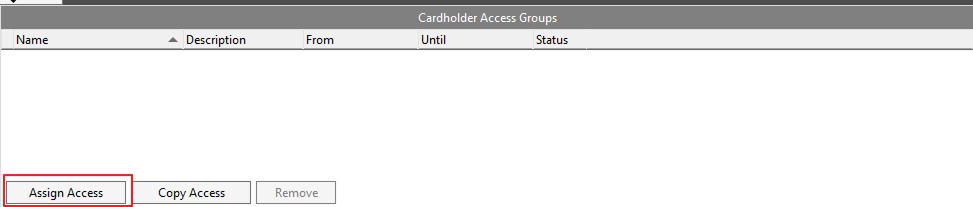
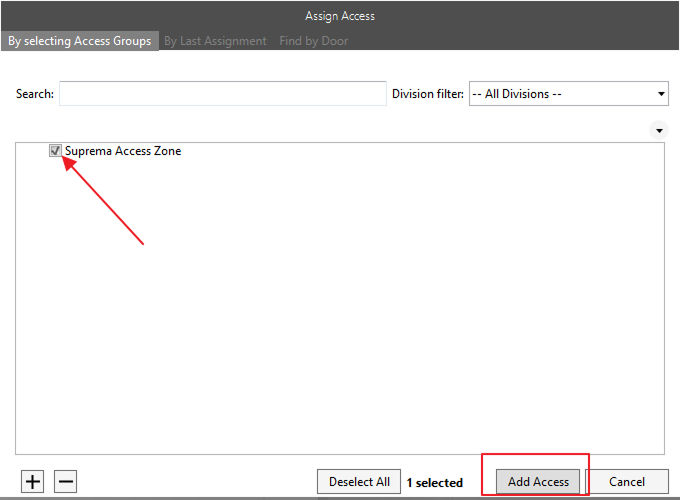
Now, connect the Mifare Encoder to the system. Press the Assign Access button, choose the Suprema Access group we created, and press the Save button.
-
After adding the access group and connecting the Mifare Encoder right-click on Viewer Configuration and reload the viewer.
-
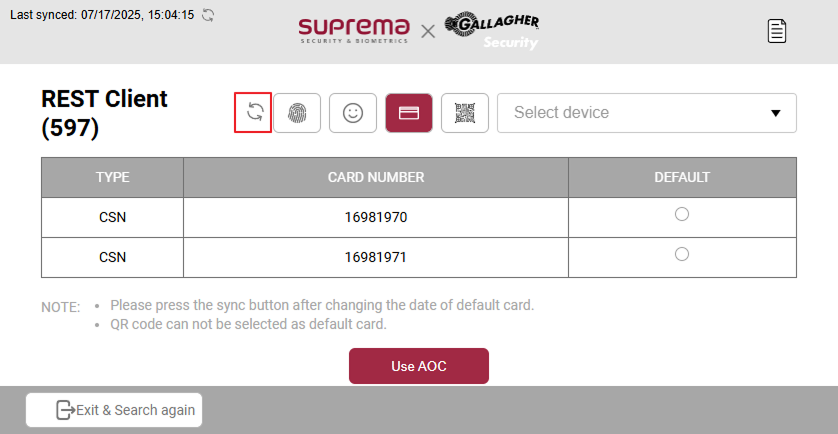
Putting the card on the Encoder Assign Card from the Encoder button will actively press that button will assign the card to the user, after that press the Save button. Then press the Edit button in the middleware.
InfoIf you want to enroll only Biometric then don’t assign any card in advance, just press the Edit button after assigning the access zone.
You can assign multiple cards to the user when you assign the card and press the Save button press the green sync button it will sync the whole data of the particular user.
-
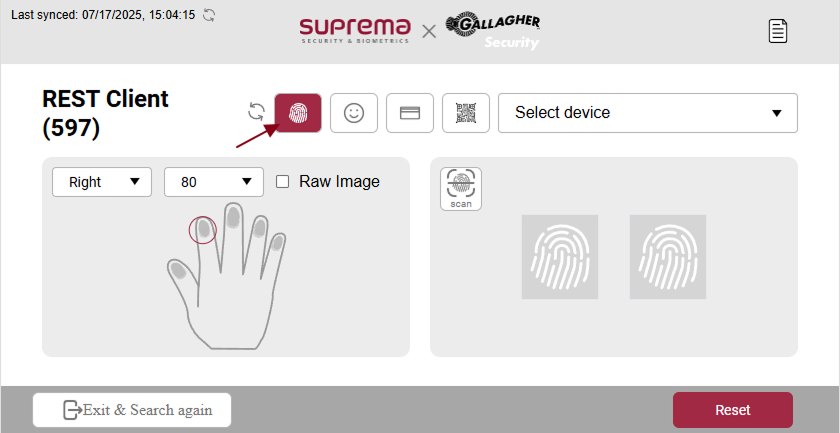
Press the Fingerprint button and it will load the fingerprint module.
-
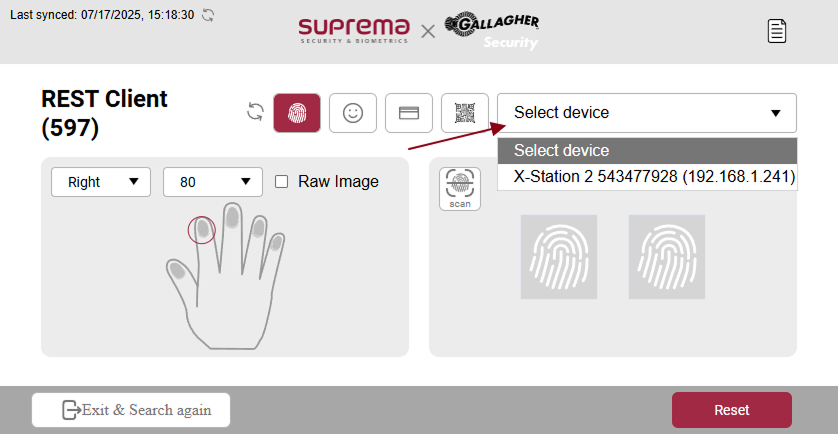
Select the device from the list.
-
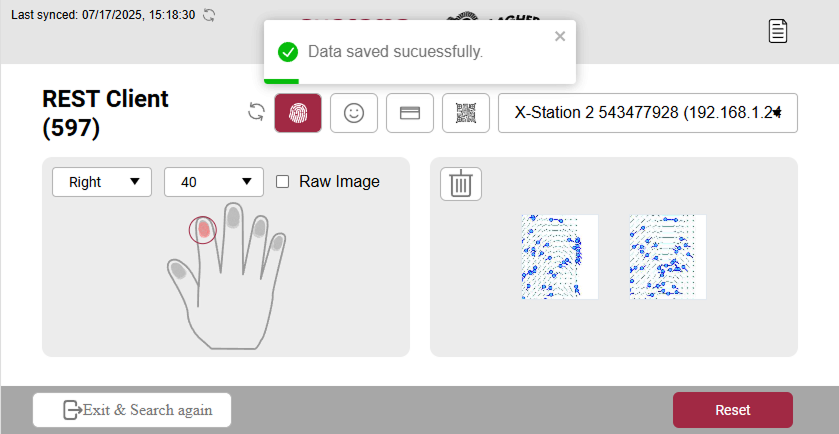
You can select the left or right hand, after that quality of the fingerprint and press the scan button, it will start scanning. When the scanning is complete, the scan button will change to the delete button and the fingerprint will appear on the display, Data will be stored automatically when the data is saved successfully the saved fingerprint will be colored.
-
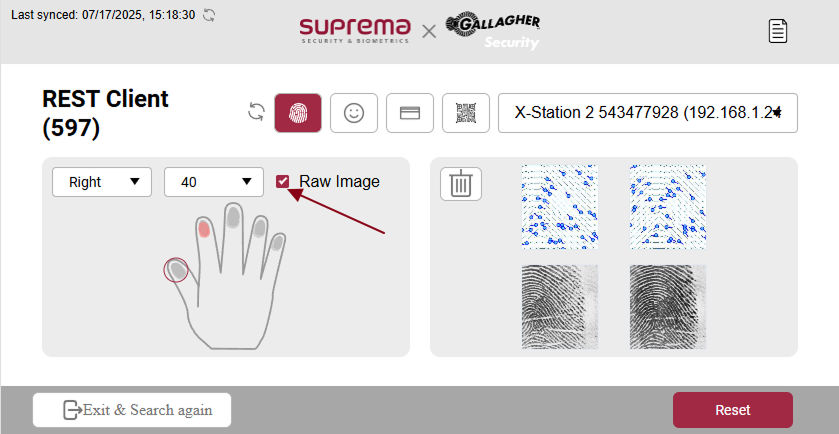
If you want a raw image then tick the Raw Image checkbox and then scan the finger.
-
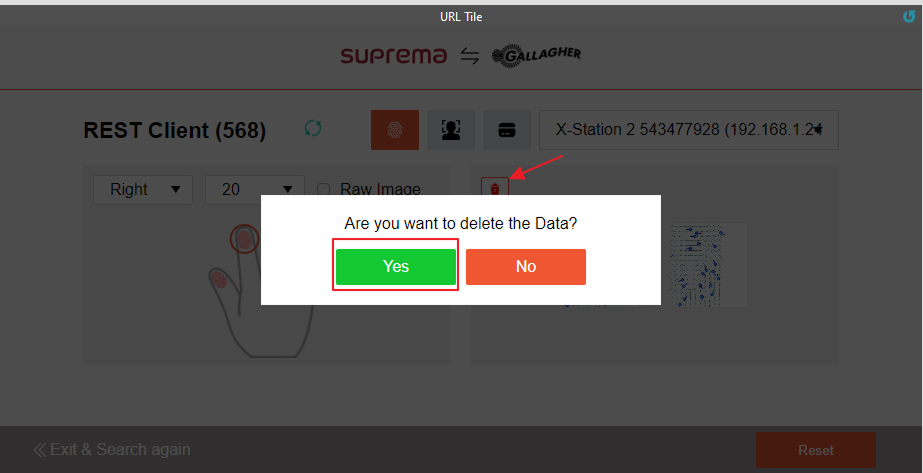
To delete the single fingerprint press the delete button and the pop-up will appear then press the Yes button, It will delete that particular fingerprint.
To Reset all the fingerprint data, press the reset button and the pop-up will appear then press yes it will reset all the fingerprint data.
-
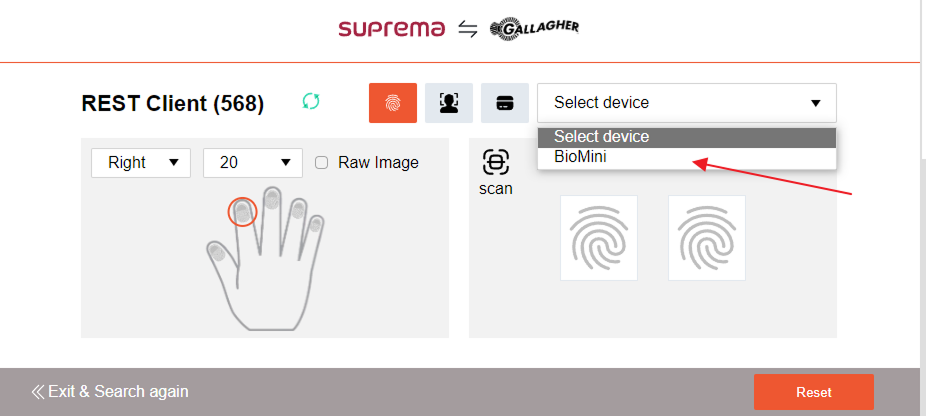
We can use BioMini Plus 2 to enroll user fingerprint data. For that just connect the device and you will see it inside the fingerprint select device section. Select the device and start enrolling data for the user.
-
To enroll the visual face press the button beside the fingerprint it will load the visual face module.
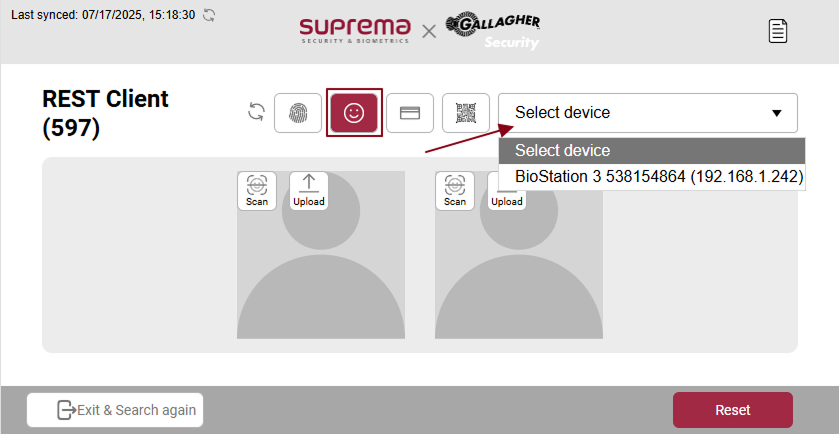
There are two methods to scan the visual face. We can upload it or we can scan the face to enroll.
-
Press the upload icon, then a new window will open then you can choose the image you want to upload.
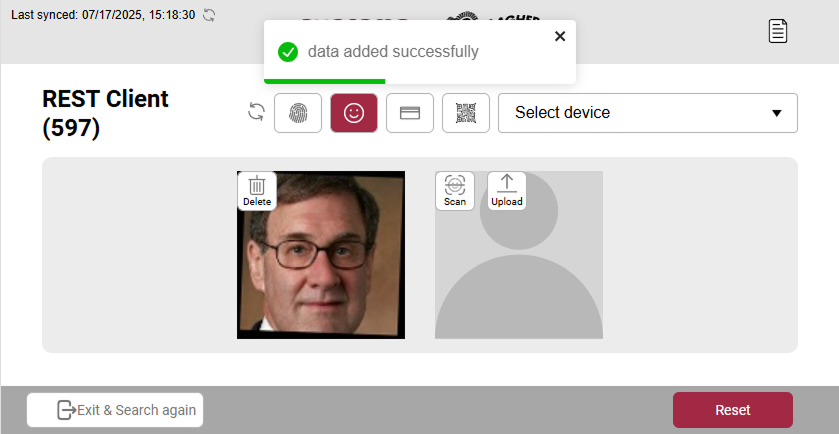
If you press the scan button it will activate the device that you have selected, use that selected device to scan your face. Data will be stored automatically after uploading or scanning the visual face and then a success message will pop up.
 Info
Info-
The supported image file size is up to 2MB.
-
Supported image file formats are JPG, JPEG, and PNG.
-
If an error occurs while entering a visual face with a profile image, please use a sharper image.
-
-
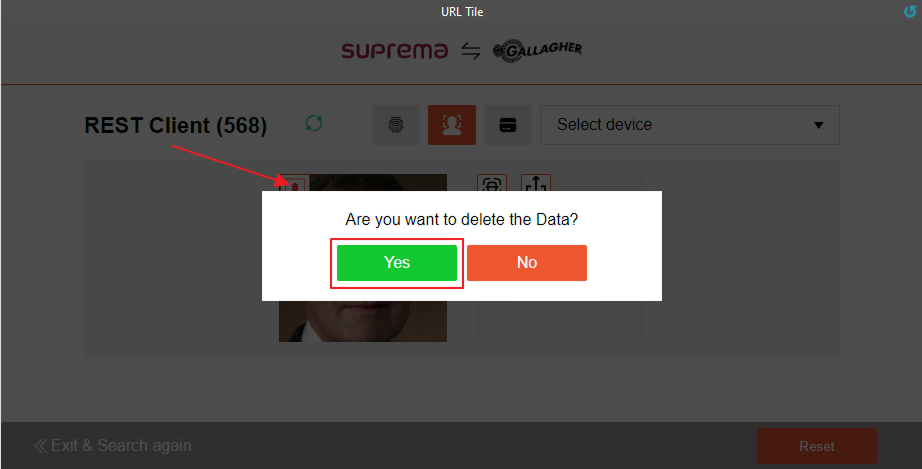
If you want to rescan or re-upload the data you need to delete the old data press the red delete button pop-up and press Yes and it will delete that image.
-
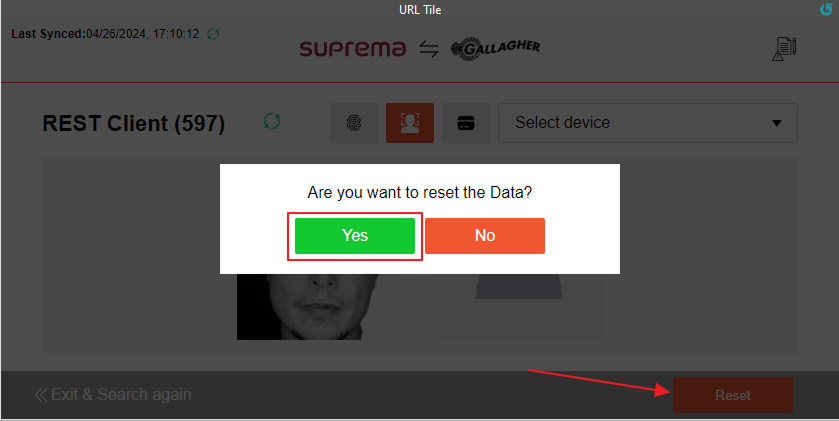
And if you want to reset all visual face data press the reset button and press Yes it will reset all the data.
-
If you exit and search for the user again, all the saved data will appear in the table.
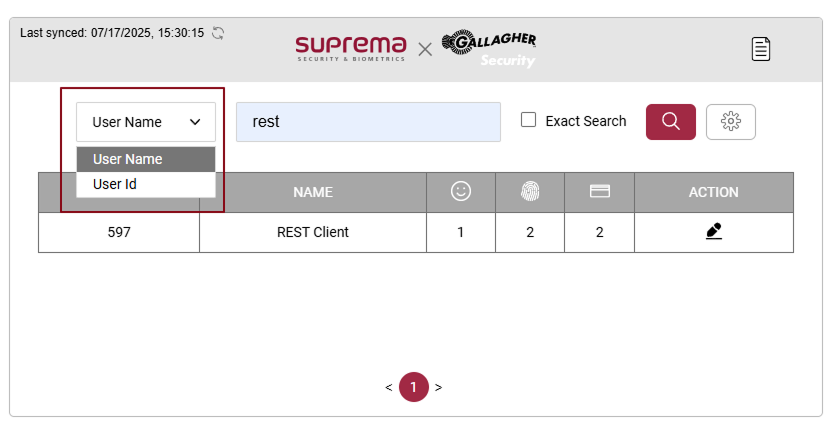
You can also search for the user with its id change the drop-down user name to user id and search for a user with id.
Enroll the User’s Photo ID in the Command Center for Face Template
-
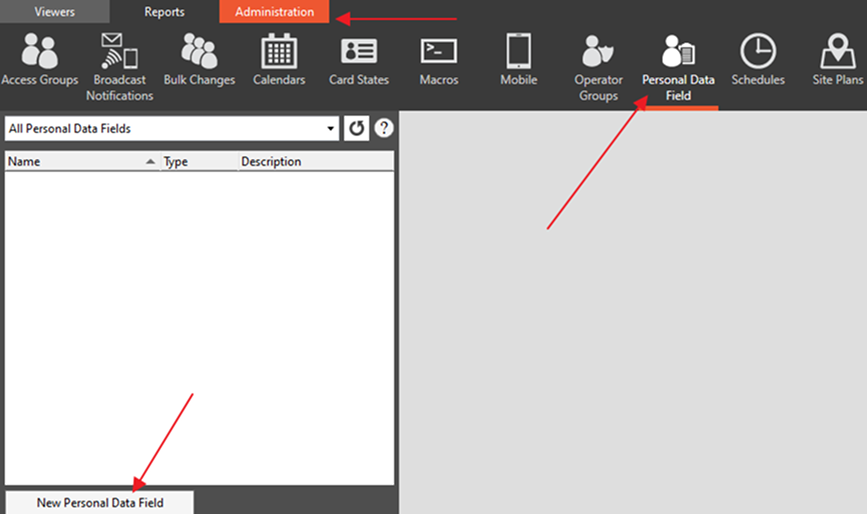
Go to the Administration and Click on Personal Data Field and press on New Personal Data Field.
-
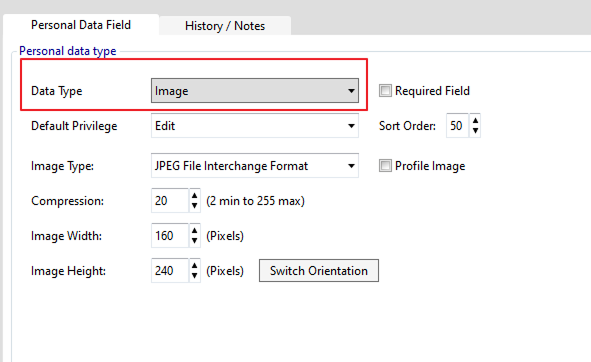
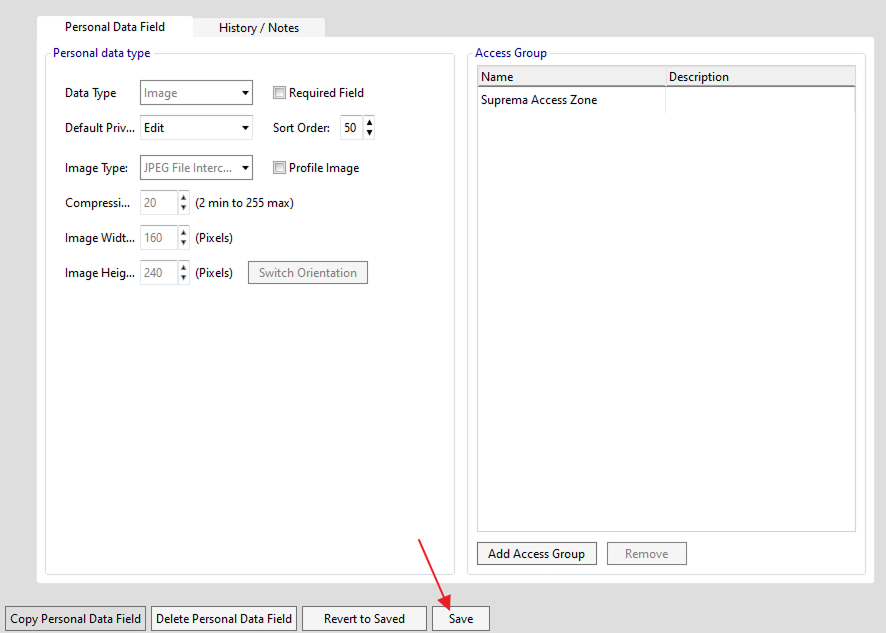
Now inside the pop-up set the name as Image and press the Close button. In the Data Type field select Image as a Data Type Don’t change anything here and assign Access Group by pressing on the Add Access Group button inside the Access Group section and selecting Suprema Access Zone After selecting Access Zone press the Add Selection button for the field.
-
After Assigning Access Zone press the Save button on the bottom.
-
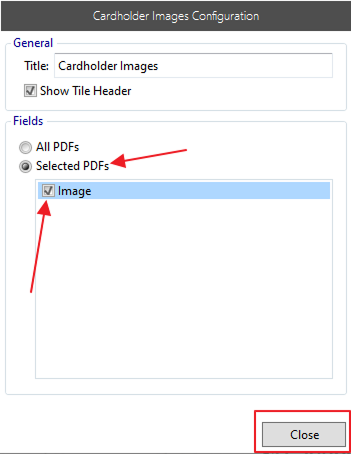
Now go to the Viewer Configuration and press Click to configure for Cardholder Images. Inside Cardholder Images Configuration Choose Selected PDFs, select the Image field and press the Close button. Now press the Save button on the bottom left side to save the changes. Now right-click on Viewer Configuration and reload the viewer to reflect the changes.
-
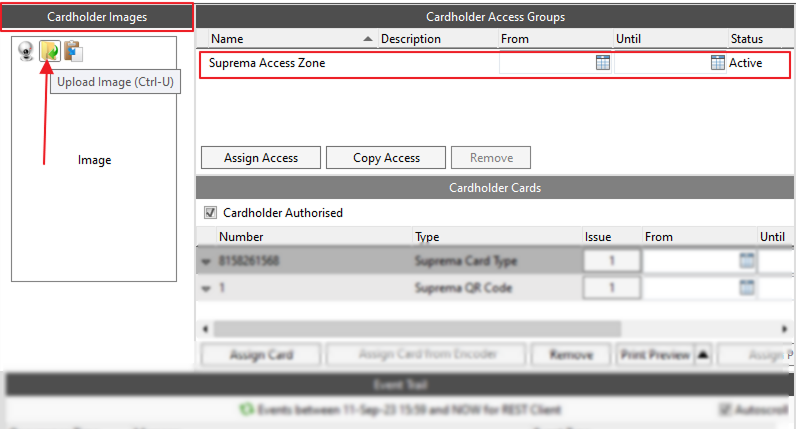
Now inside the Cardholder Viewer, you can see the Cardholder Images tab You can upload images By clicking on the yellow icon. For this, we must assign an Access Zone to the user. After Uploading the image press the Save button.
-
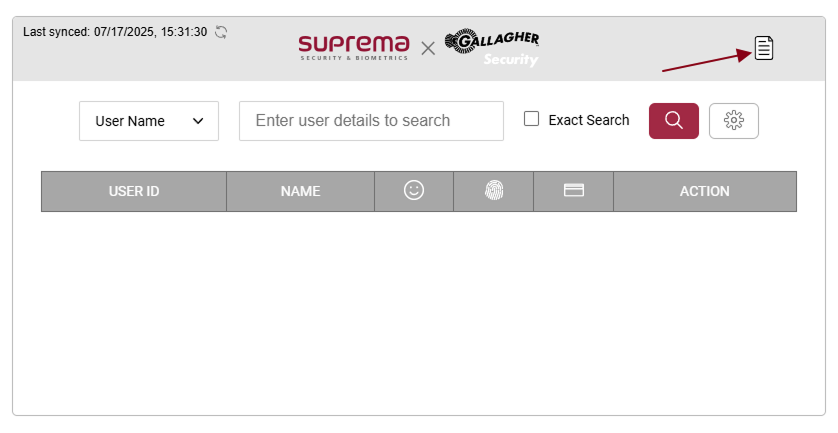
If you want to see the error message that occurs for users while updating the user information you can find that inside the ErrorLog section by clicking on this icon one Pop-Up will open which shows different errors for the user.
-
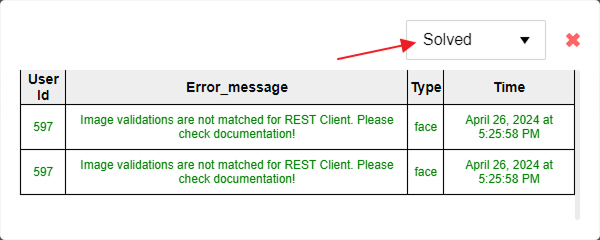
As in the below Image, we have an error for one user, Here the Type defines what type of error it is, Status Un-solved means the Error is not solved for the user yet and Solved indicates the error is solved for the user. Now the one red box indicates the name of the user and the another red box indicates the user ID.

-
Now the below image is after changing the user image from the Gallagher Command center as we get the error while enrolling the face for the user and after successful enrollment the color of the Error message is also changed and Status is also changed.
-
If you want to change the settings on the device, press the settings button and you can see the below screens:
Enroll the User’s Email ID in the Command Center for the QR Code
-
Go to the Administration and Click on Personal Data Field and press on New Personal Data Field.
-
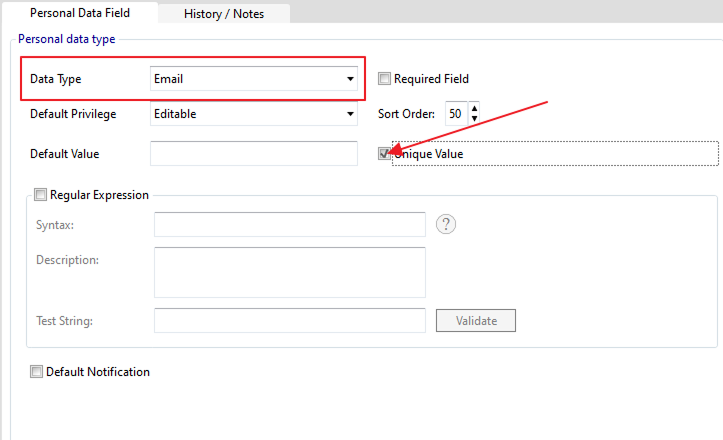
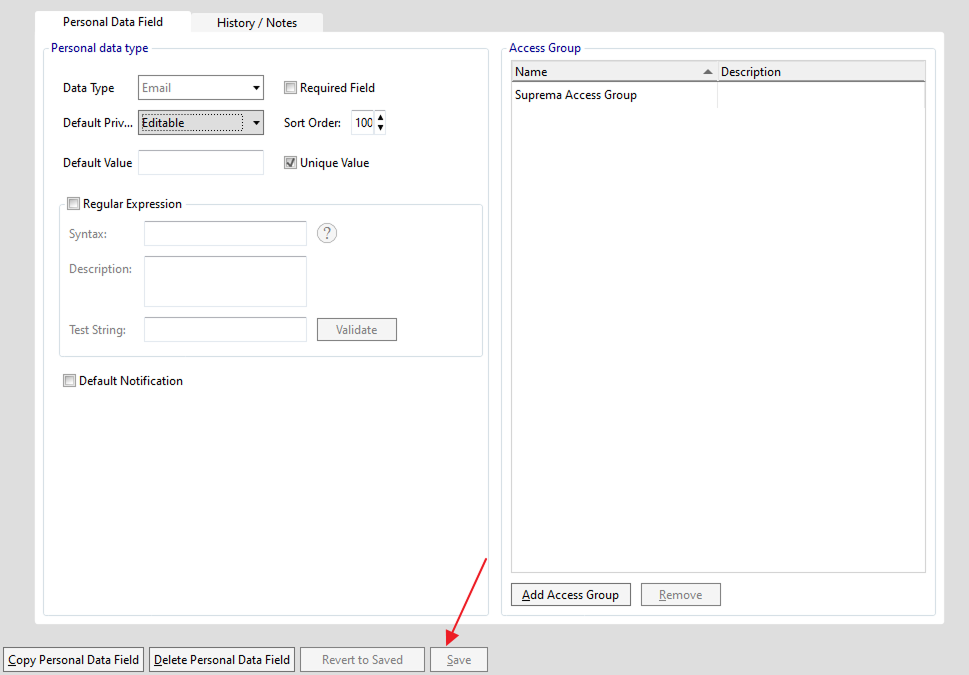
Now inside the pop-up set the name as Email and press the Close button. In the Data Type field select Email as a Data Type and Tick the Unique Value checkbox. Don’t change anything here and assign Access Group by pressing on the Add Access Group button inside the Access Group section and selecting Suprema Access Zone After selecting Access Zone press the Add Selection button for the field.
InfoPlease use the same terms as mentioned for the fields.
-
After Assigning Access Zone press the Save button on the bottom.
-
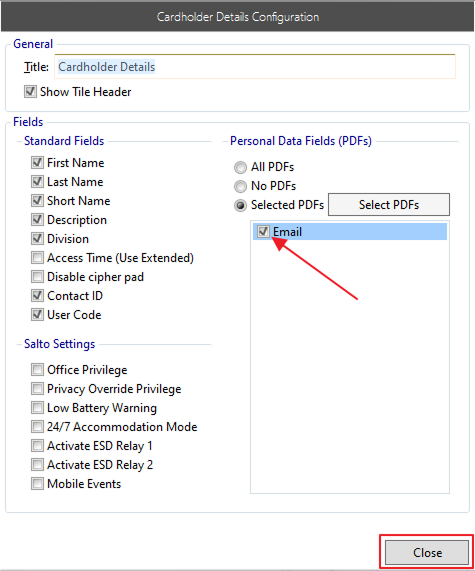
Now go to the Viewer Configuration and press Click to configure for Cardholder Details. Inside Cardholder Details Configuration Choose Selected PDFs and select Email field and press the Close button. Now press the Save button on the bottom left side to save the changes. Right-click on Viewer Configuration and press reload viewer.
-
To assign the QR Code, go to the user profile within the middleware and click on the QR icon. As shown below, the Add QR button is disabled, and there's a note indicating that the user's email hasn't been assigned in Gallagher.
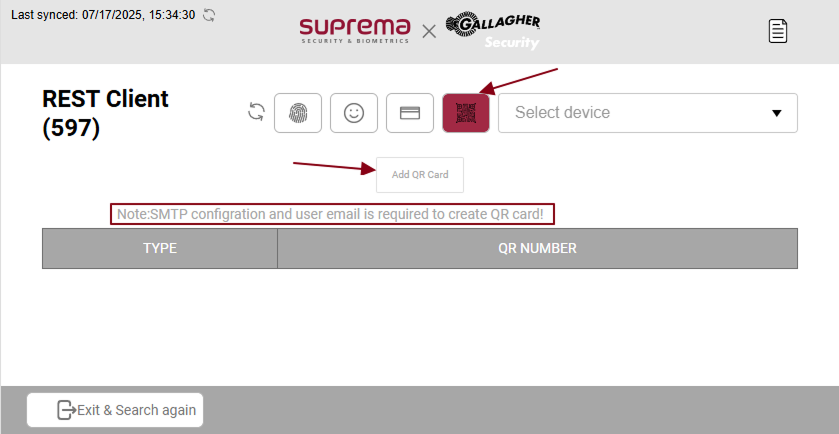 Info
Info-
To configure the SMPT configurations - Configure SMTP for QR Code.
-
To configure the email address in Gallagher, email configuration in Gallagher.
-
Configure the QR Card type in Gallagher - Create QR Code card Type.
-
-
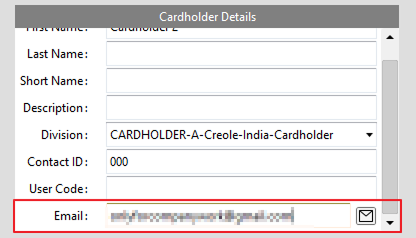
To assign an email address to a user, Inside the command center go to the user details and put user email inside the Cardholder details email field and press the save button.
-
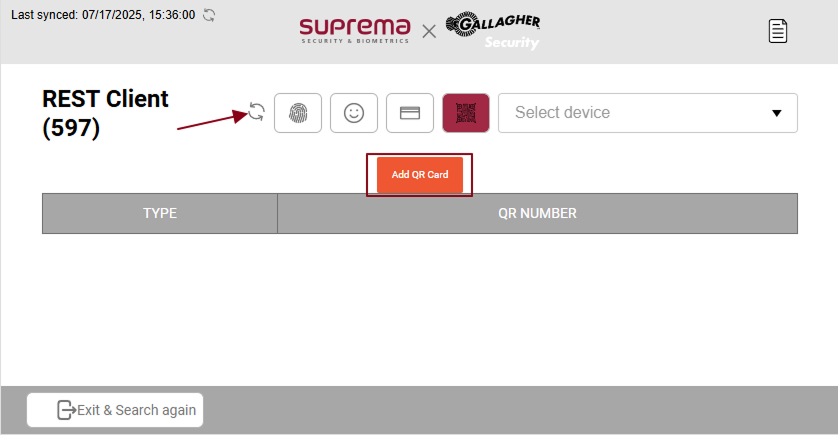
In the middleware user profile, press the sync button, and the email will be automatically assigned to the user profile in BioStar 2. The email button will now be enabled, and the note will be removed.
-
Now press the Add QR Code button inside the QR section of the user profile it will add the QR Code to Gallagher and BioStar 2 and send the QR Code to the email address that we assigned above!
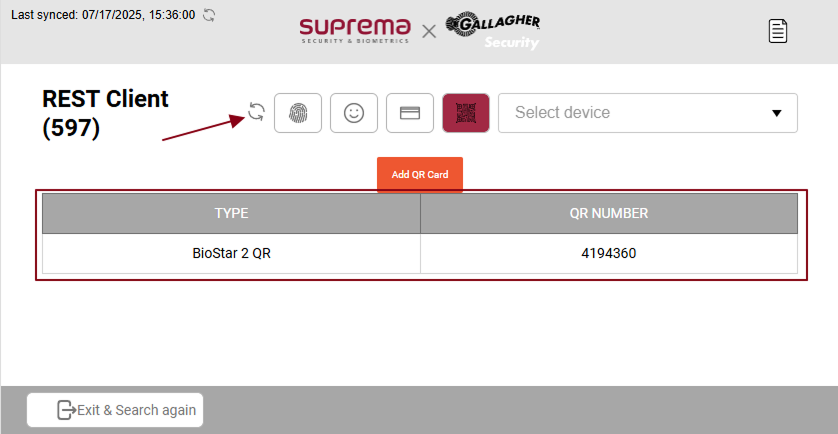
Once the Qr is added you can refresh the data by pressing the sync button.

-
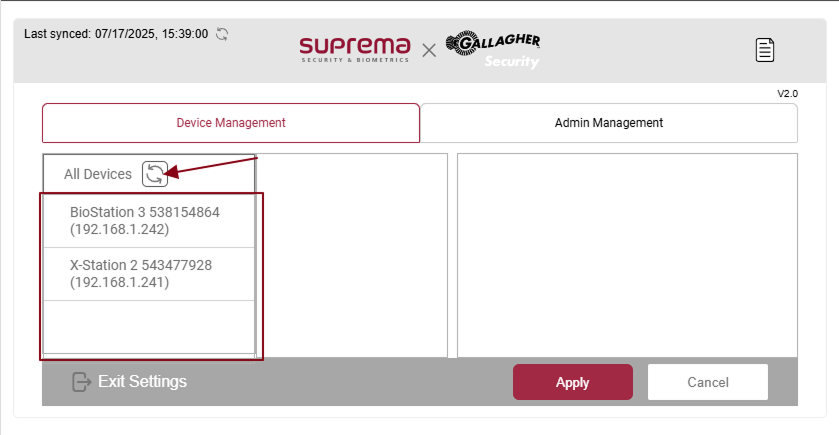
You have to press the sync button to sync the devices and you can see all the connected devices from here and select any of the connected devices to see the device setting.
-
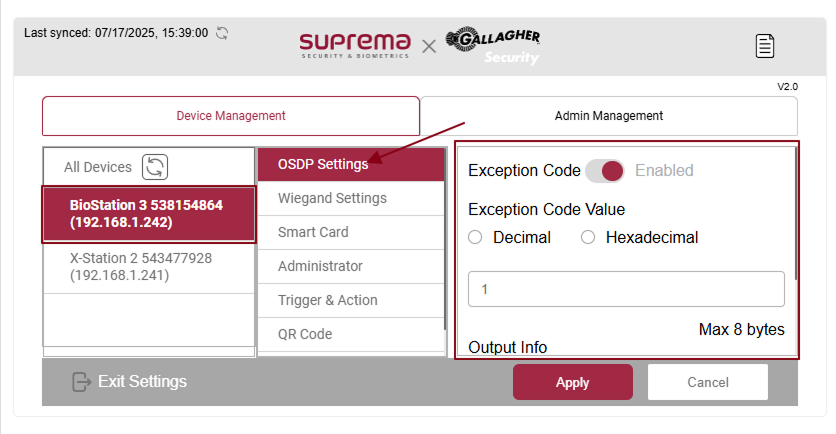
The below image indicates the device's OSDP settings.
-
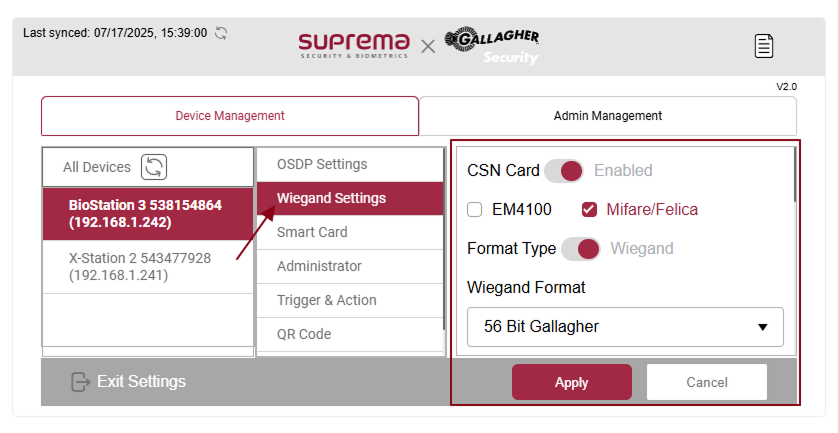
The images below are for the device’s Wiegand setting.
-
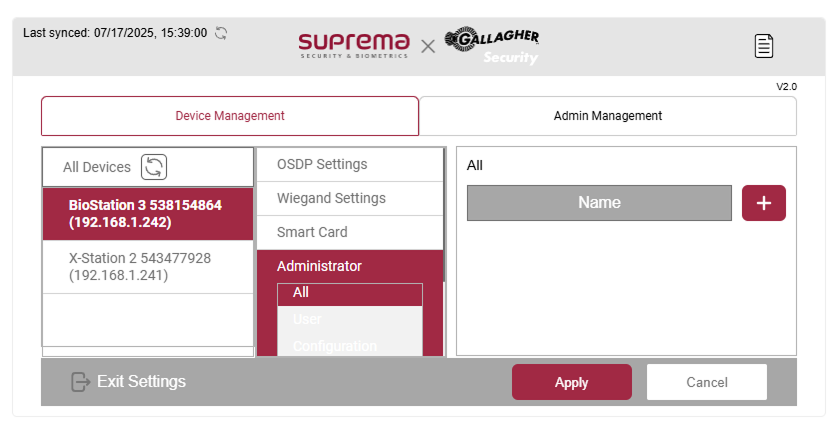
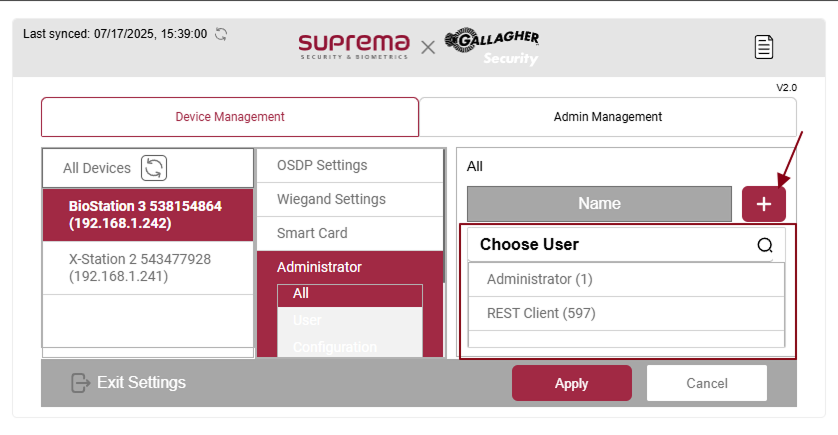
So the above image is for administrator mode where you can choose modes according to your needs, as you can see in the below image by pressing the + button you can select different users from the dropdown.
-
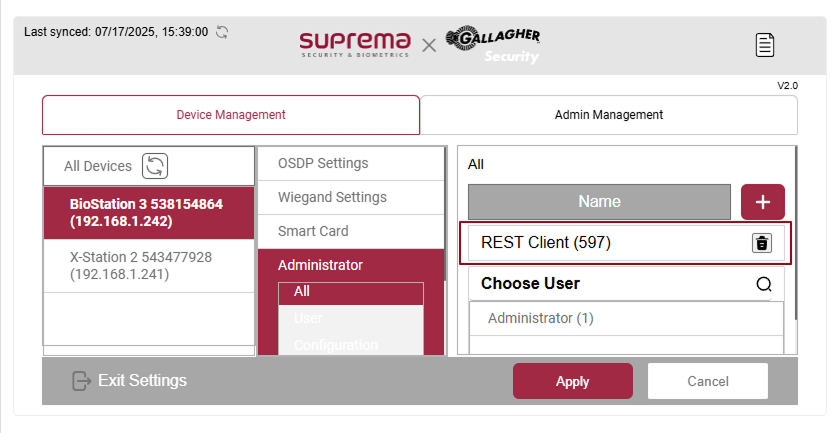
After selecting the user it can be displayed like the below image, you can delete the user from the list by clicking on the delete button.
-
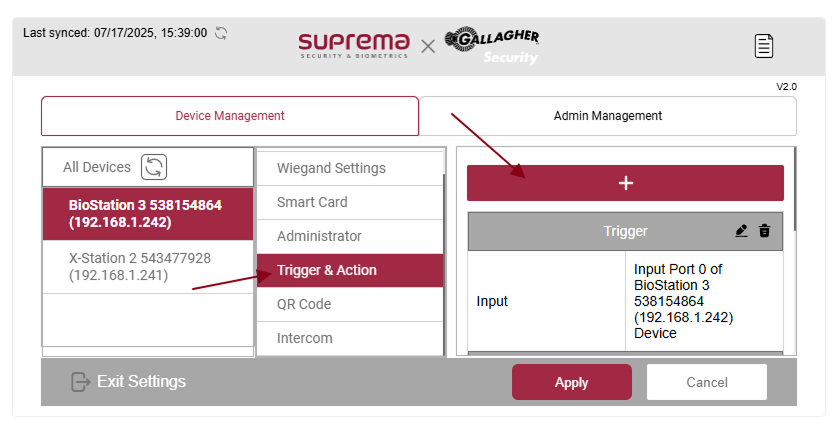
This is the trigger and action mode for the device's output mode. You can configure it by pressing the + button.
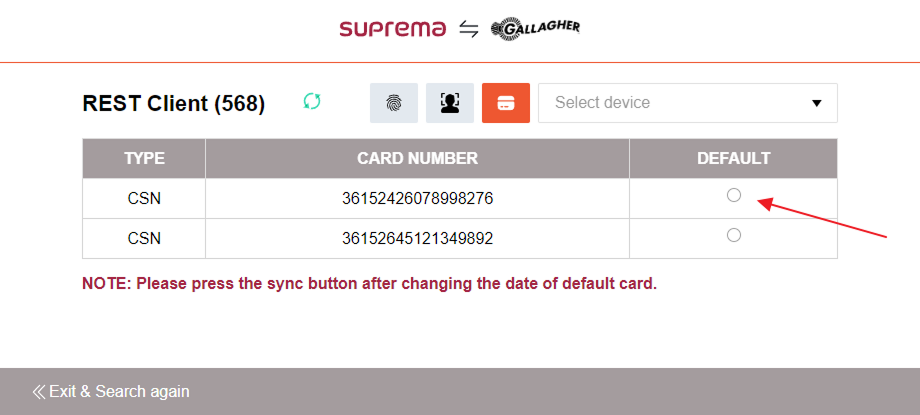
Default card Selection
-
You can select the default card by pressing the radio button for the user.
-
You can set cardholder expiry by setting the expiry date to default card.
 Info
InfoIf you made any changes in cardholder details, from the Command Centre. You need to open the same user in suprema integration with middleware and press the sync button.
Smart Card (AOC/TOC)
You must have a 2.9.4 or above version of BioStar 2 to use the smartcard feature.
-
If you want to use the Smart Card (AOC/TOC) option go to settings in the device, press the settings button, and inside Device Management select the device you want to configure and select the Smart Card option.
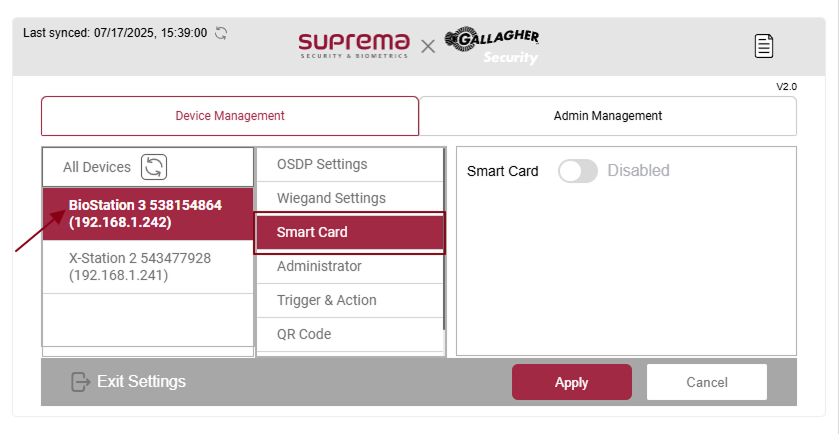
-
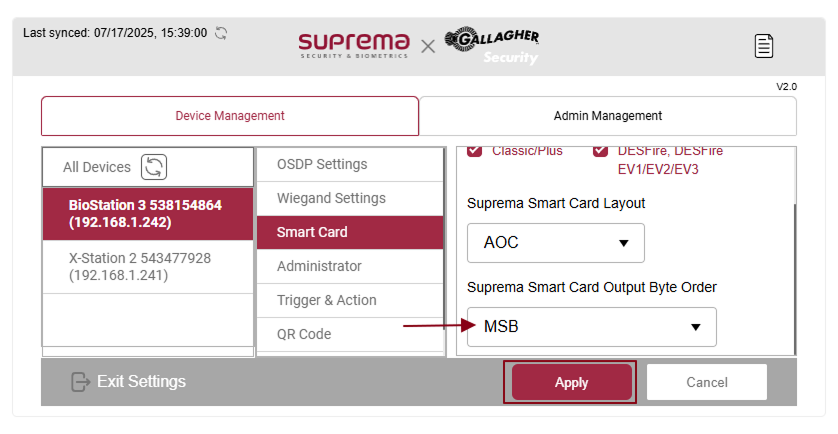
Now enable the Smart Card toggle and do the following settings as below screen.

-
After changing all the settings press the Apply button. After that press the Exit Settings button from the bottom left corner to exit from the setting tab.
-
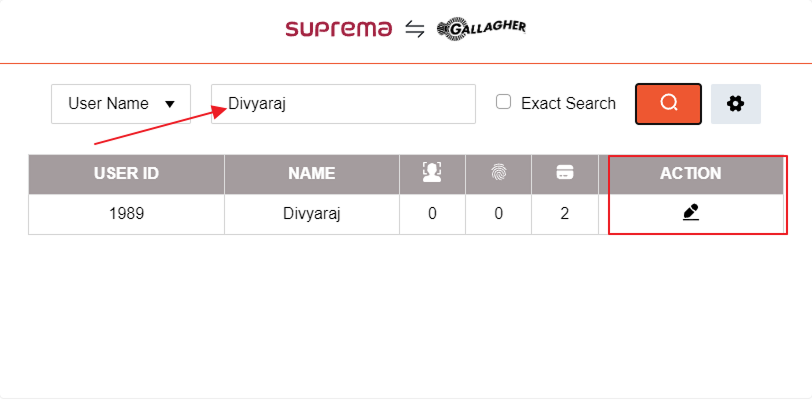
Now search for the user on the user search screen, you want to apply the smart card and press the edit button to view user details.
-
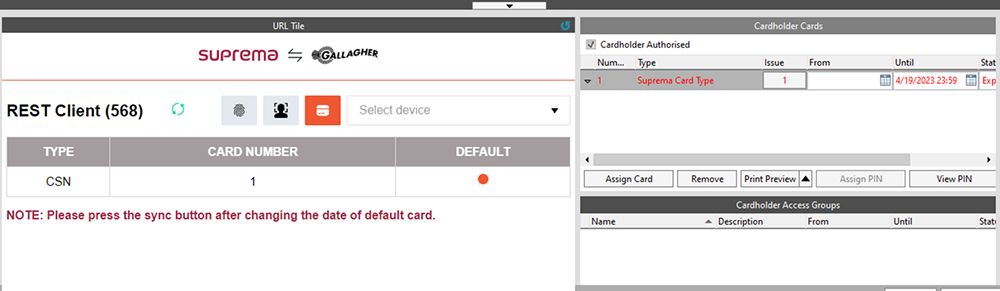
Now to assign the smart card you need to assign a card from the encoder from the Gallagher inside cardholder cards tab.
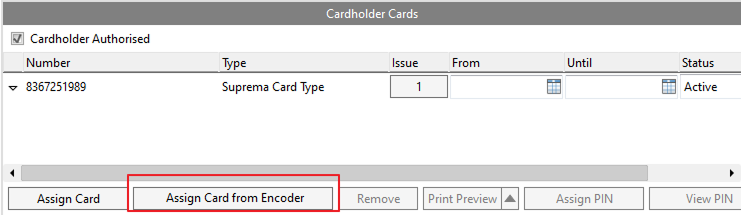
-
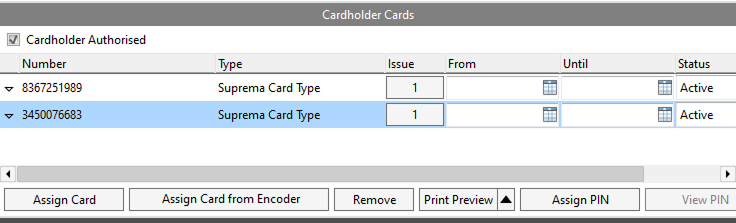
After pressing the button you can see the card number now you have to press save to inside Gallagher and you can see the newly assigned card.
-
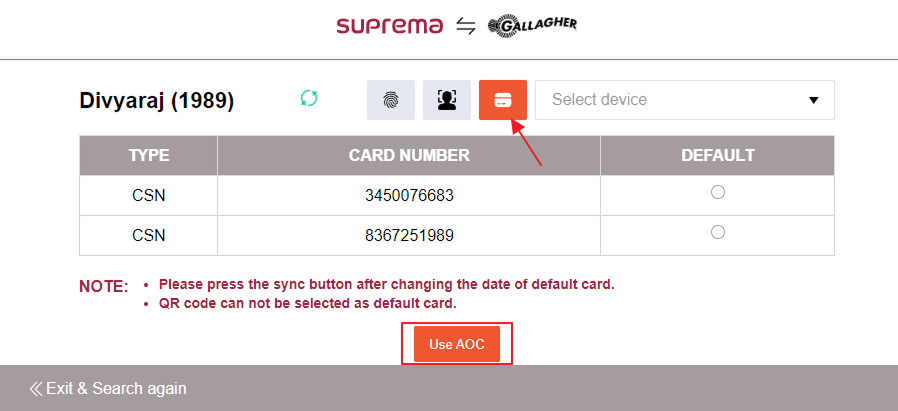
Now inside the user details table go inside the card section and press the Use AOC button to assign a smart card to the user.
InfoTo assign a Smart Card (AOC) for the user, the user must need the biometrics.
-
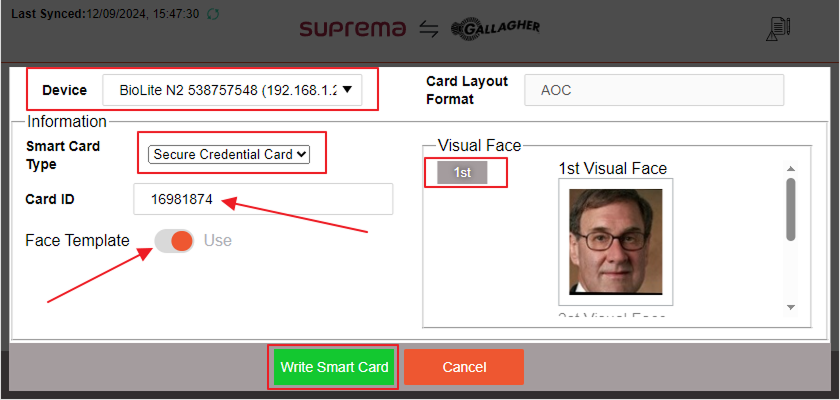
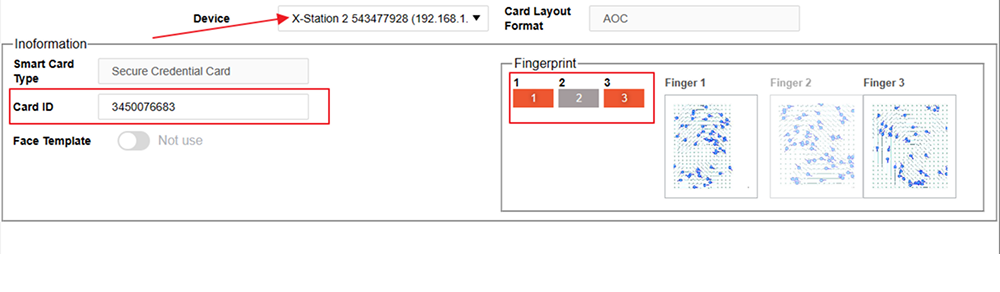
Now select the device you want to use for AOC, and use the same number for the card ID we get while assigning from the encoder. Select the face template and choose an image of the visual face tab. Press the write smart card button.
-
Now you have to scan the same card against the selected device to assign the card to the user. If you are not scanning the same card you will get an error message, else it will write the card for the user and clear all the biometric information for the user.
InfoYou can only assign one biometric to the Smart Card (AOC) for the user.
-
To assign the smart card with a fingerprint user must need a fingerprint, the user can assign up to 2 fingerprints per card. Inside the user card section press the Use AOC button and select the device, use the same number for the card ID we get, while assigning a card from the encoder. Select the fingerprints that you want to use for the smart card. Press the write smart card button.
-
Now you have to scan the same card against the selected device to assign the card to the user. If you are not scanning the same card you will get an error message, else it will write the card for the user and clear all the biometric information for the user.
HID ICLASS card
-
If you want to use the HID ICLASS card option go to settings in the device, press the settings button, and inside Device Management select the device you want to configure and select the Wiegand Settings option then scroll down and find the Wiegand settings.
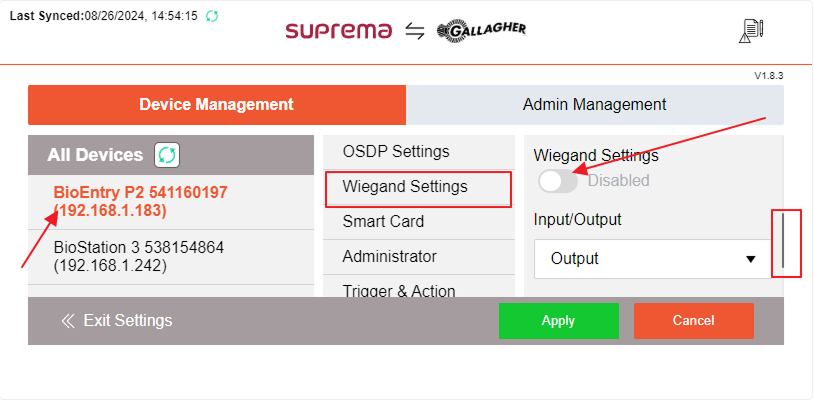
-
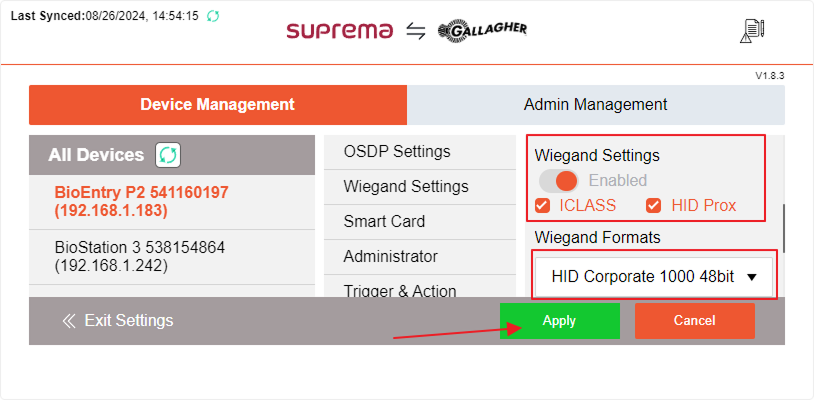
Now enable the Wiegand Settings option, and select ICLASS AND HID PROX Options. The Wiegand format must be the same as the selected default in the dropdown. Press Apply the button to save the changes.
InfoTo use the Wiegand card you must need at least one biometric for users.
-
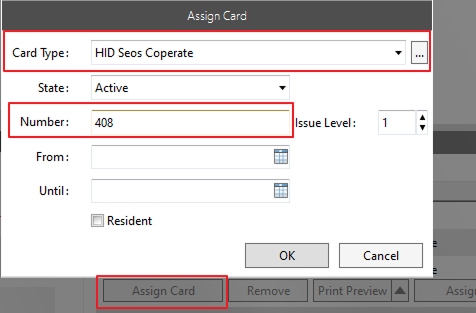
To use the feature, you have to assign the card to the user. Go to the Gallagher command center, press the assign card button, select the HID Seos Corporate, enter the number, press the OK button, and press Save.
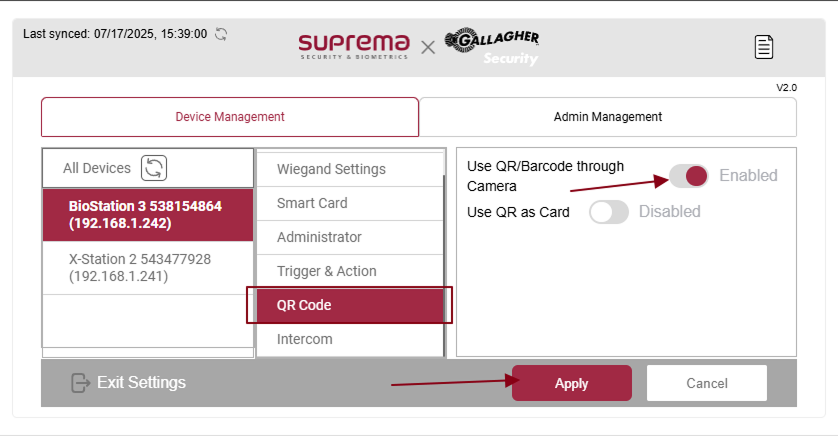
QR Code Card
If you want to use the QR Code card option, go to settings by pressing the settings button, and inside Device Management, select the device you want to configure. Then, select the QR Code Settings option, and enable the use of QR/Barcode through the camera option settings. Press the Apply button to save the changes.
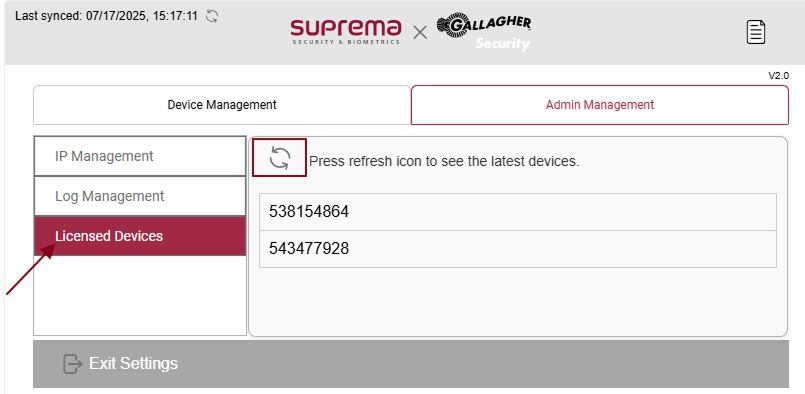
Licensed devices
If you want to check the devices associated with the license, you need to go to Admin Management under settings and click on the Licensed devices, and then need to press the sync button. It will show the latest devices list associated under your license.