Add Users
This document provides step-by-step instructions on adding and managing individual users in BioStar Air. It covers the entire process of selecting the user type (regular or temporary), issuing the appropriate credentials, and setting access levels and validity periods. It also includes how to edit or delete the added user’s information.
Refer to the following video for step-by-step guidance on the entire process of adding a new user.
Add users
- Web
- Mobile
-
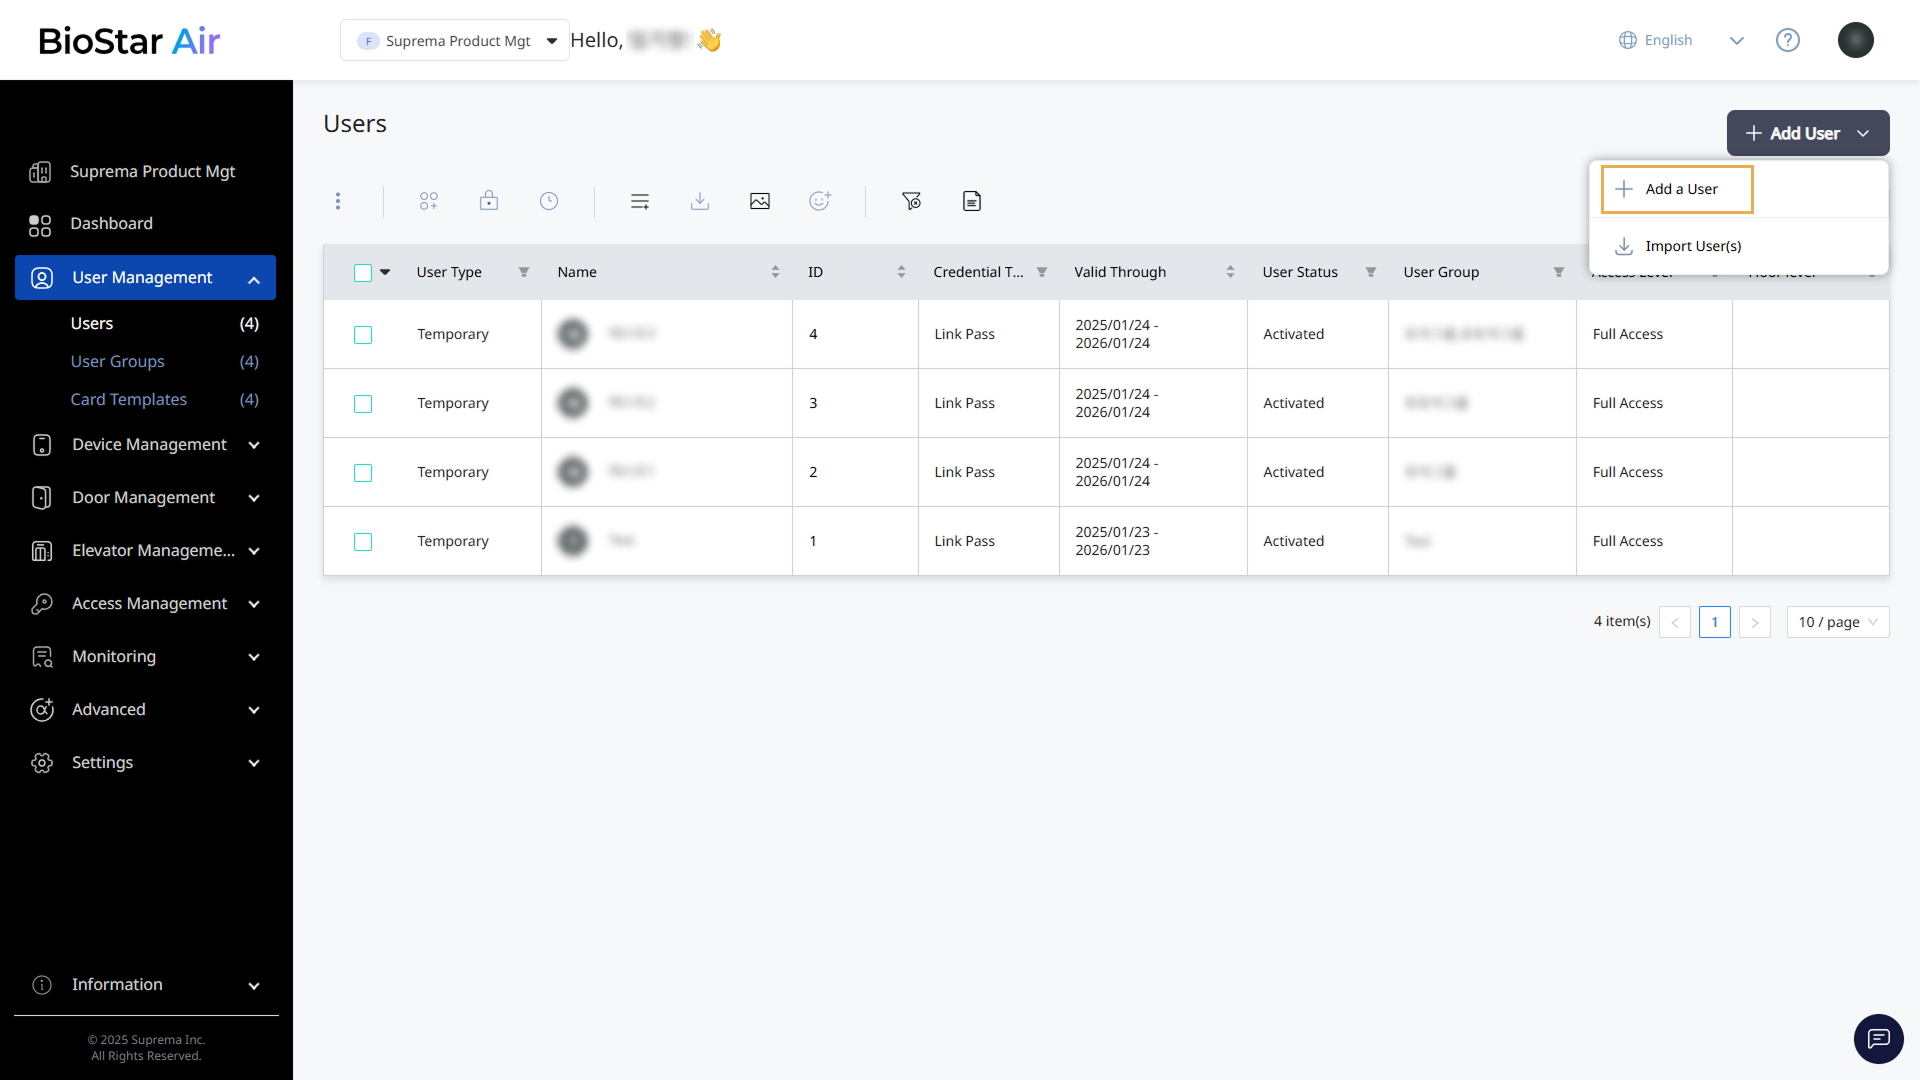
Click User Management → Users in the left sidebar.
-
A list of users appears.
-
Click Add User → Add a User at the top right of the screen.
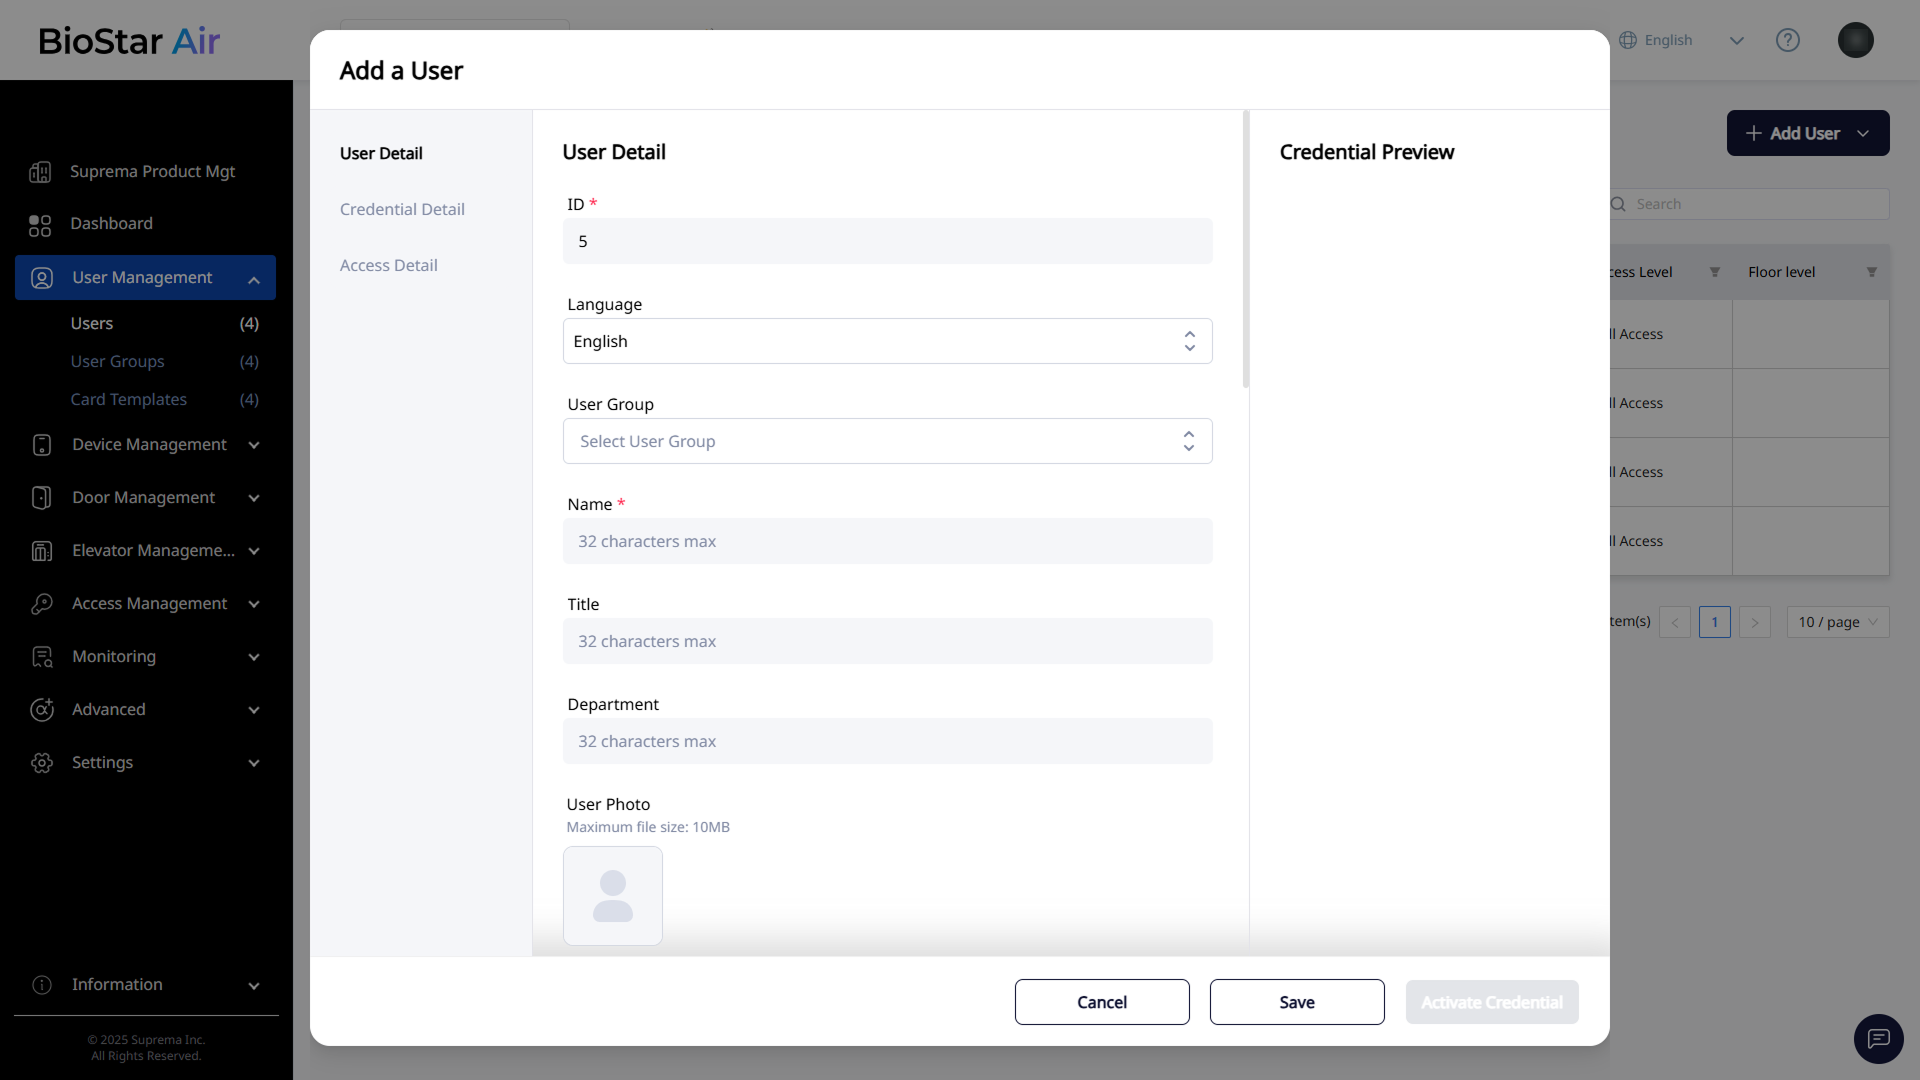
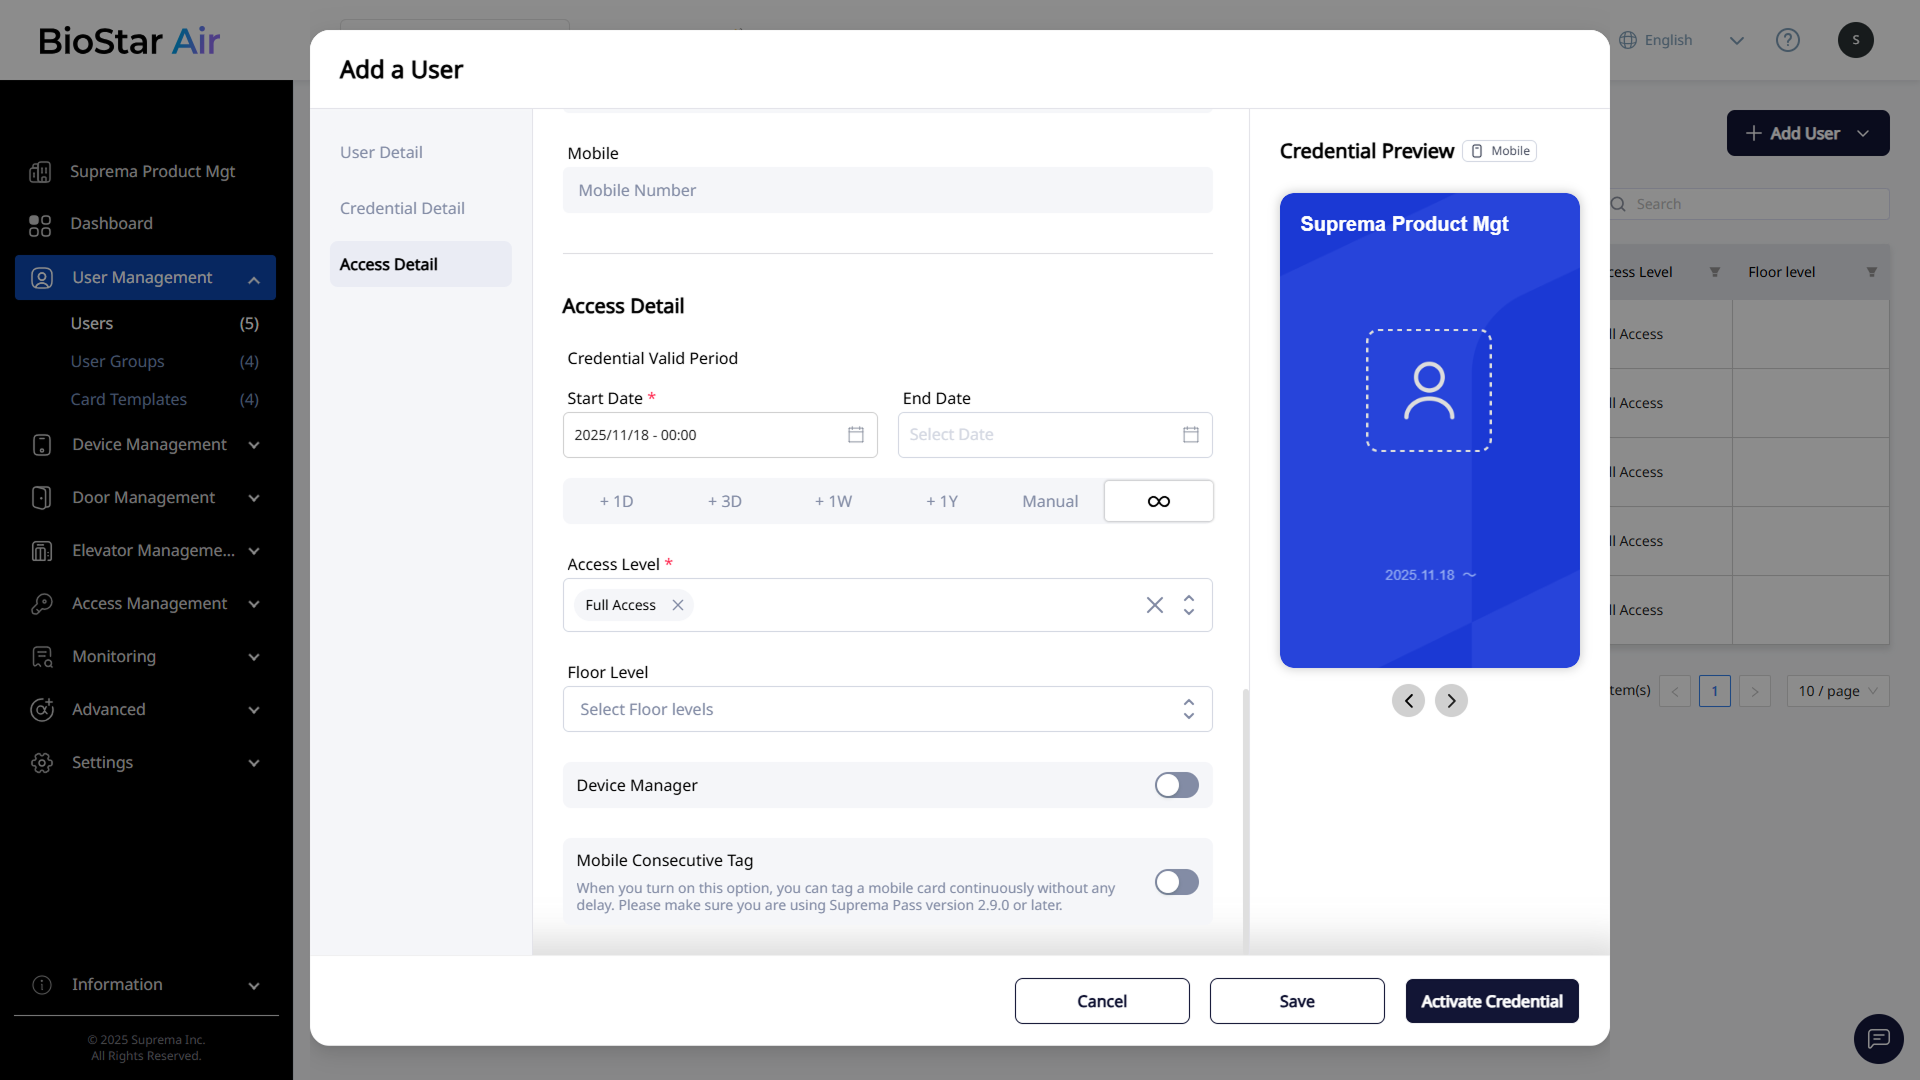
When the Add a User window appears, enter and configure the required information in each section. Set the required fields in all sections and click Activate Credential at the bottom right.
-
Log in with the mobile app.
-
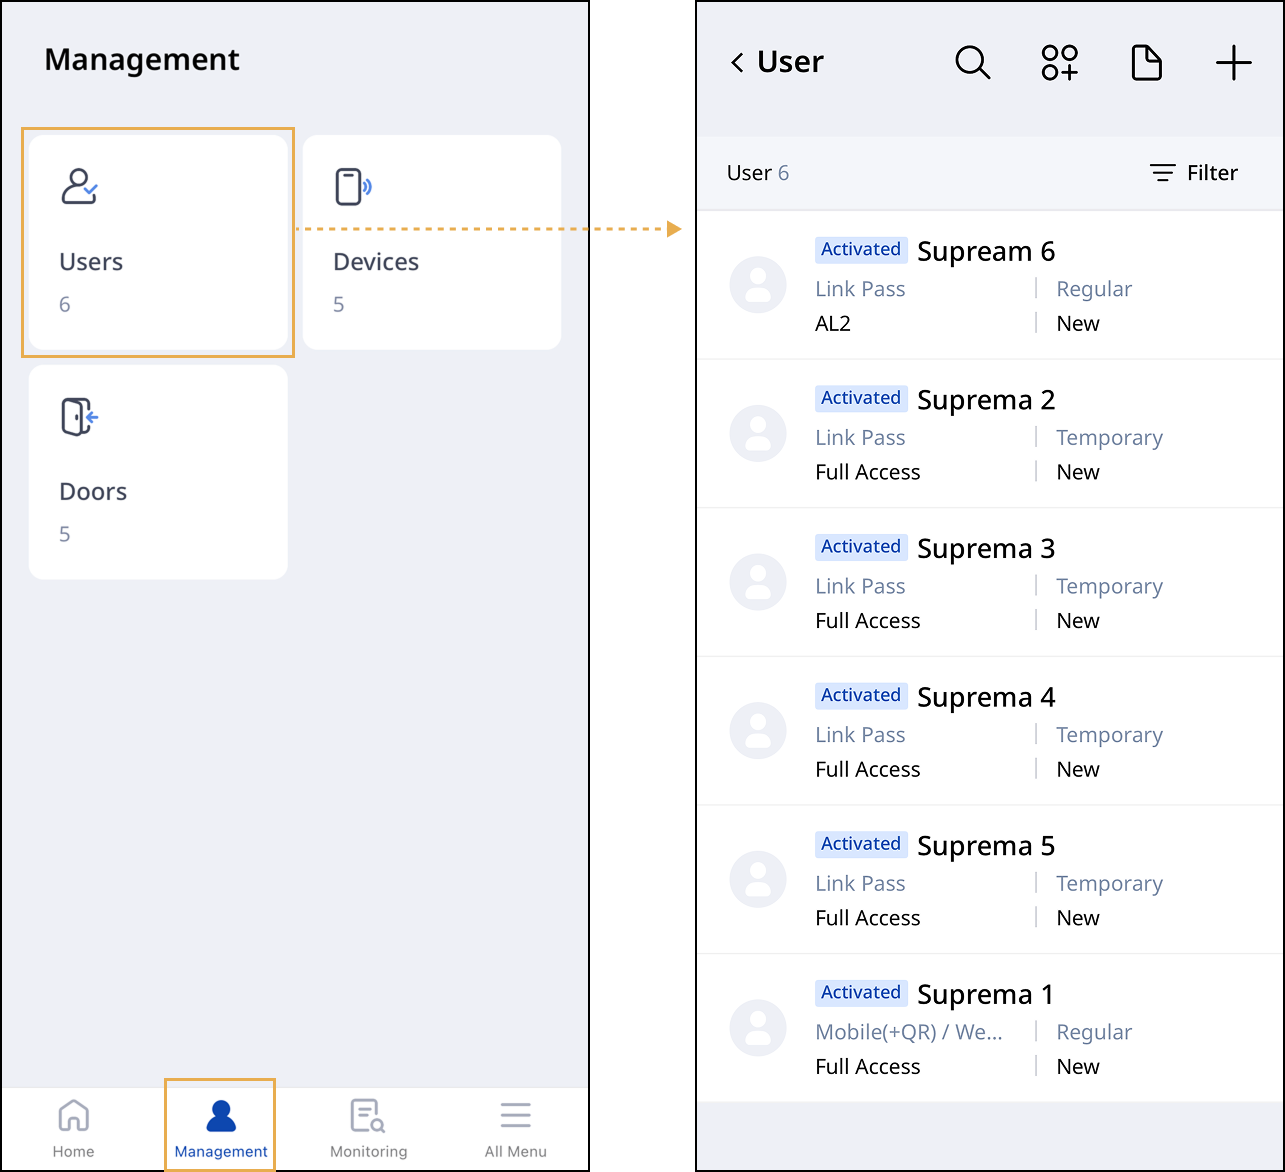
Tap Management at the bottom of the home screen.
-
Tap the Users card.
-
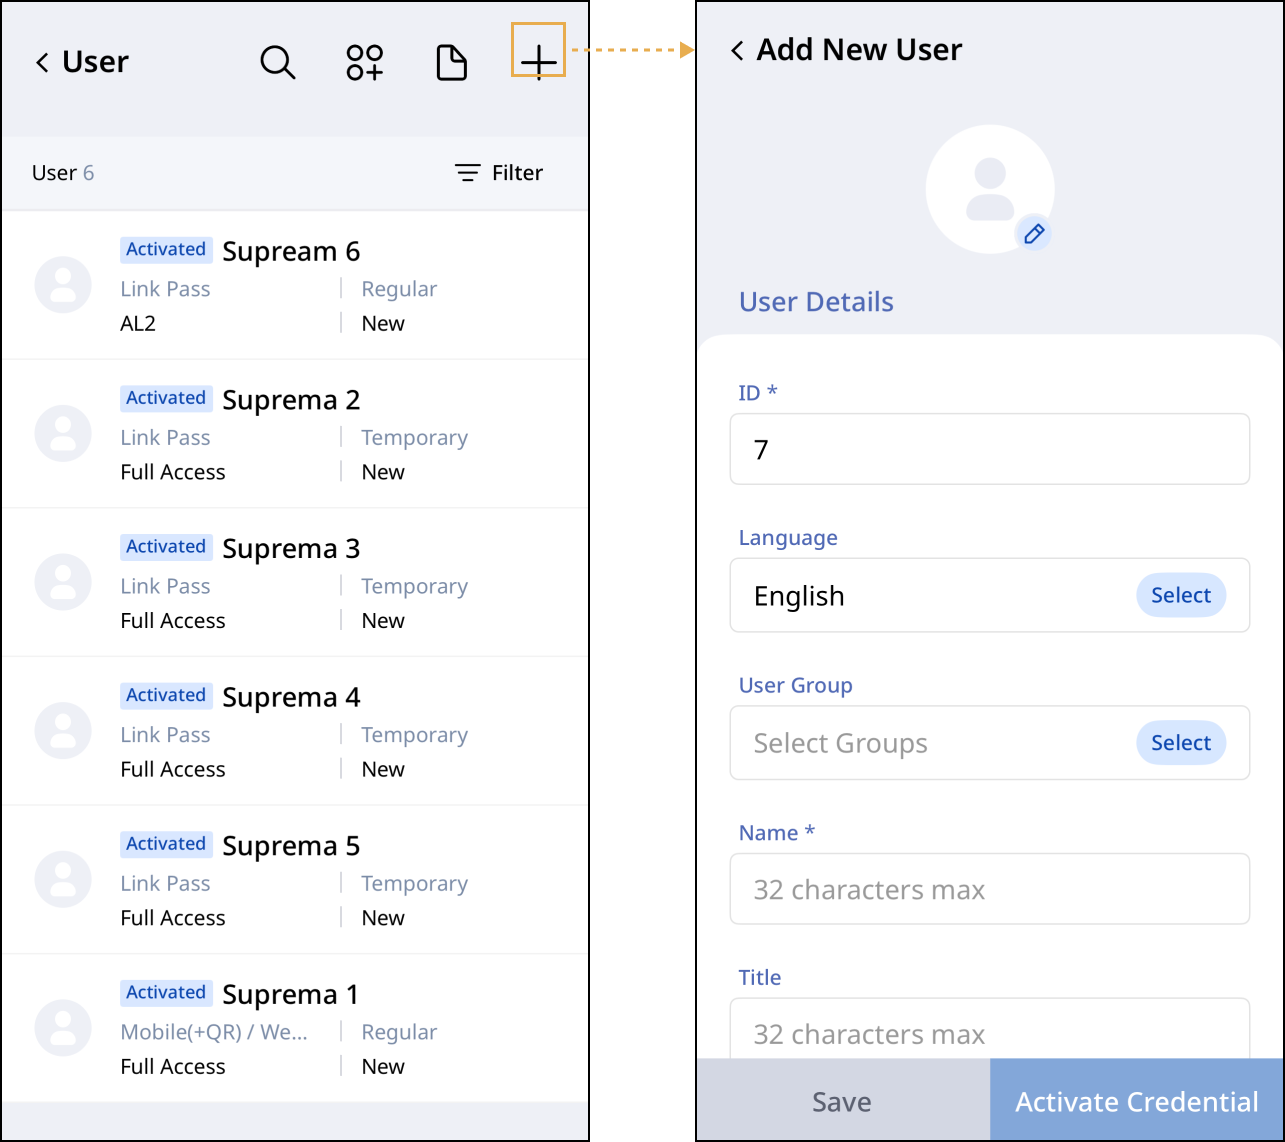
Tap at the top of the user list.
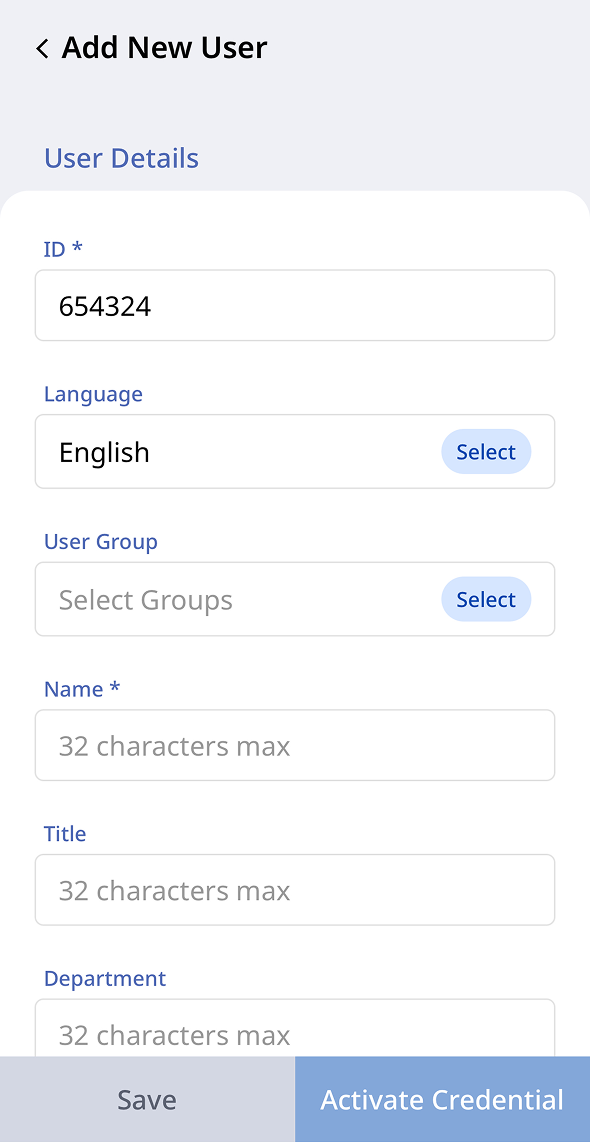
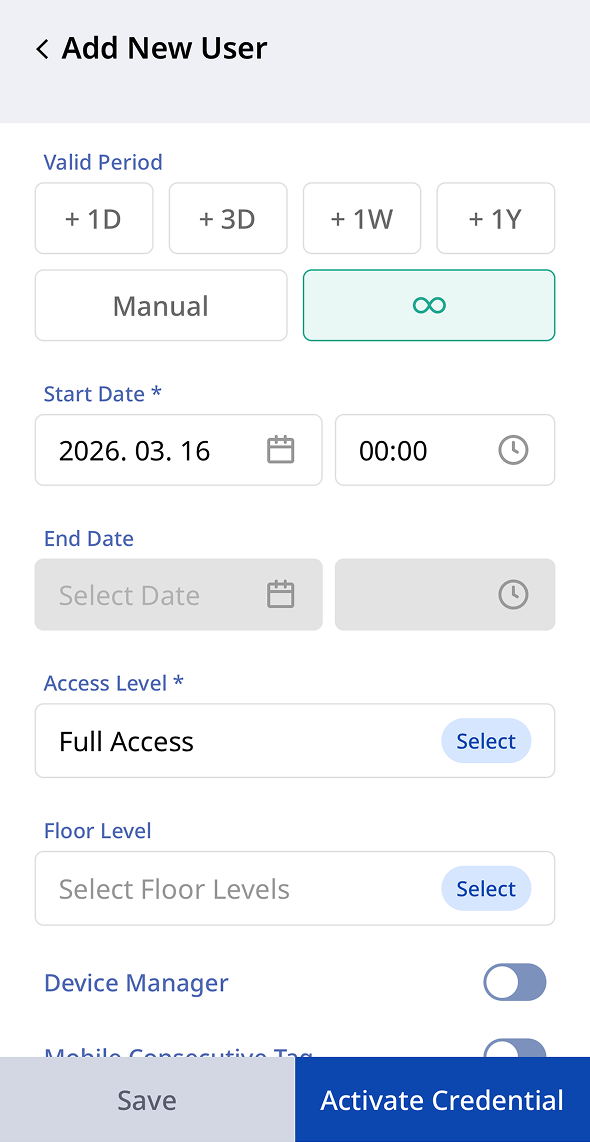
When the Add a User screen appears, enter and configure the required information in each section. Set the required fields in all sections and click Activate Credential at the bottom right.
Enter user information
Enter the new user's basic information in the User Detail section.
- Web
- Mobile
-
ID: Enter a specific ID manually or allow the system to generate it sequentially.
-
Language: Select the user's default language.
-
User Group: Select the group to which the user belongs.
-
Name: Enter the user's full name.
-
Title: Enter the user's title.
-
Department: Enter the name of the user's department.
-
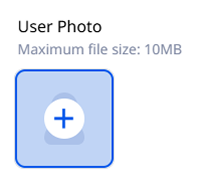
User Photo: Upload the user's profile image. For more information, see #uploadProfileImage.
-
* indicates a required field.
-
Enter the user's email and phone number in Send Invitation By in the Credential Detail section.
Upload profile image
- Web
- Mobile
-
Hover over the profile image area and click the plus icon.
-
Select the image file saved locally.
-
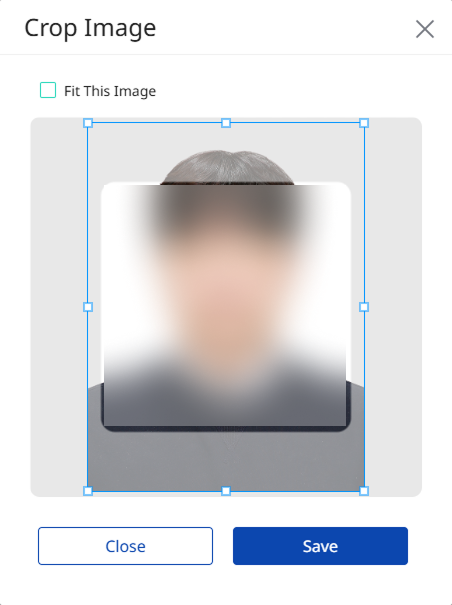
When the Crop Image window appears, adjust the photo to the desired size. Click Fit This Image to resize the image automatically.
-
Click Save to save the uploaded image as the profile image.
-
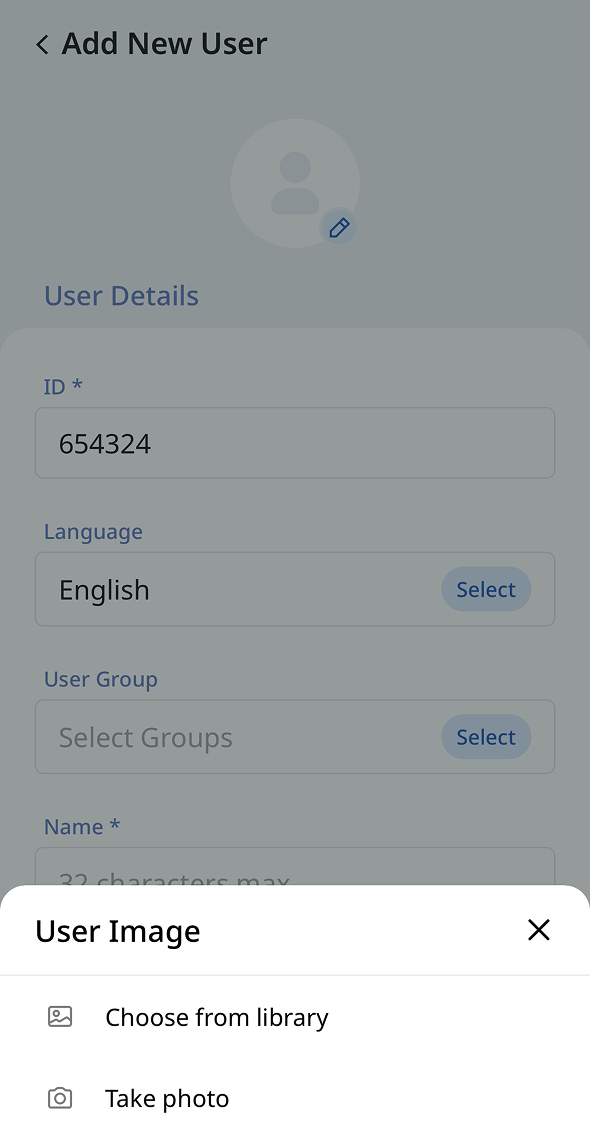
Tap the user profile image.
-
Choose how to add an image from the menu that appears at the bottom.
-
Choose from library: Select an image file saved on your mobile device to upload.
-
Take photo: Use your mobile device's camera to take a photo and upload it.
-
-
Resize the uploaded image to an appropriate size and save it.
Select user type
- Web
- Mobile
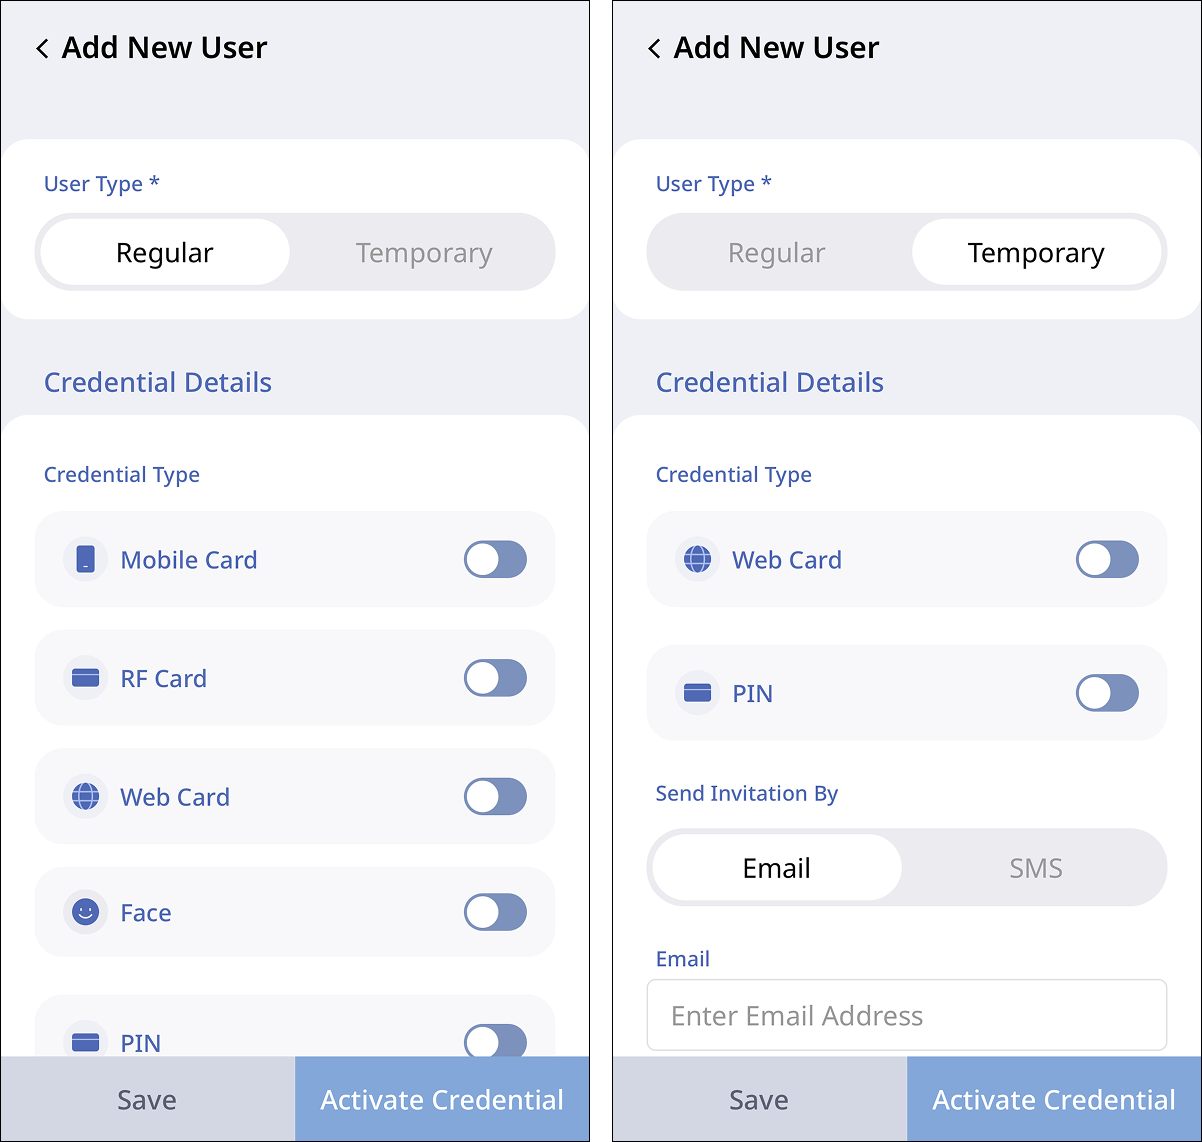
Select whether the user you are adding in the Credential Detail section is a regular user or a visitor. The credential types that can be issued vary by user type.
-
Regular: A user who is a regular member of an organization or facility and requires long-term, ongoing access. All credential types can be issued.
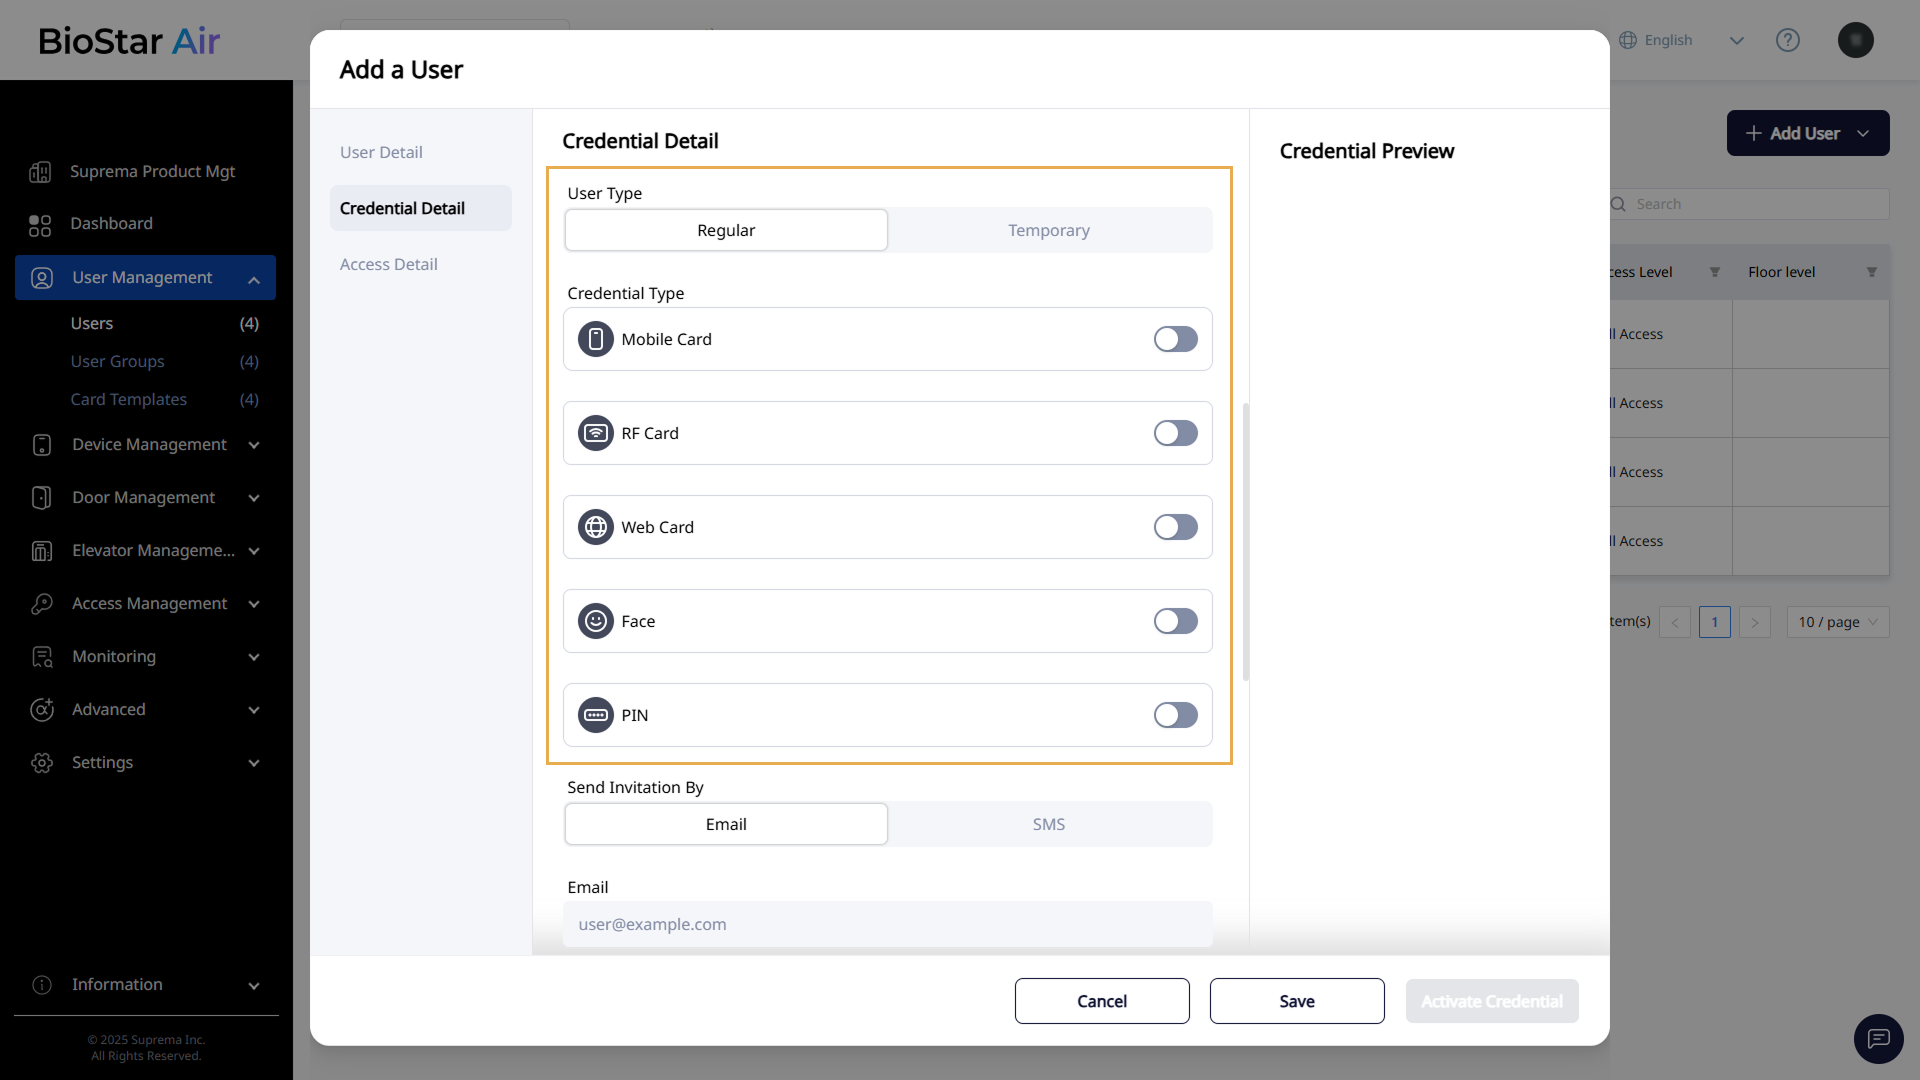
-
Temporary: A visitor or non-regular member who needs short-term, limited access. This can include guests, external visitors, short-term contractors, delivery couriers, and so on. Only Web Card credentials, including QR code and LinkPass, can be issued.
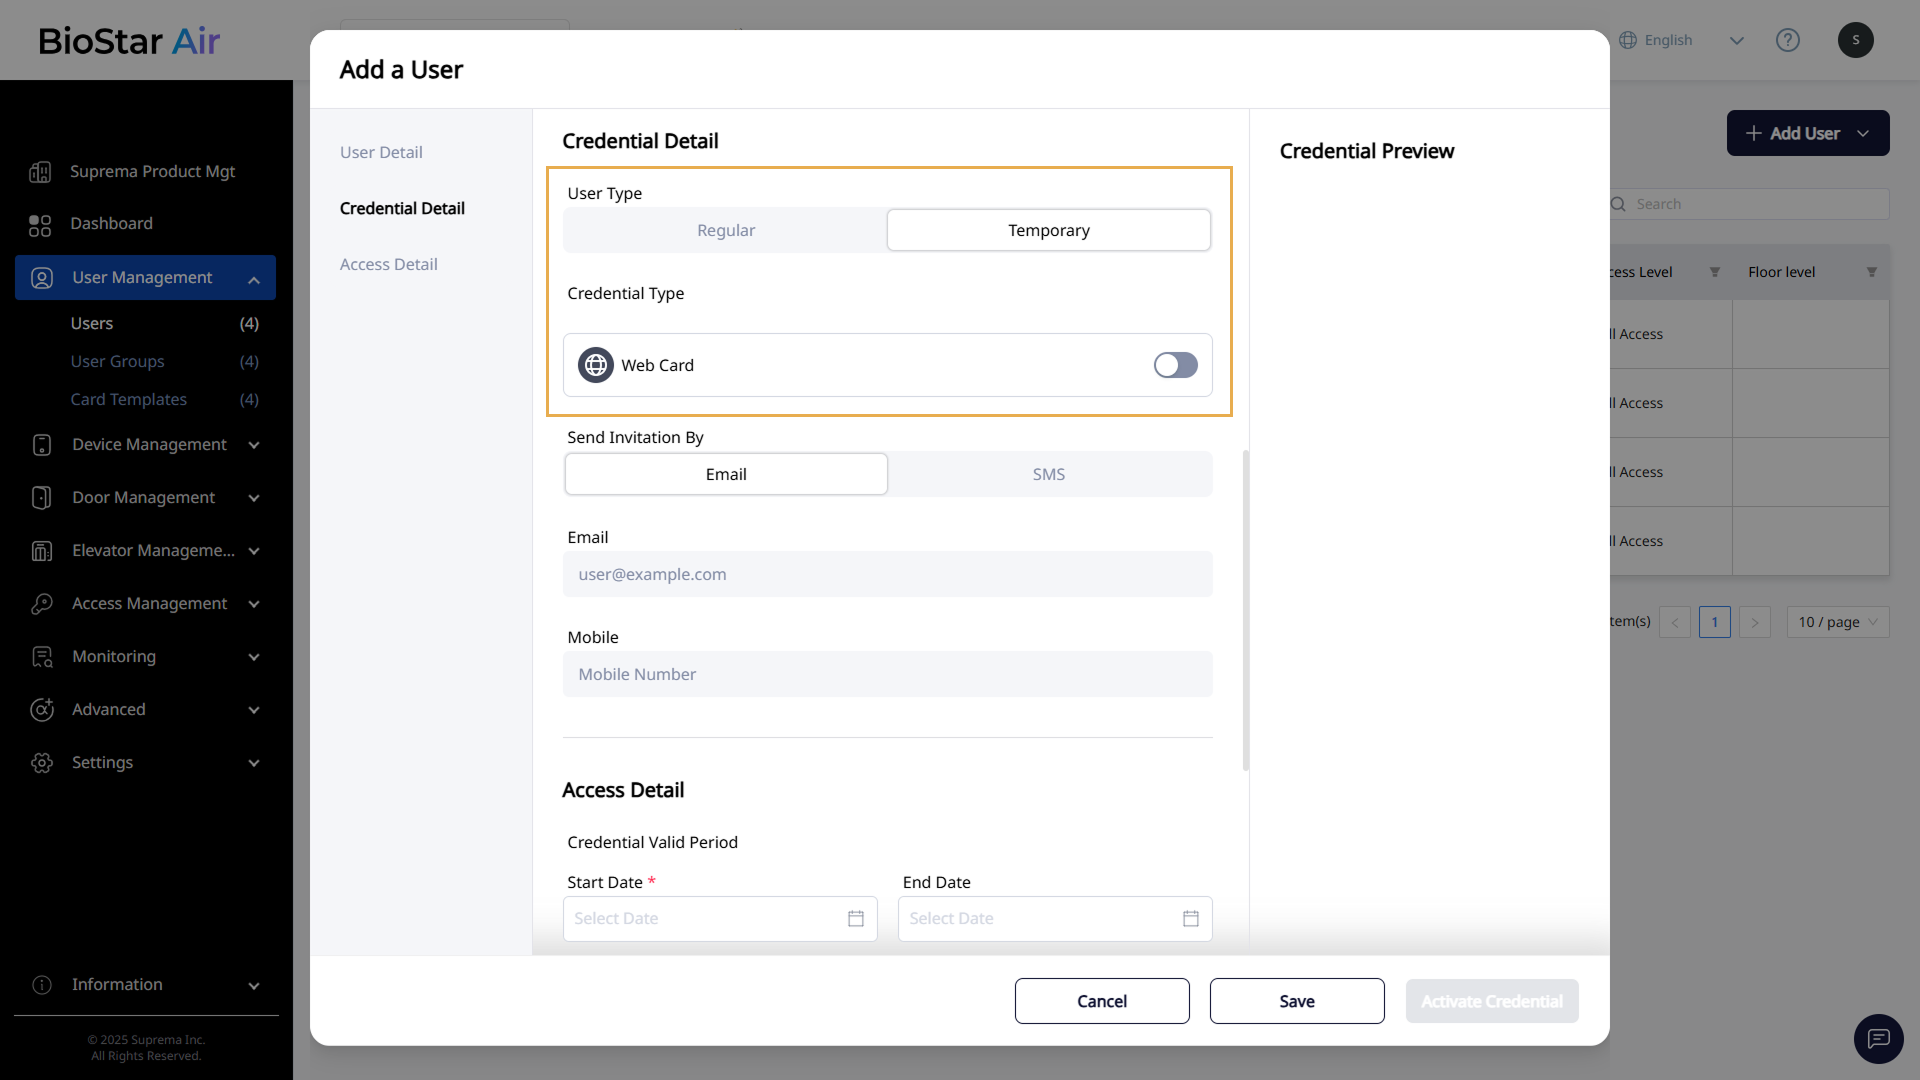
Select whether the user you are adding in Credential Detail is a regular user or a visitor. The credential types that can be issued vary by user type.
-
Regular: A user who is a regular member of an organization or facility and requires long-term, ongoing access. All credential types can be issued.
-
Temporary: A visitor or non-regular member who needs short-term, limited access. This can include guests, external visitors, short-term contractors, delivery couriers, and so on. Only Web Card credentials, including QR code and LinkPass, can be issued.
-
Regular users are automatically assigned the full access level, whereas Temporary users must manually select an access level.
-
User Type is supported in BioStar Air version 2.6 or higher.
Issue credentials
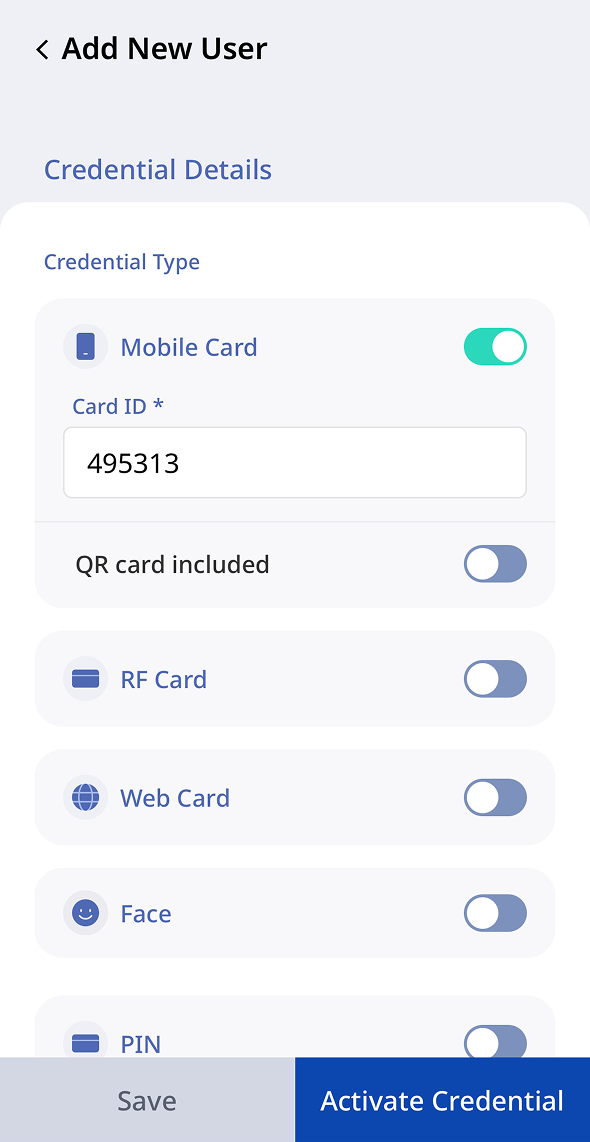
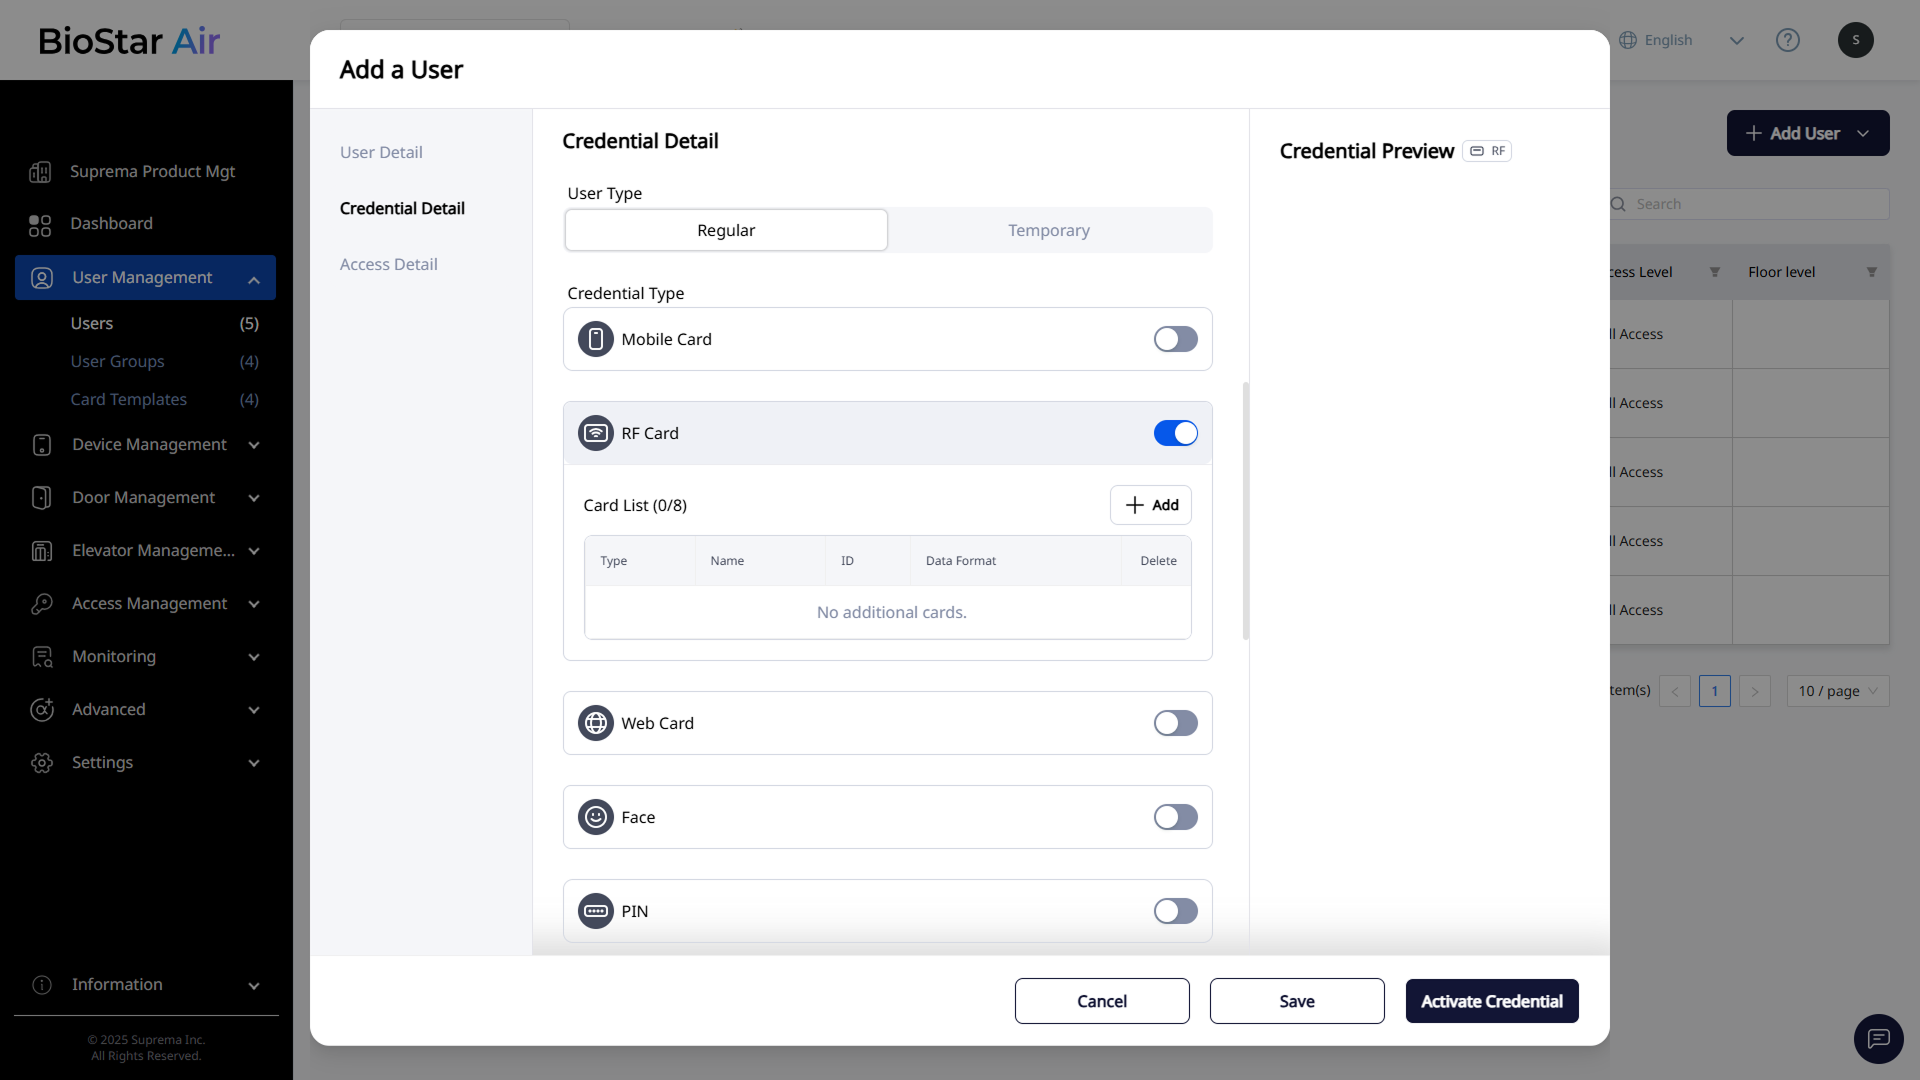
Enter user information, and then set the credentials to use for access authentication in the Credential Detail section. Each credential has a toggle switch to enable or disable it.
-
Mobile Card: Use the Suprema Pass mobile app as an access authentication method. The administrator can edit the card ID number.
- Web
- Mobile

-
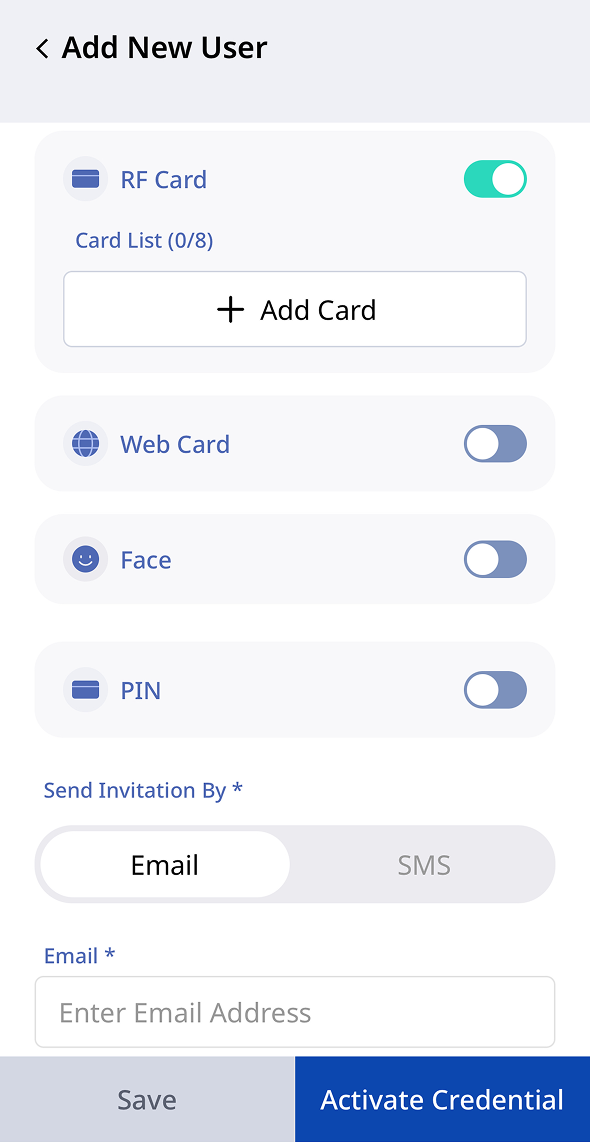
RF Card: Add up to eight RFID cards per user for access authentication. Click Add.
- Web
- Mobile
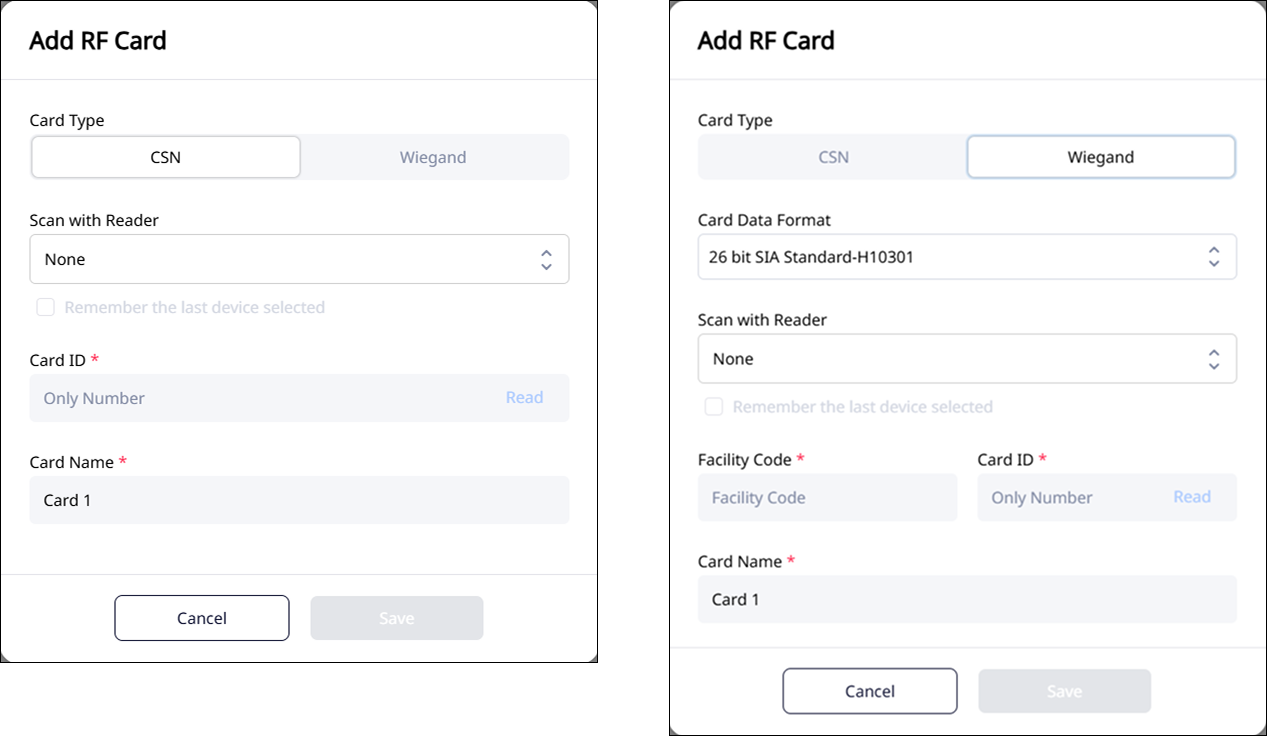
Configure the card type (CSN or Wiegand), card ID, and card name. Select a reader in Scan with Reader. Alternatively, scan a physical RFID card with the connected reader.
- Web
- Mobile

-
Web Card: Use Web QR or Link Pass as access authentication methods.
- Web
- Mobile
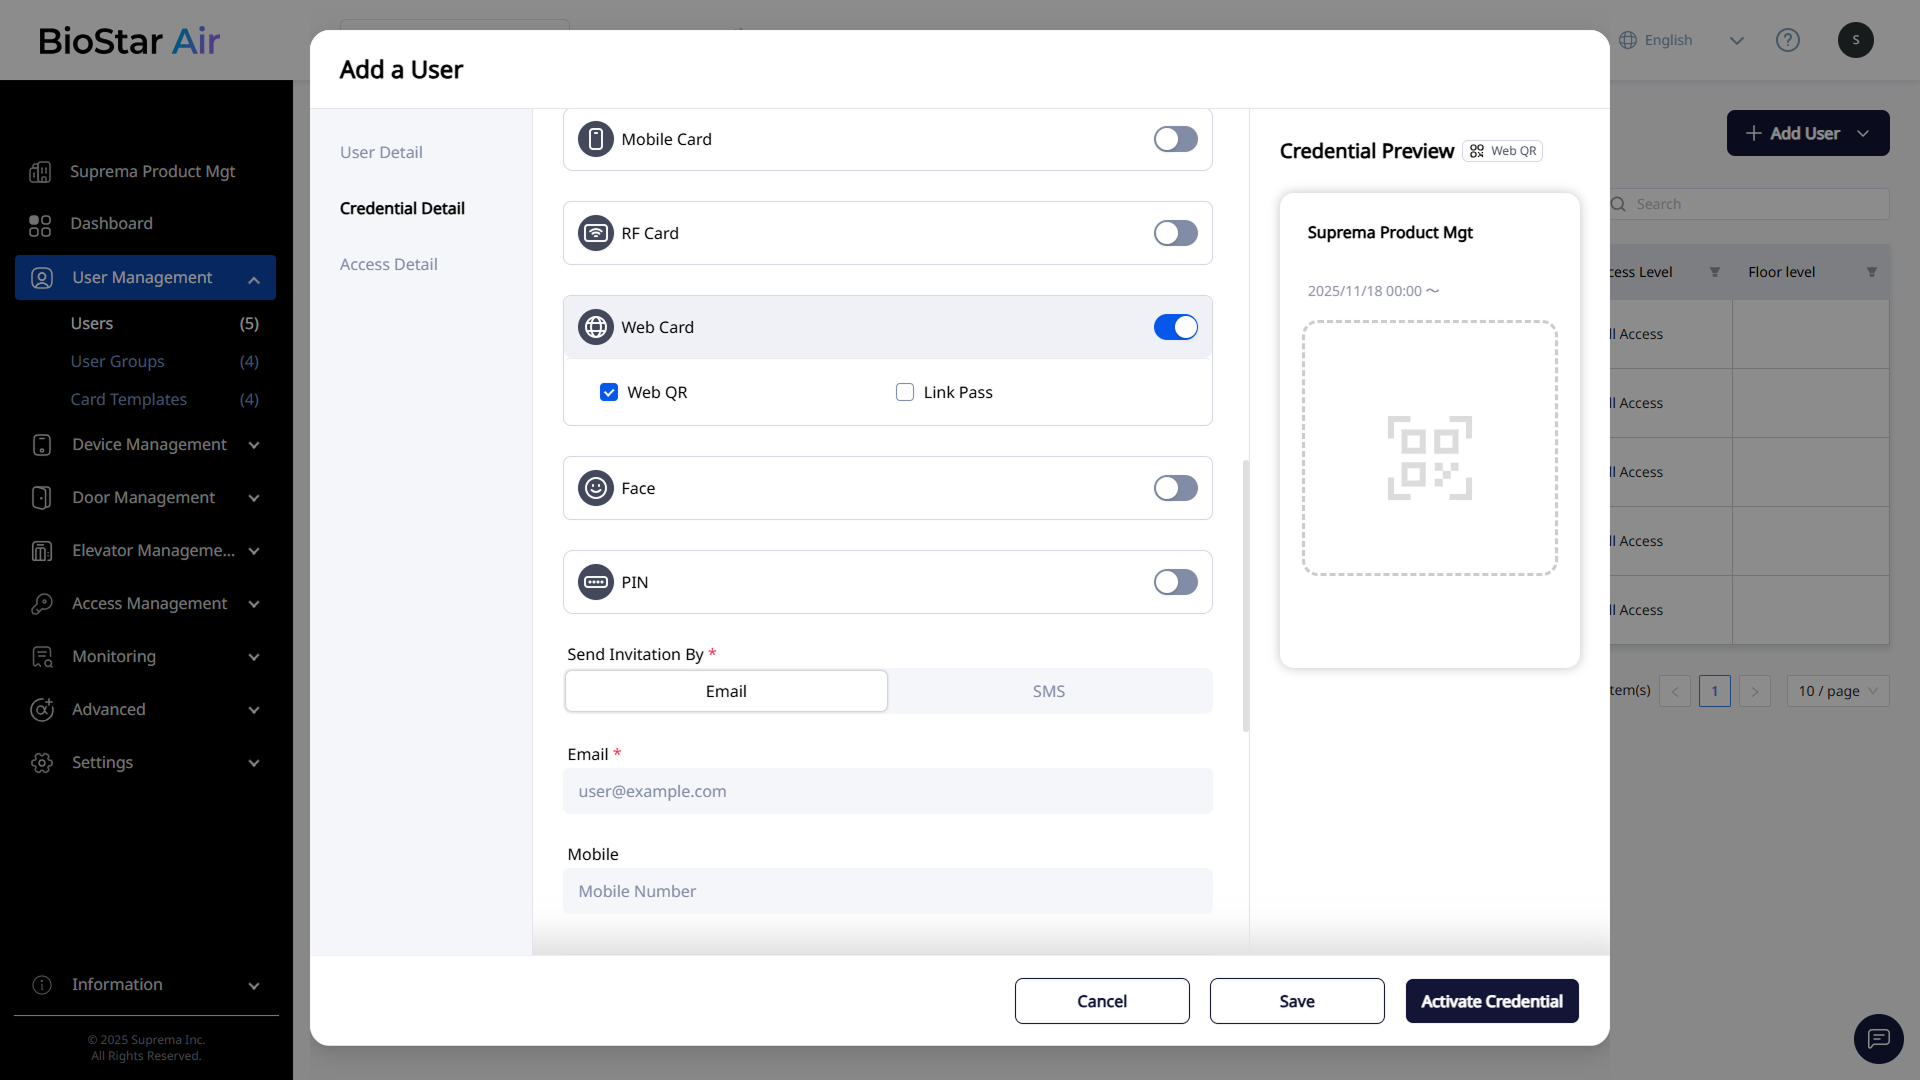
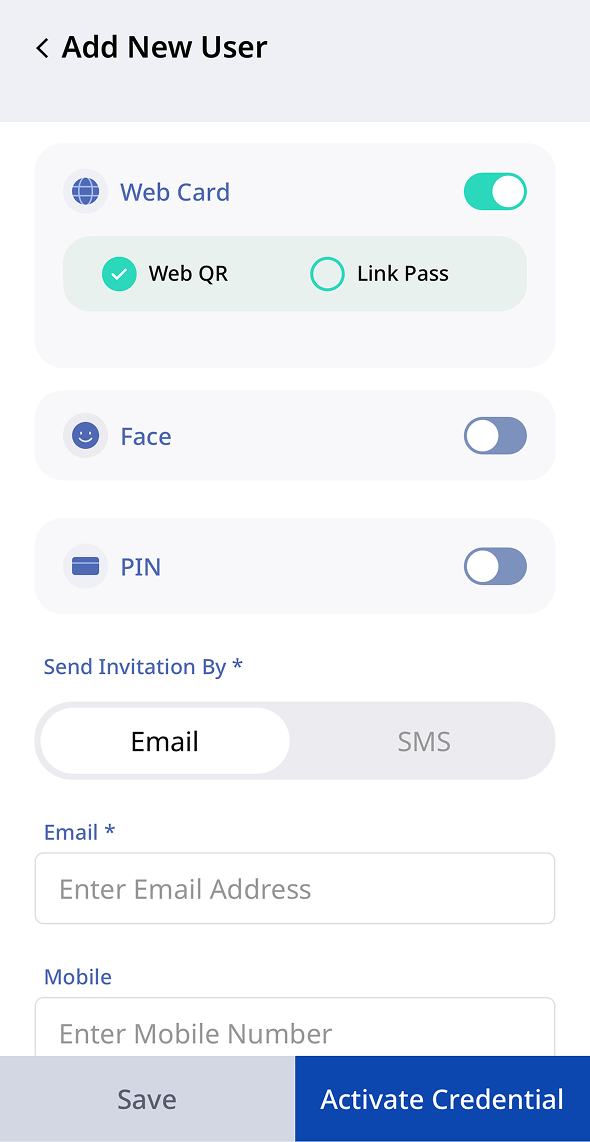
Web QR appears only after enabling QR Reader at Settings → Site → Additional Features.
-
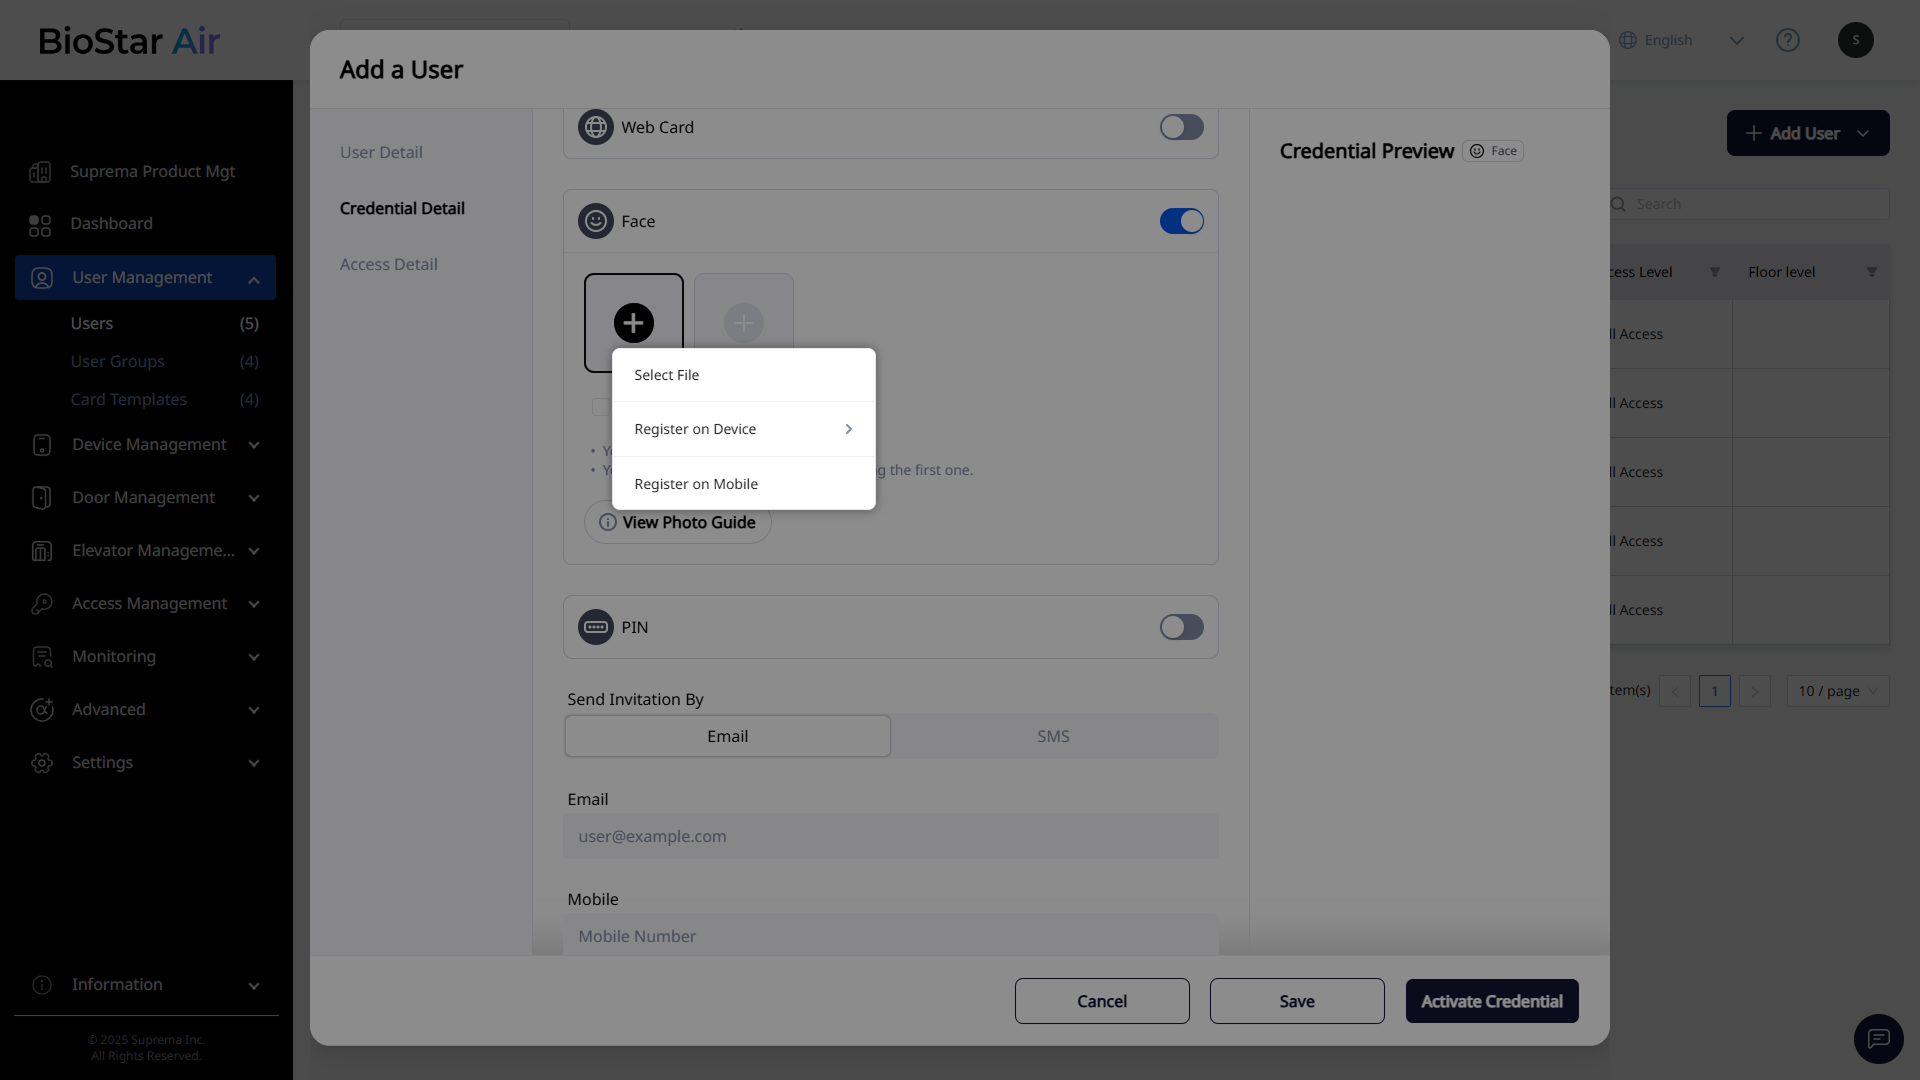
Face: Add up to two face profile images for access authentication. You can upload an existing image or enroll it using a connected reader. Alternatively, email the user a link so they can enroll directly using their mobile device's camera.
- Web
- Mobile
-
Select File: Select an image file saved locally to upload.
-
Register on Device: Use the connected reader to enroll a face image.
-
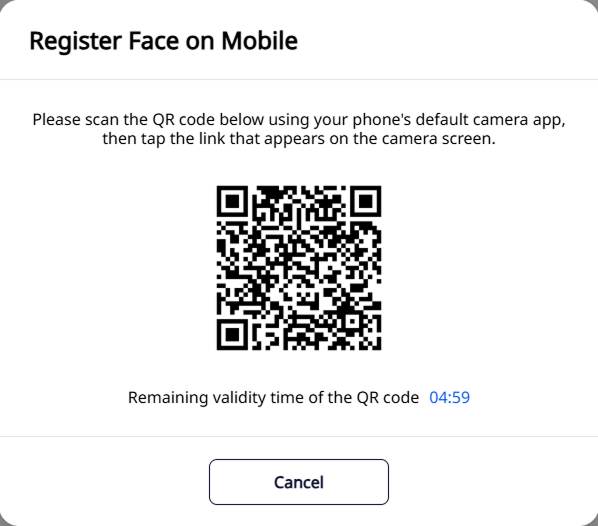
Register on Mobile: Scan a QR code with a mobile device’s camera to open a link for face image enrollment.
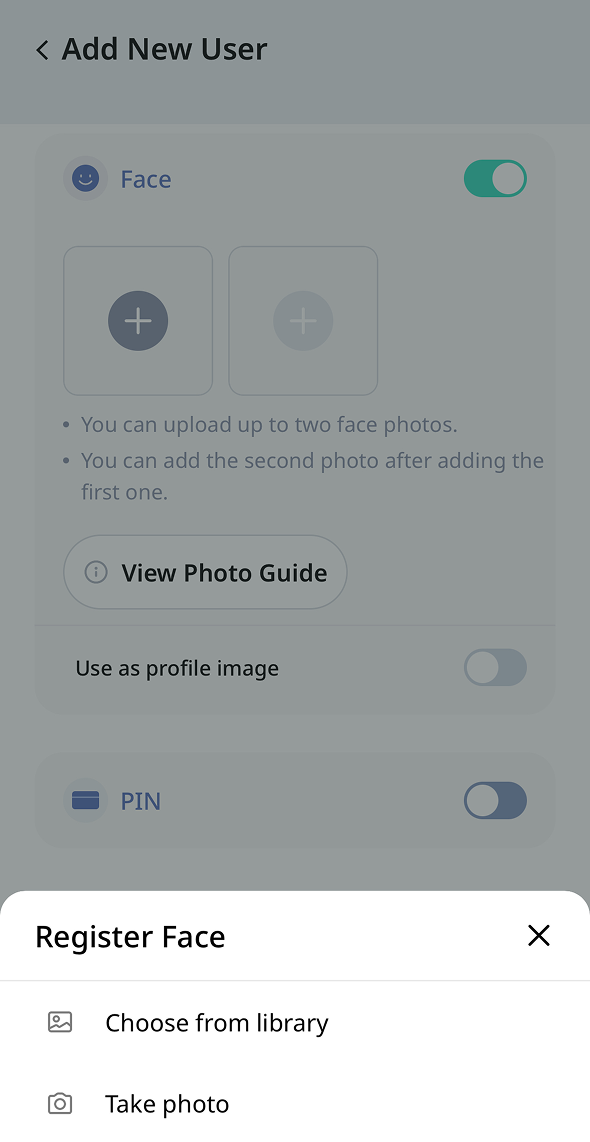
Tap to add a face photo. Choose how to add a face photo from the menu that appears at the bottom.
-
Choose from library: Select an image file saved on your mobile device to upload.
-
Take photo: Use your mobile device's camera to take a photo and upload it.
-
Use as profile image: You can use the image currently set as your profile picture as your face credential.
For more information on enrolling a face photo, see View Photo Guide.
-
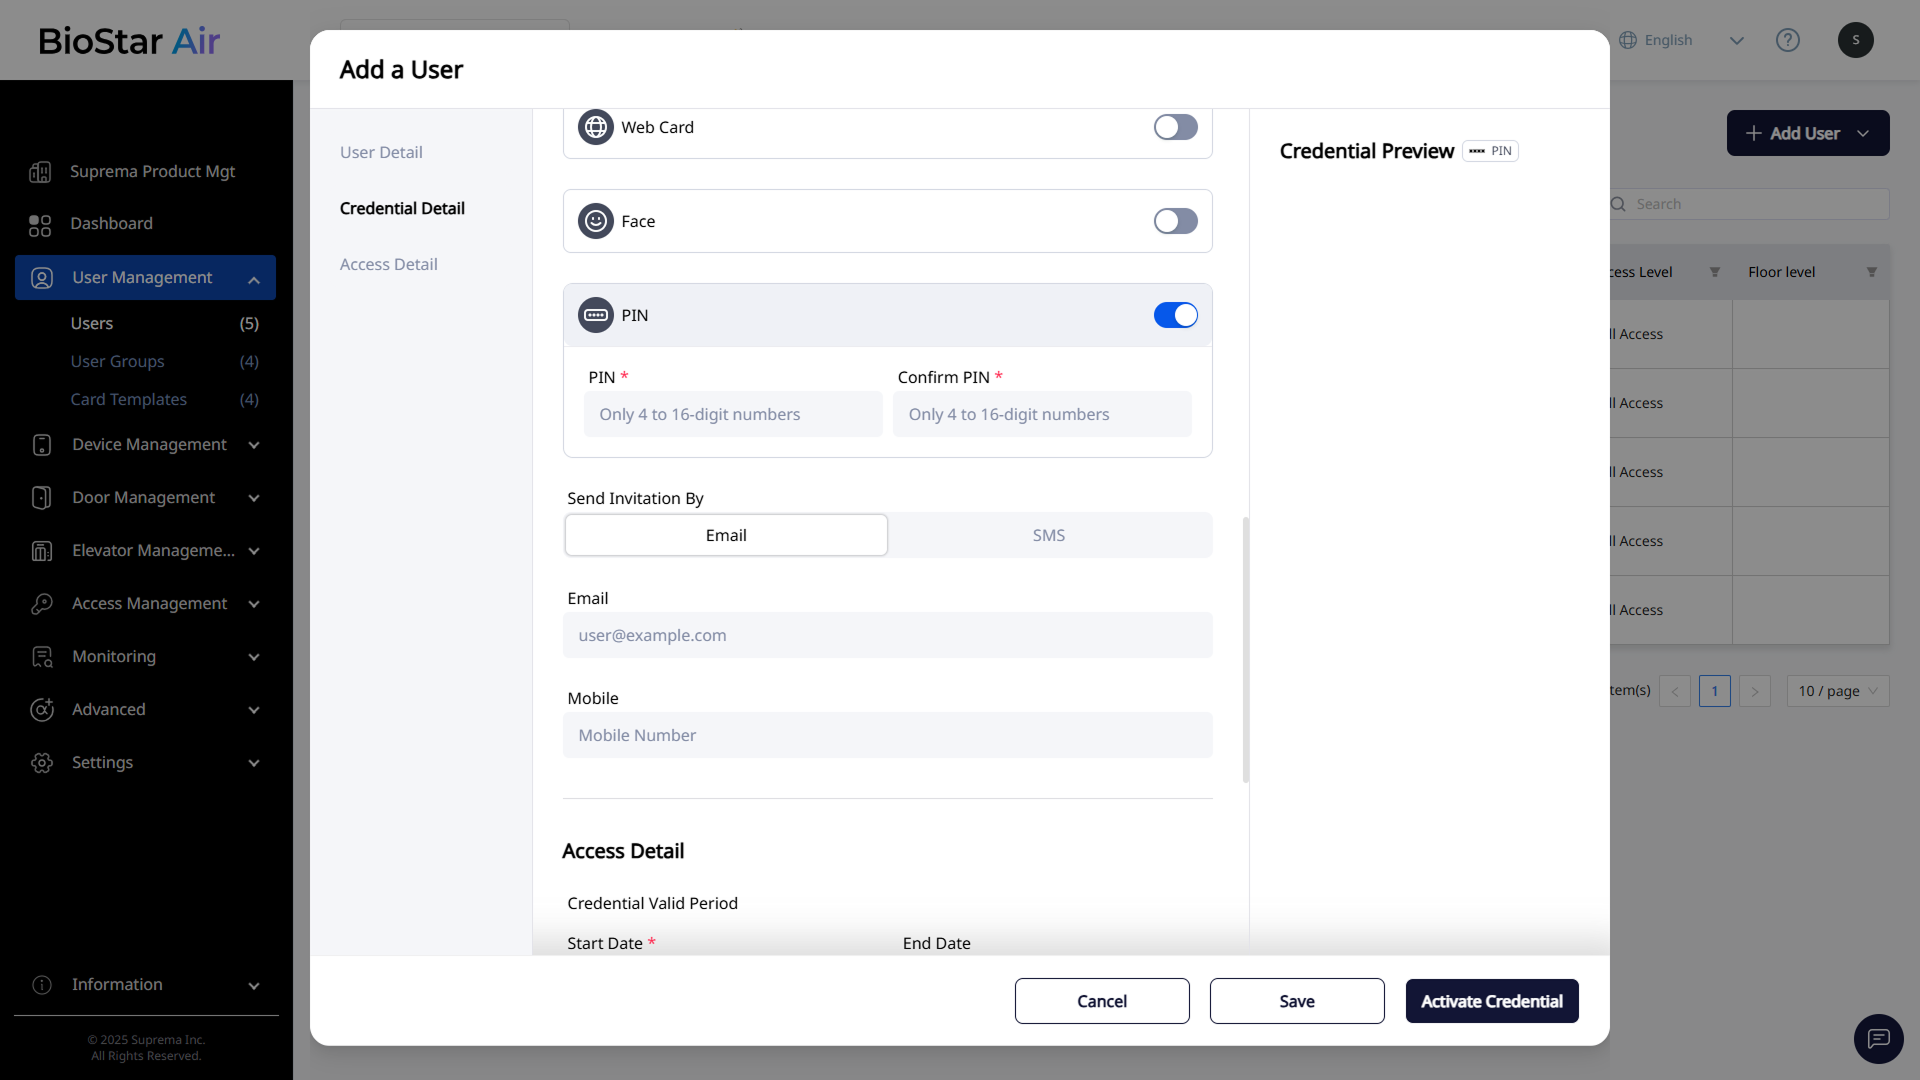
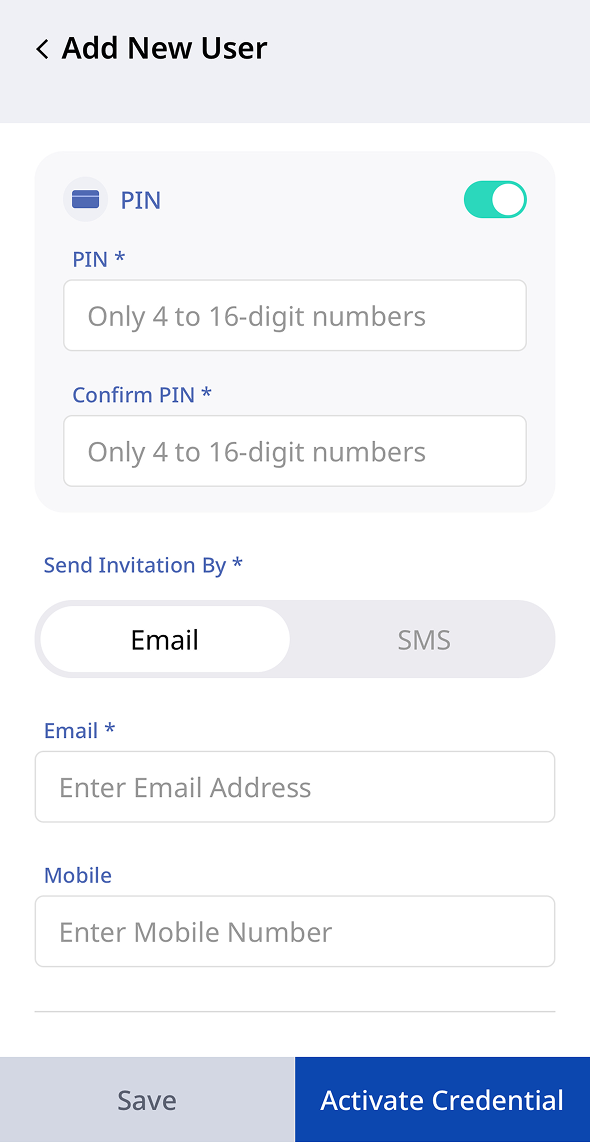
PIN: Set a 4–16-digit PIN to use as part of two-factor authentication (2FA).
- Web
- Mobile
Send invitation link
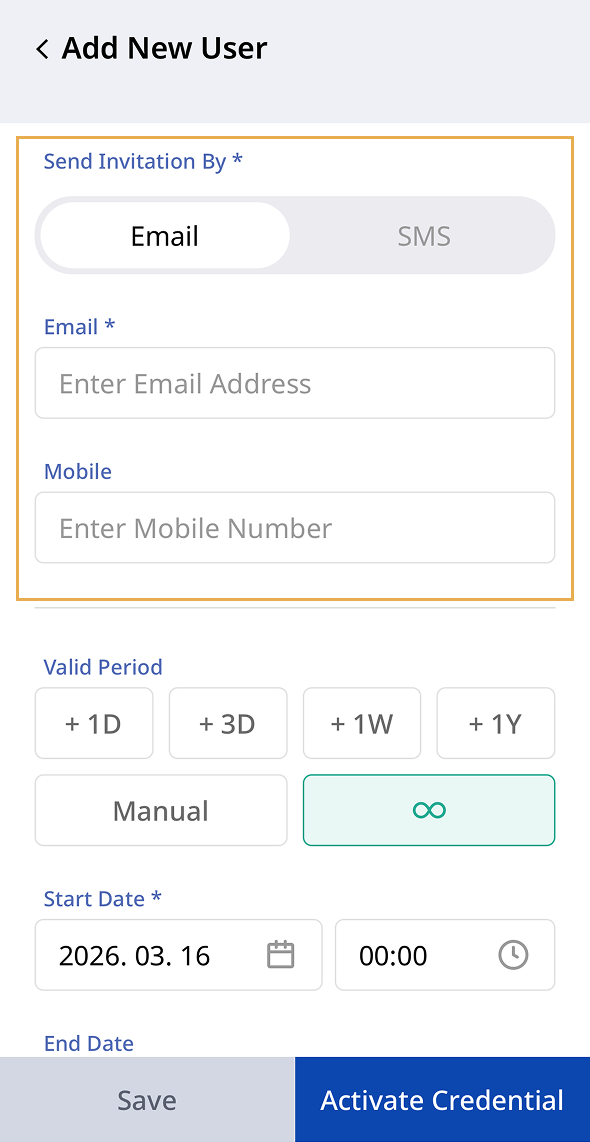
Email the Suprema Pass app download link to users who use Mobile Card or Web Card. Enter the email address (required) and phone number (optional).
- Web
- Mobile
Request SMS credit recharge in Settings → Credit Center to use the SMS option.
Set access levels and validity
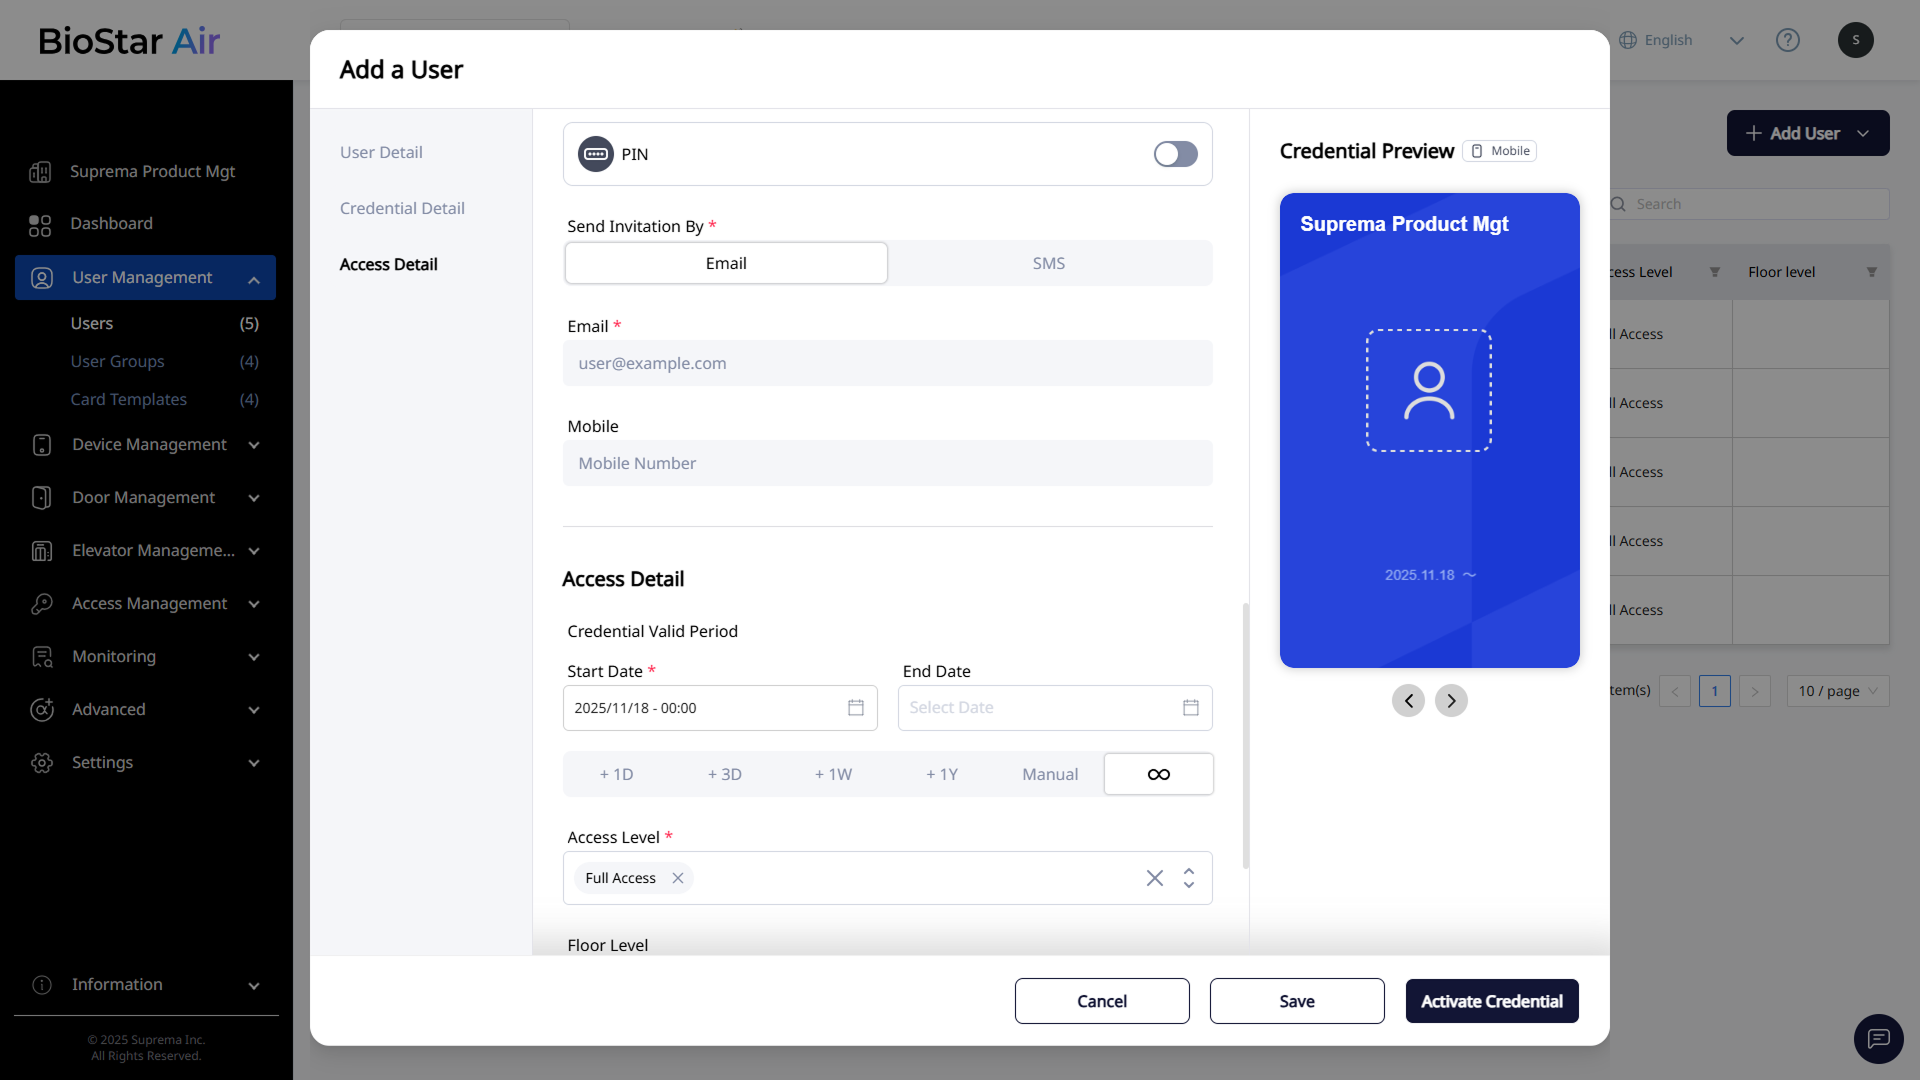
After selecting credentials, configure the credential validity period, access levels, and floor levels in the Access Detail section.
- Web
- Mobile
-
Credential Valid Period: Set the validity period of the credentials issued to the user. Click to leave the expiration date open-ended.
-
Access Level: Select the access levels for the user. Grant full access or choose a predefined access level.
-
Floor Level: Select the floor levels the user can access.
-
Device Manager: Allow a user to manage access permissions on a specific reader.
-
Mobile Consecutive Tag: Allows consecutive mobile card tags without wait time. This feature is supported in Suprema Pass app version 2.9.0 or higher.
-
Access Level can be assigned permanently (expires with the credential) or temporarily (expires before the credential). For more information on access-level settings, see Manage Access Levels.
-
For more information on floor-level settings, see Manage Floor Levels.
-
Device Manager option is available only to X-Station 2 users who have access to the X-Station 2 device's admin menu.
Select card template
- Web
- Mobile
Click or under Card Template in the right panel to change the card template design.

Tab or on Credential Preview to change the card template design.
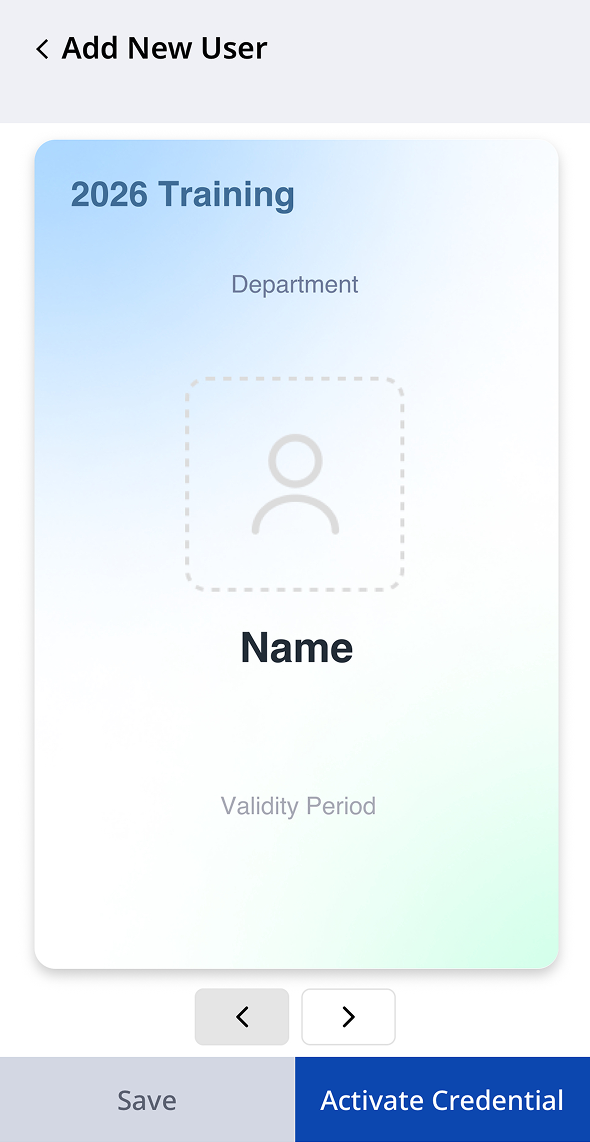
For more information about creating new card templates, see Manage Card Templates.
Save or activate the user
After configuring all user settings, choose one of the following options.
-
Click Save to save the user for later activation.
-
Click Activate Credential to issue and activate the credentials immediately.