Add Users in Bulk
If you need to add multiple users at once, use BioStar Air's bulk user import feature. Upload a CSV file to register tens or hundreds of employees in just minutes. You can also bulk-upload profile images while entering user information. This document provides step-by-step instructions for downloading the CSV template, preparing the file, uploading it, managing profile images, and verifying user information after upload.
Refer to the following video for a step-by-step guide to adding multiple users in bulk.
Download the CSV template
Follow these steps to download the CSV template file.
-
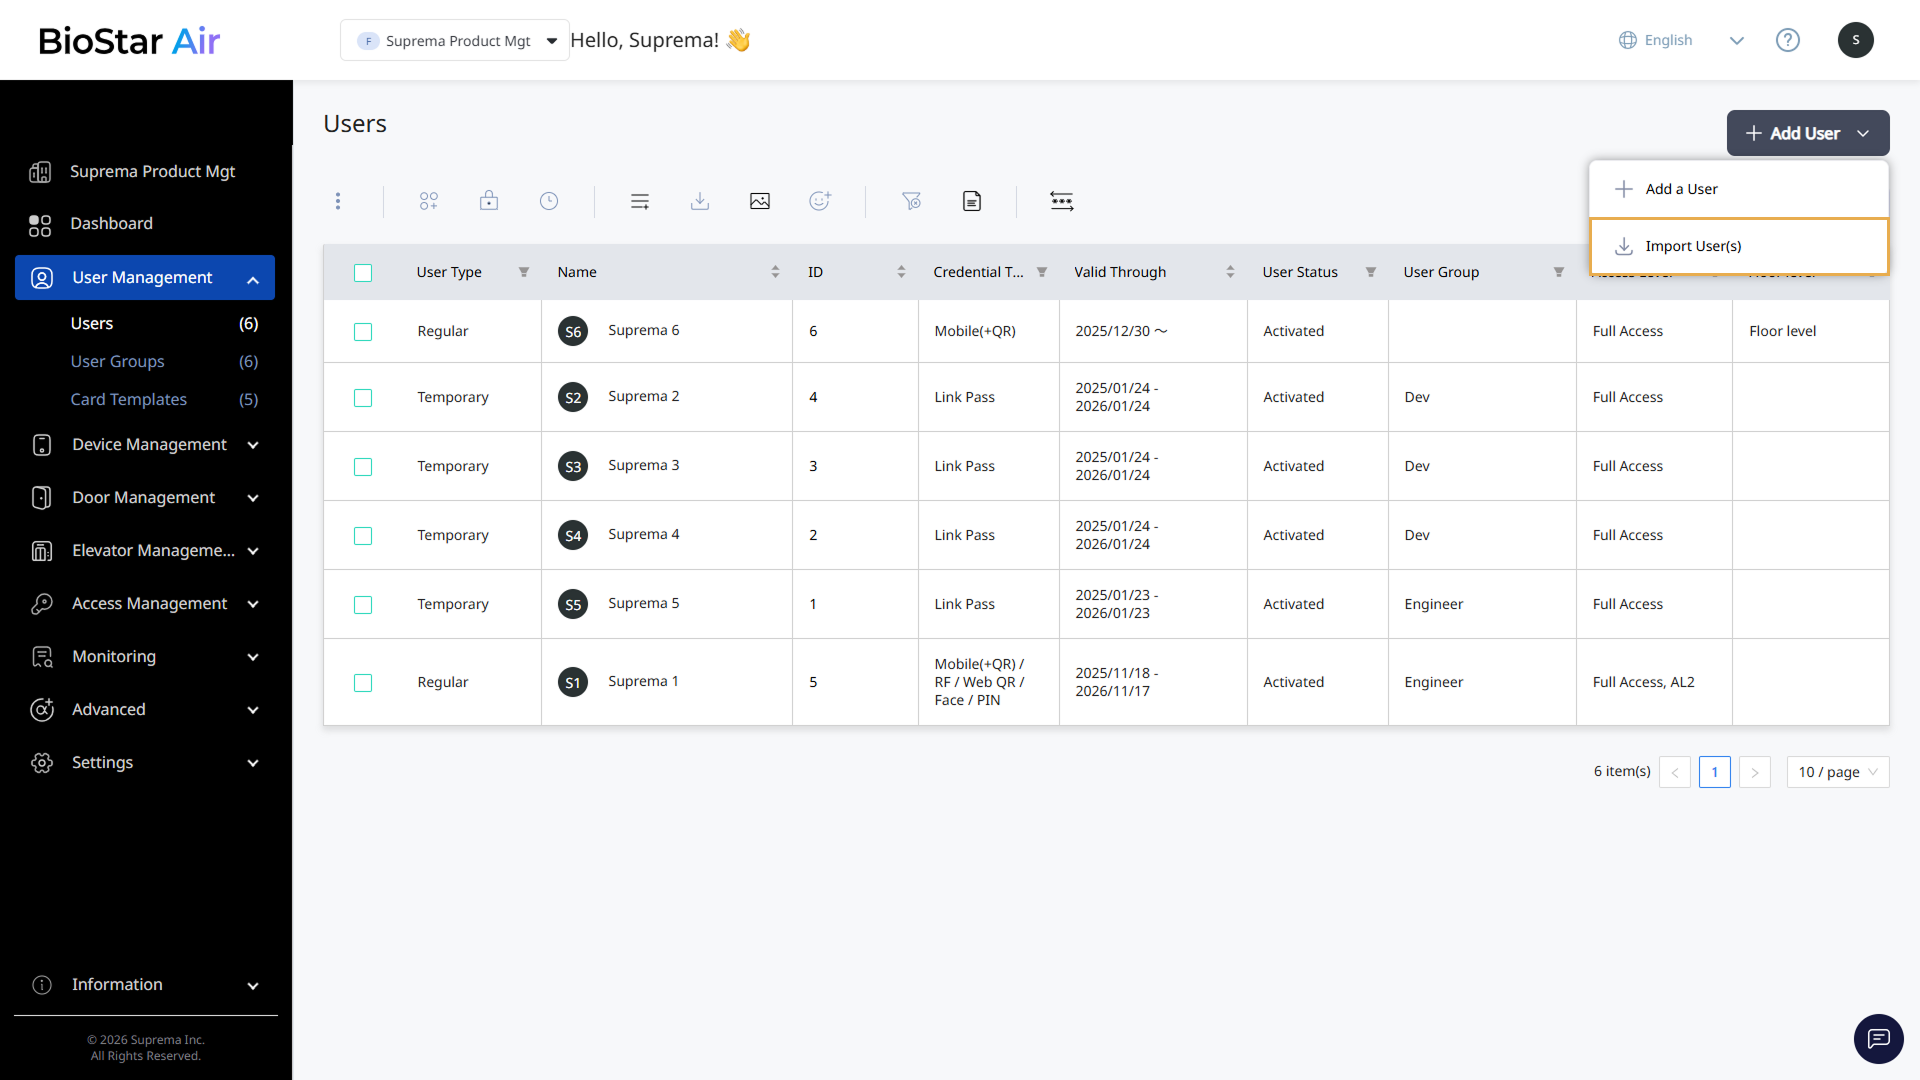
Click User Management → Users in the left sidebar.
-
Click Add User → Import User(s) at the top right of the screen.
-
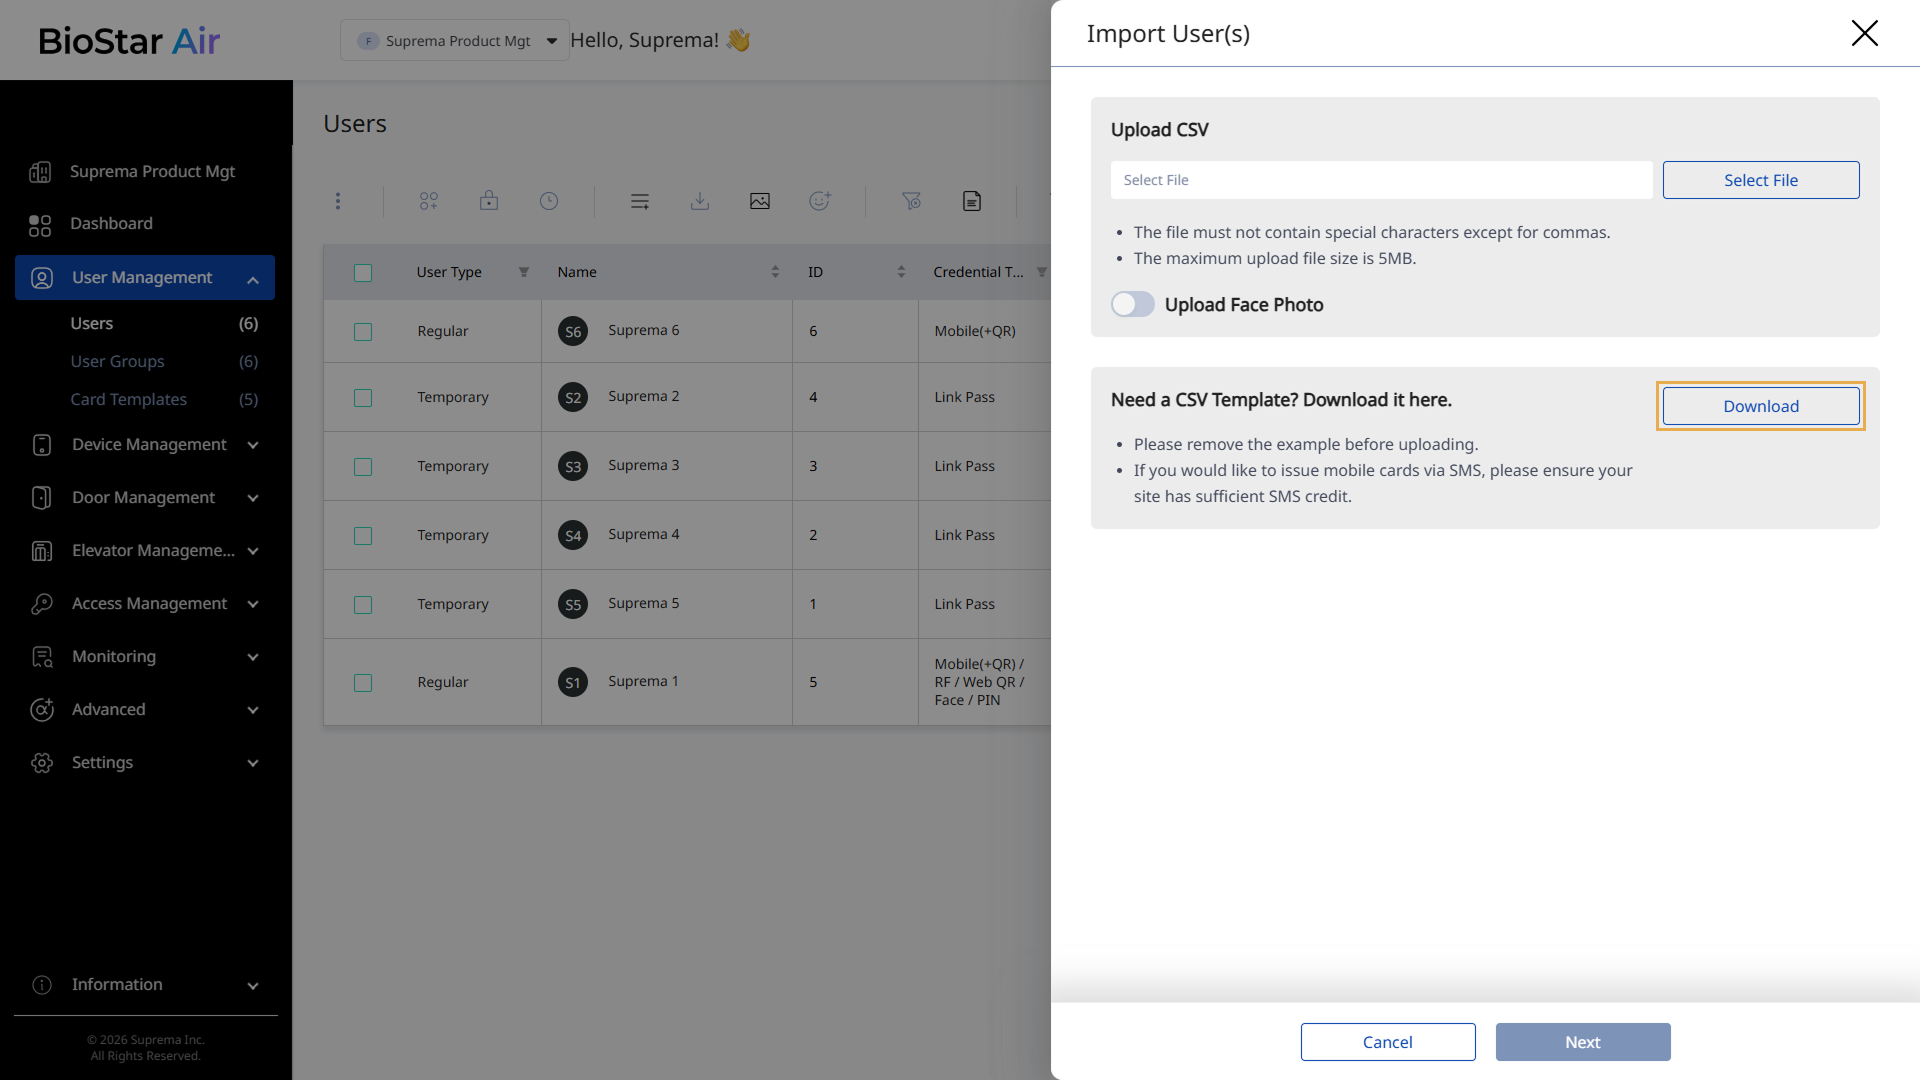
When the Import User(s) panel appears, click Download.
-
Save the CSV template file (biostar-import-user-csv-example.csv) locally.
Prepare the CSV file
Download the CSV template and enter the required details for each user.
Key input fields
The key fields to enter are as follows.
-
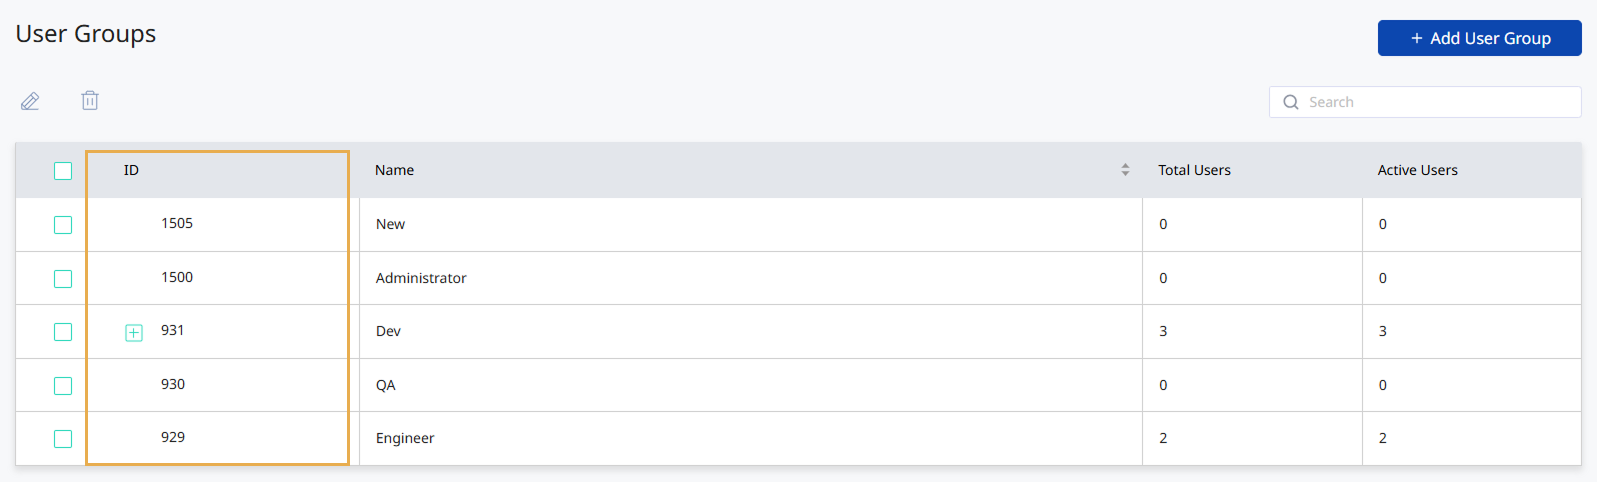
Group IDs: Check the group ID in User Management → User Groups.
-
Access level IDs: Check the access level ID in Access Management → Access Levels. Full Access is always set to 1. Use commas (
,) as separators to specify multiple access levels.
-
Email: Enter this if you plan to send invitations by email.
-
Mobile: Enter this if you plan to send invitations by mobile SMS.
Email and Mobile must not be duplicated. Uploading a CSV file with duplicate values may cause errors.
Support for custom Wiegand formats
You can freely configure any Wiegand format, including facility codes, segments, parity bits, and more.
-
HID Corporate 1000 and iCLASS SE and Seos formats are supported.
-
CSV template
-
Each defined format (custom or default) appears as a separate column in the CSV file.
26 bit SIA Standard-H10301, HID 37 bit-H10302, HID 37 bit-H10304, HID Corporate 1000, HID Corporate 1000 48bit
-
Separate multiple entries in a single field with a slash (
/). -
Use single quotes (
') around the card name. Avoid using double quotes ("); they may cause errors.✅ 'CardName' | ❌ "CardName"
Example
-
With a facility code: 1234567-100-'Main Office Card' (
CardID-FacilityCode-'CardName') -
With multiple segments: 12-3456-78-'Lab Entry Card'
-
Support for multiple cards
-
Assign up to eight CSN or Wiegand card formats per user.
-
CSV template
-
For a single card, enter the CSN card number.
-
Separate CSN card numbers with a slash (
/) when enrolling multiple cards.
-
Card naming format: CSN-'Card Name'
Example: 1234567-'Main Entry' / 7654321-'Back Door'
Upload the CSV file
After preparing the CSV file, upload it.
-
Click User Management → Users in the left sidebar.
-
Click Add User → Import User(s) at the top right of the screen.
-
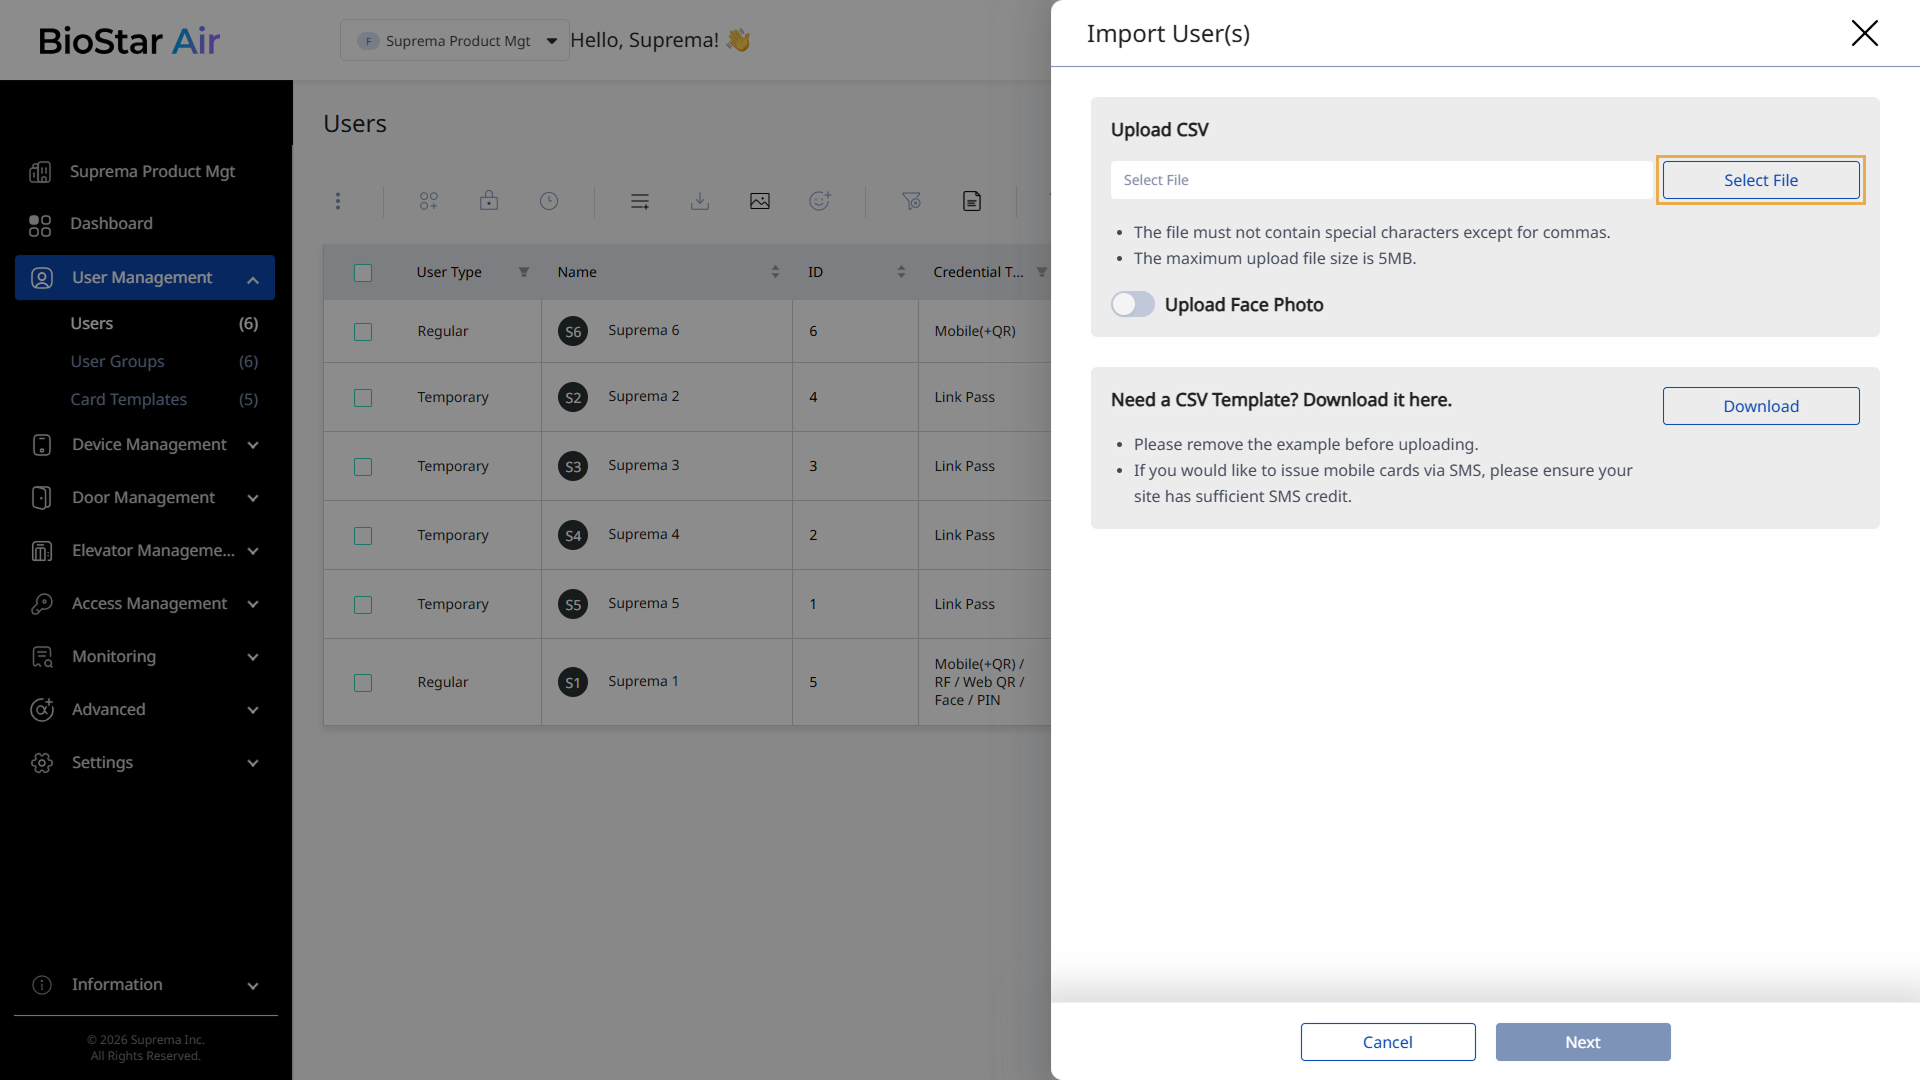
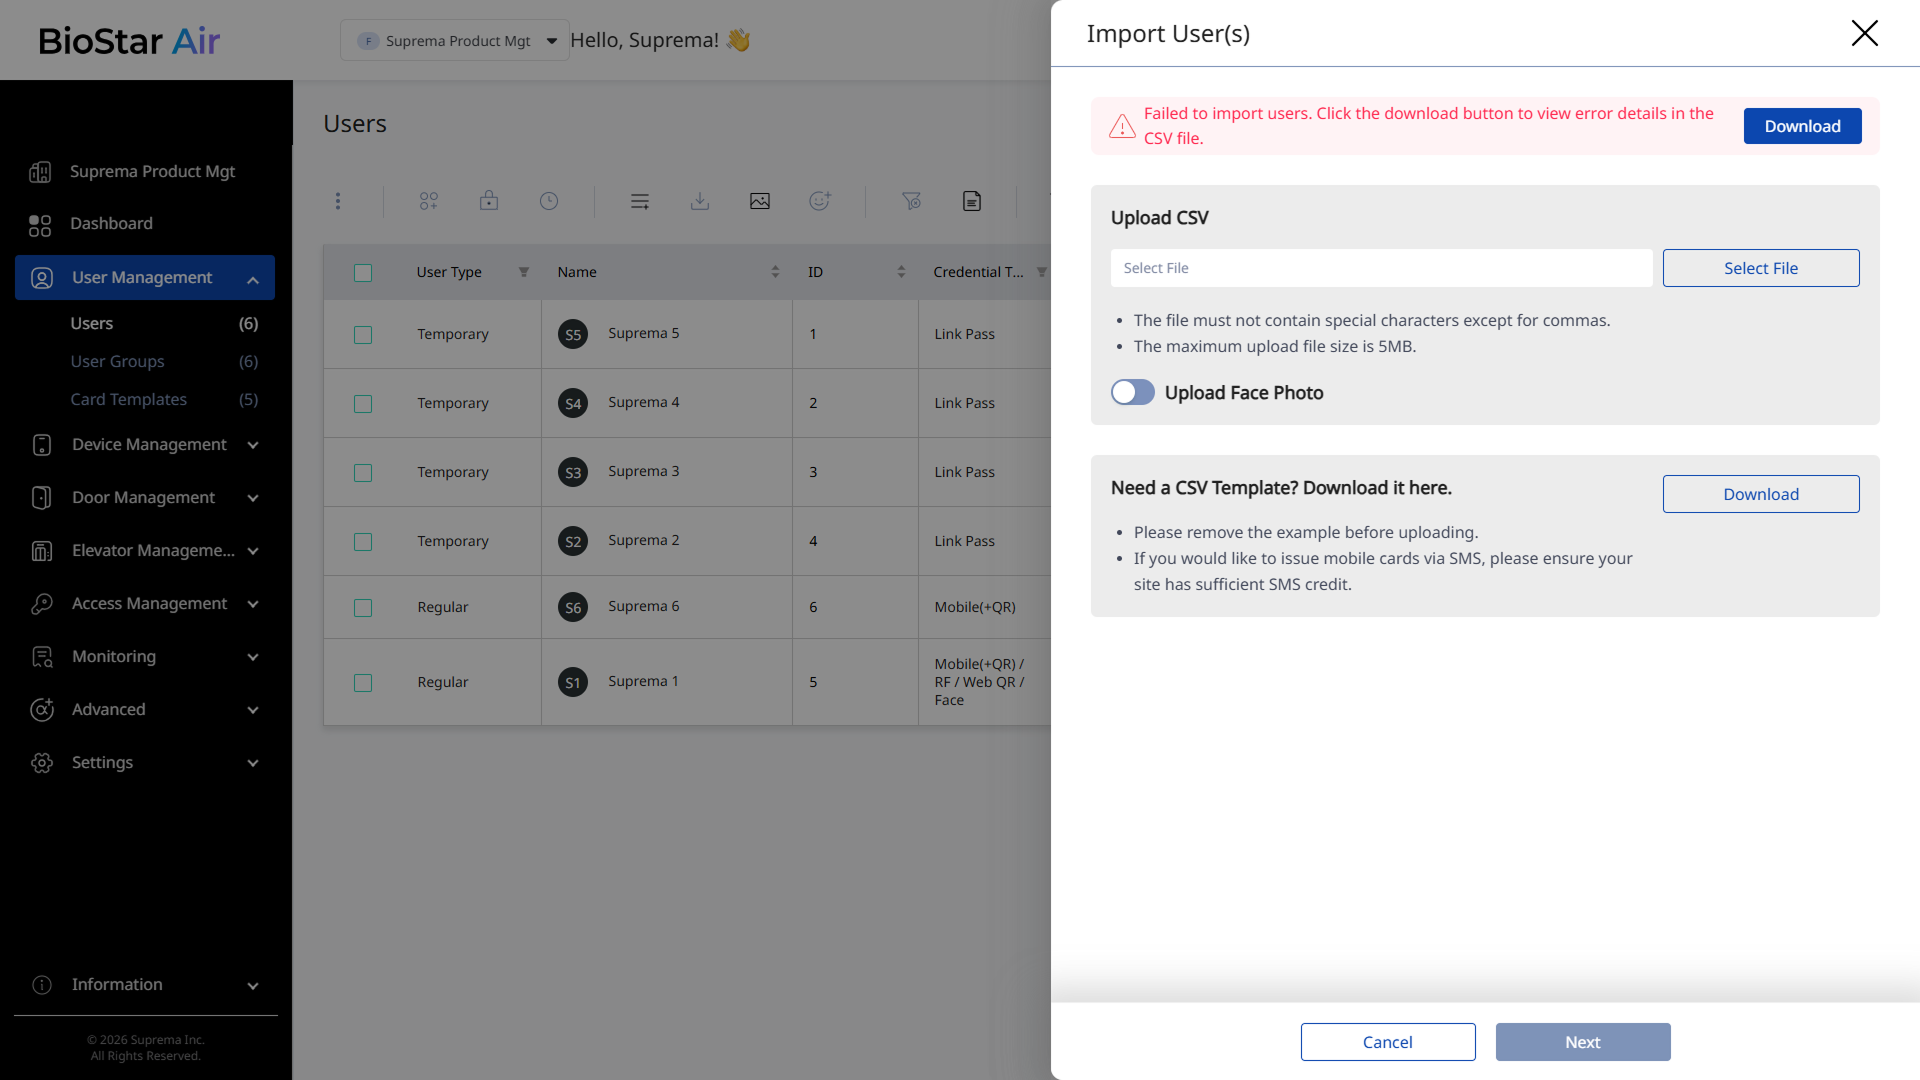
When the Import User(s) panel appears, click Select File.
-
Select the CSV file you prepared.
If the users' profile images are ready, enable the Upload Face Photo option. For more information, see #uploadProfileImages.
-
Click Next at the bottom right of the screen.
-
In the Data Preview section, review the accuracy of the data in the first column.
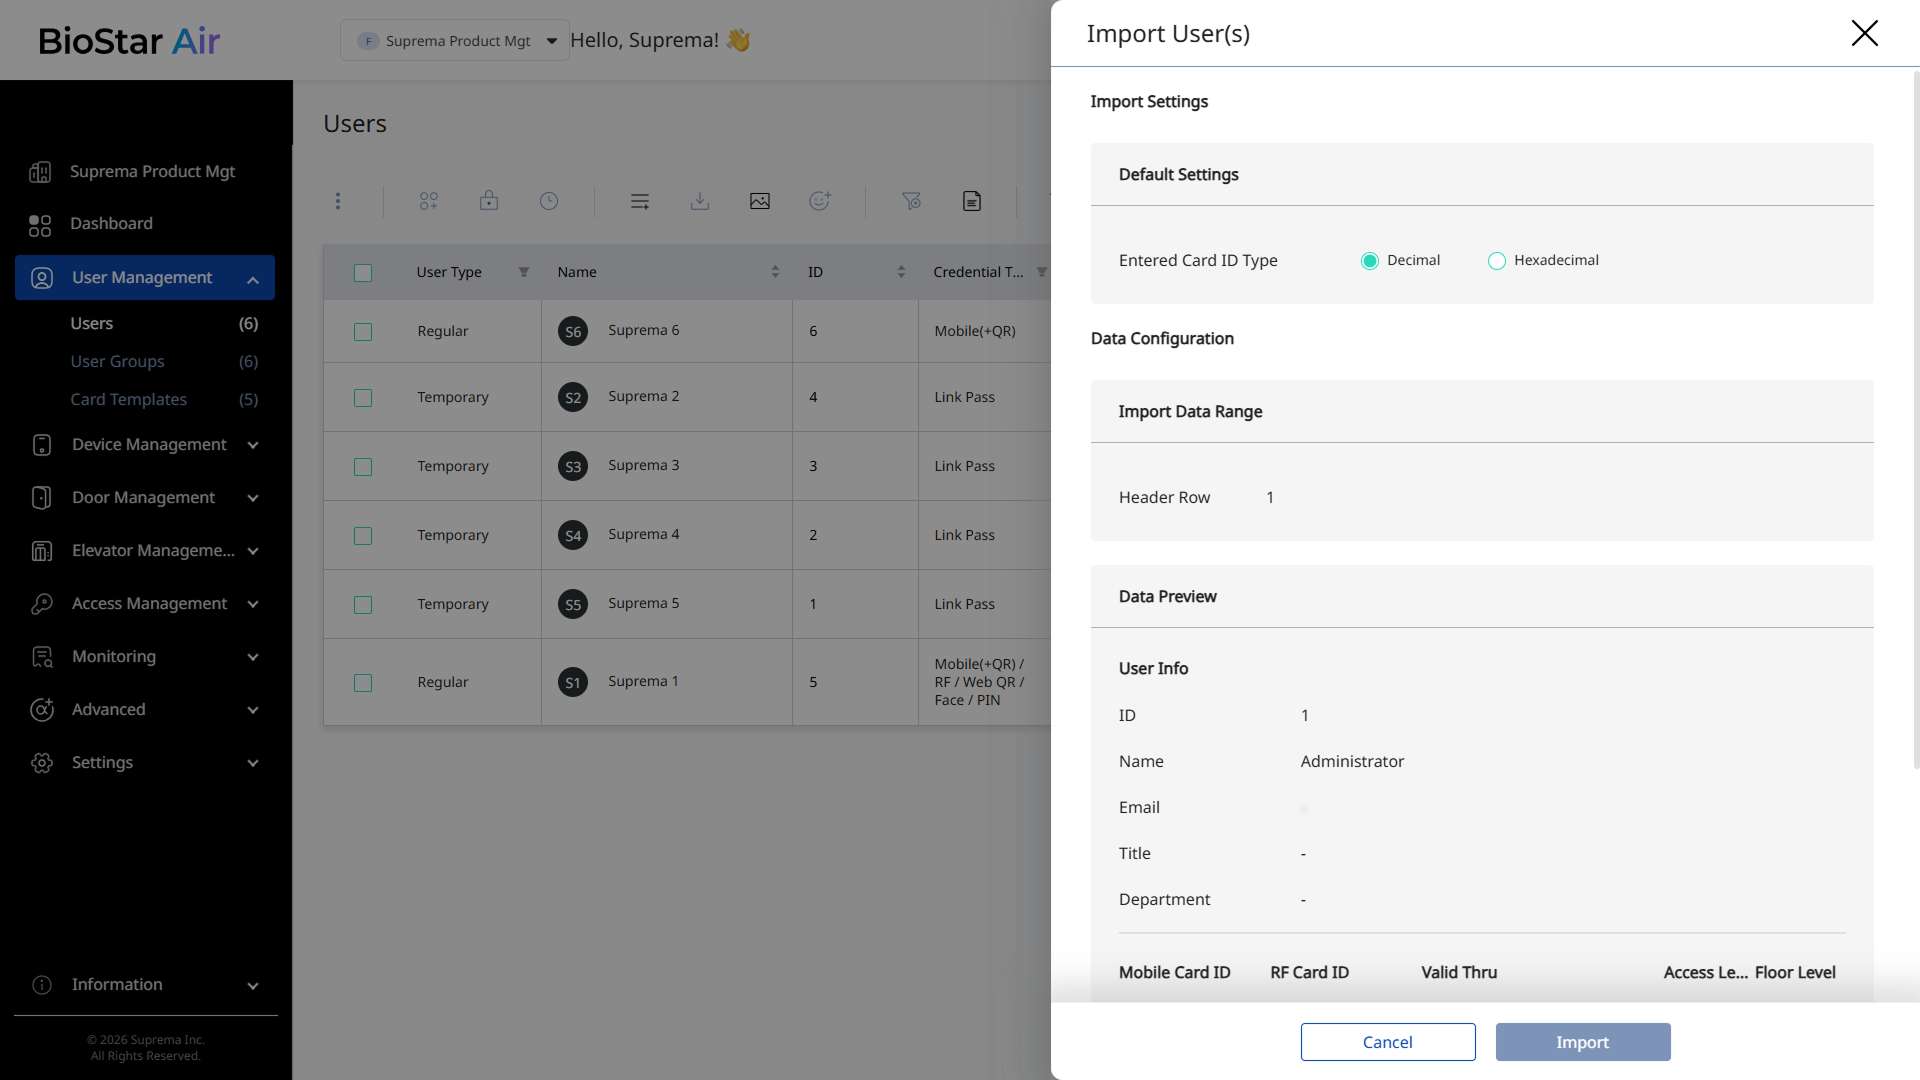
-
If there are no issues, click Import in the bottom right corner.
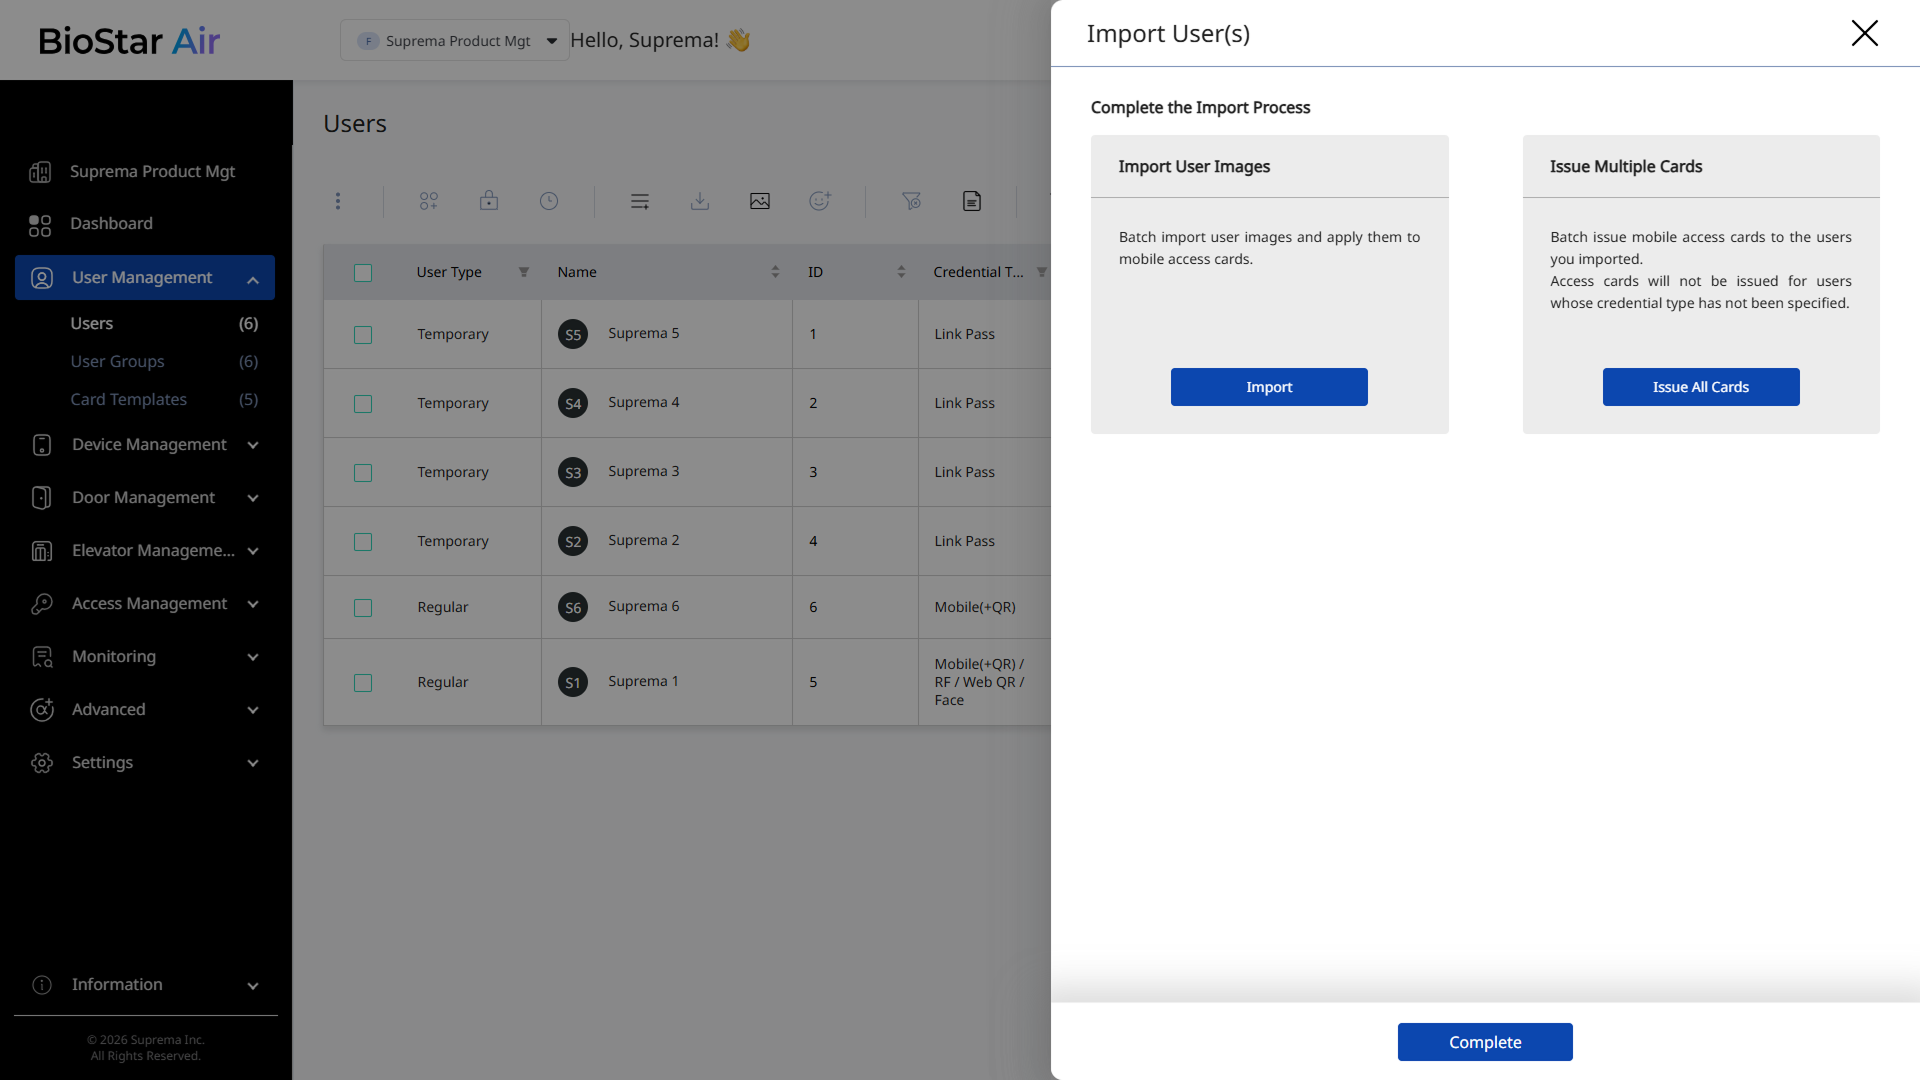
After the upload completes, you can import user images or issue mobile cards in bulk on the next screen. Select the desired action.
-
Do not use special characters other than commas (
,) in the CSV file name. -
The maximum CSV file size is 5MB.
-
Alternatively, drag and drop the CSV file into the Upload CSV field of the Import User(s) panel.
CSV File Validation
The CSV upload process now provides row-level error feedback, making troubleshooting easier. If errors occur during upload, a detailed report is provided for review. Click Download to download the report.
Upload user profile images
Profile images can be uploaded automatically with the CSV file or manually in bulk later.
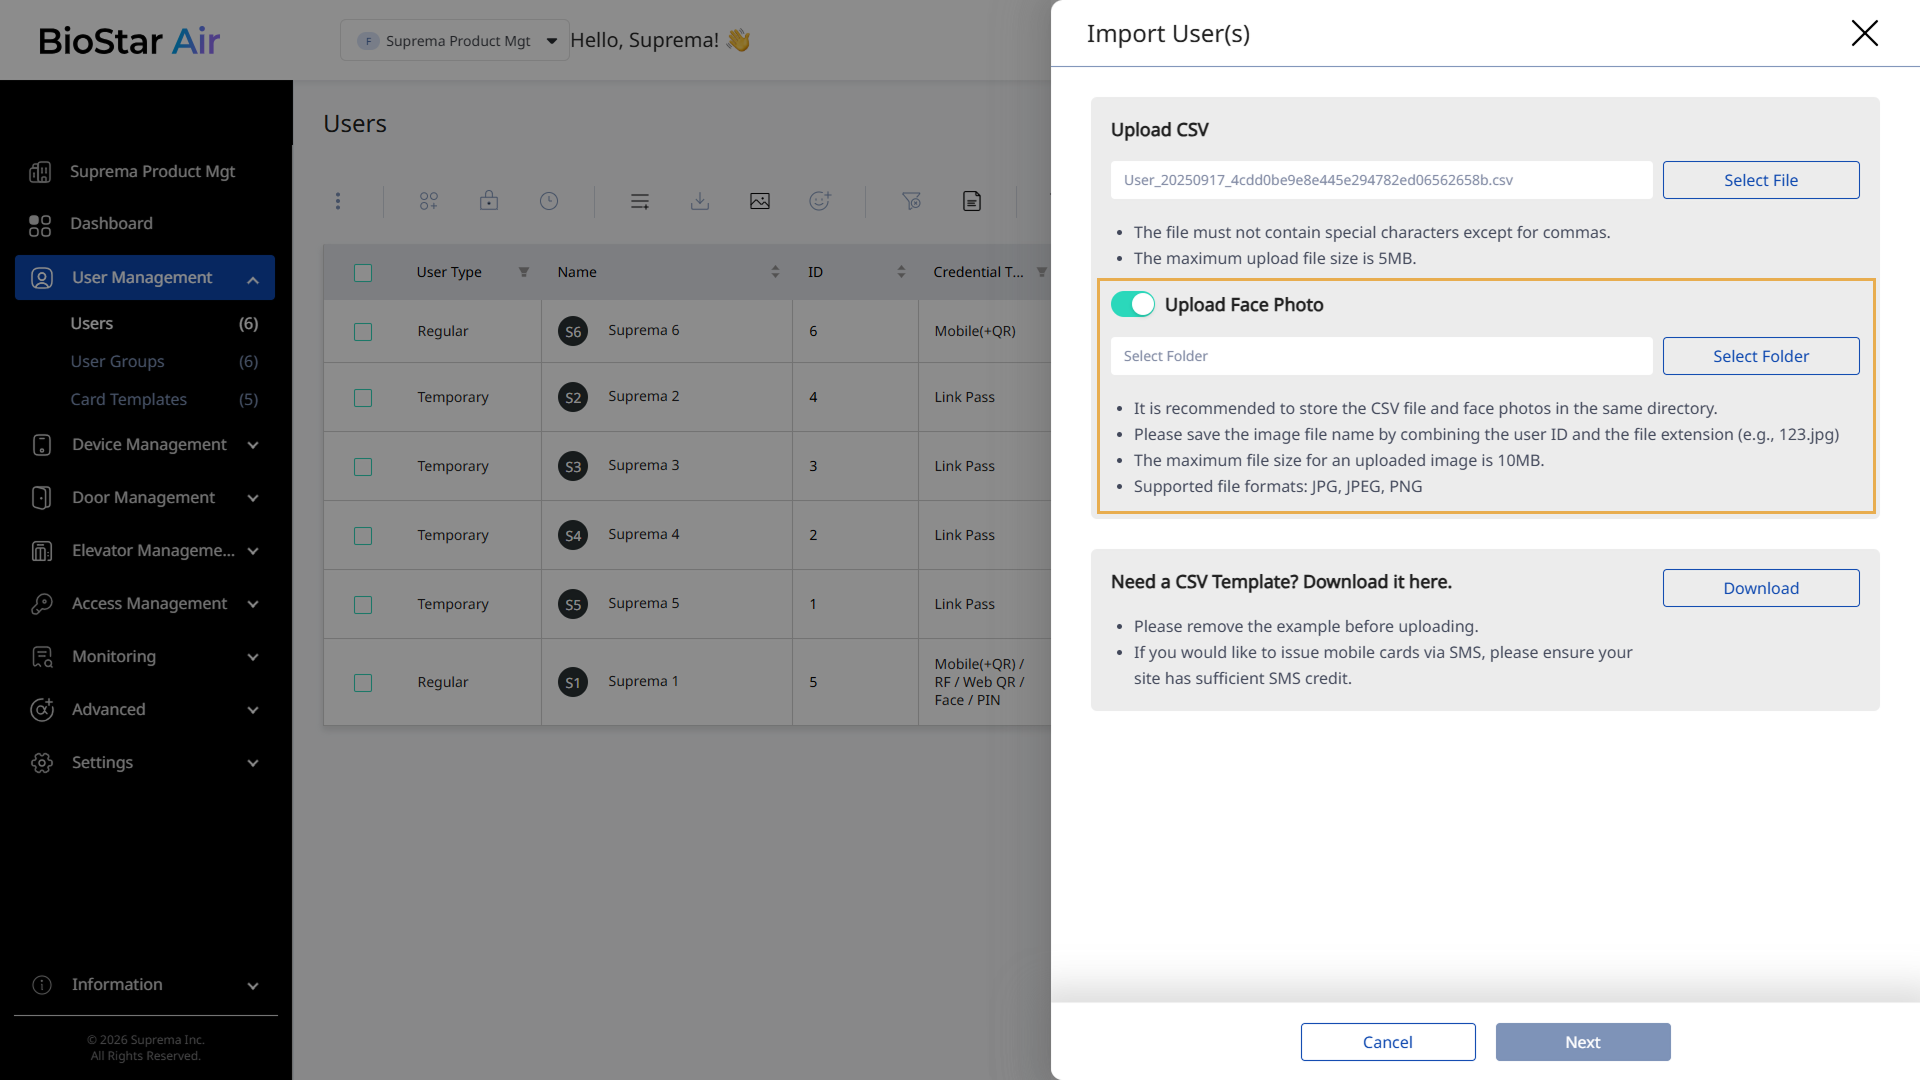
-
Prepare profile image files that match the User Key column in the CSV file.
For example, the 601.jpg file corresponds to user ID 601.
-
After uploading the CSV file in the Import User(s) panel, enable the Upload Face Photo option.
-
Click Select Folder, then select the folder that contains the profile images.
File format requirements
-
Supported formats: .jpg, .jpeg, .png
-
File size limit: 1 MB per image
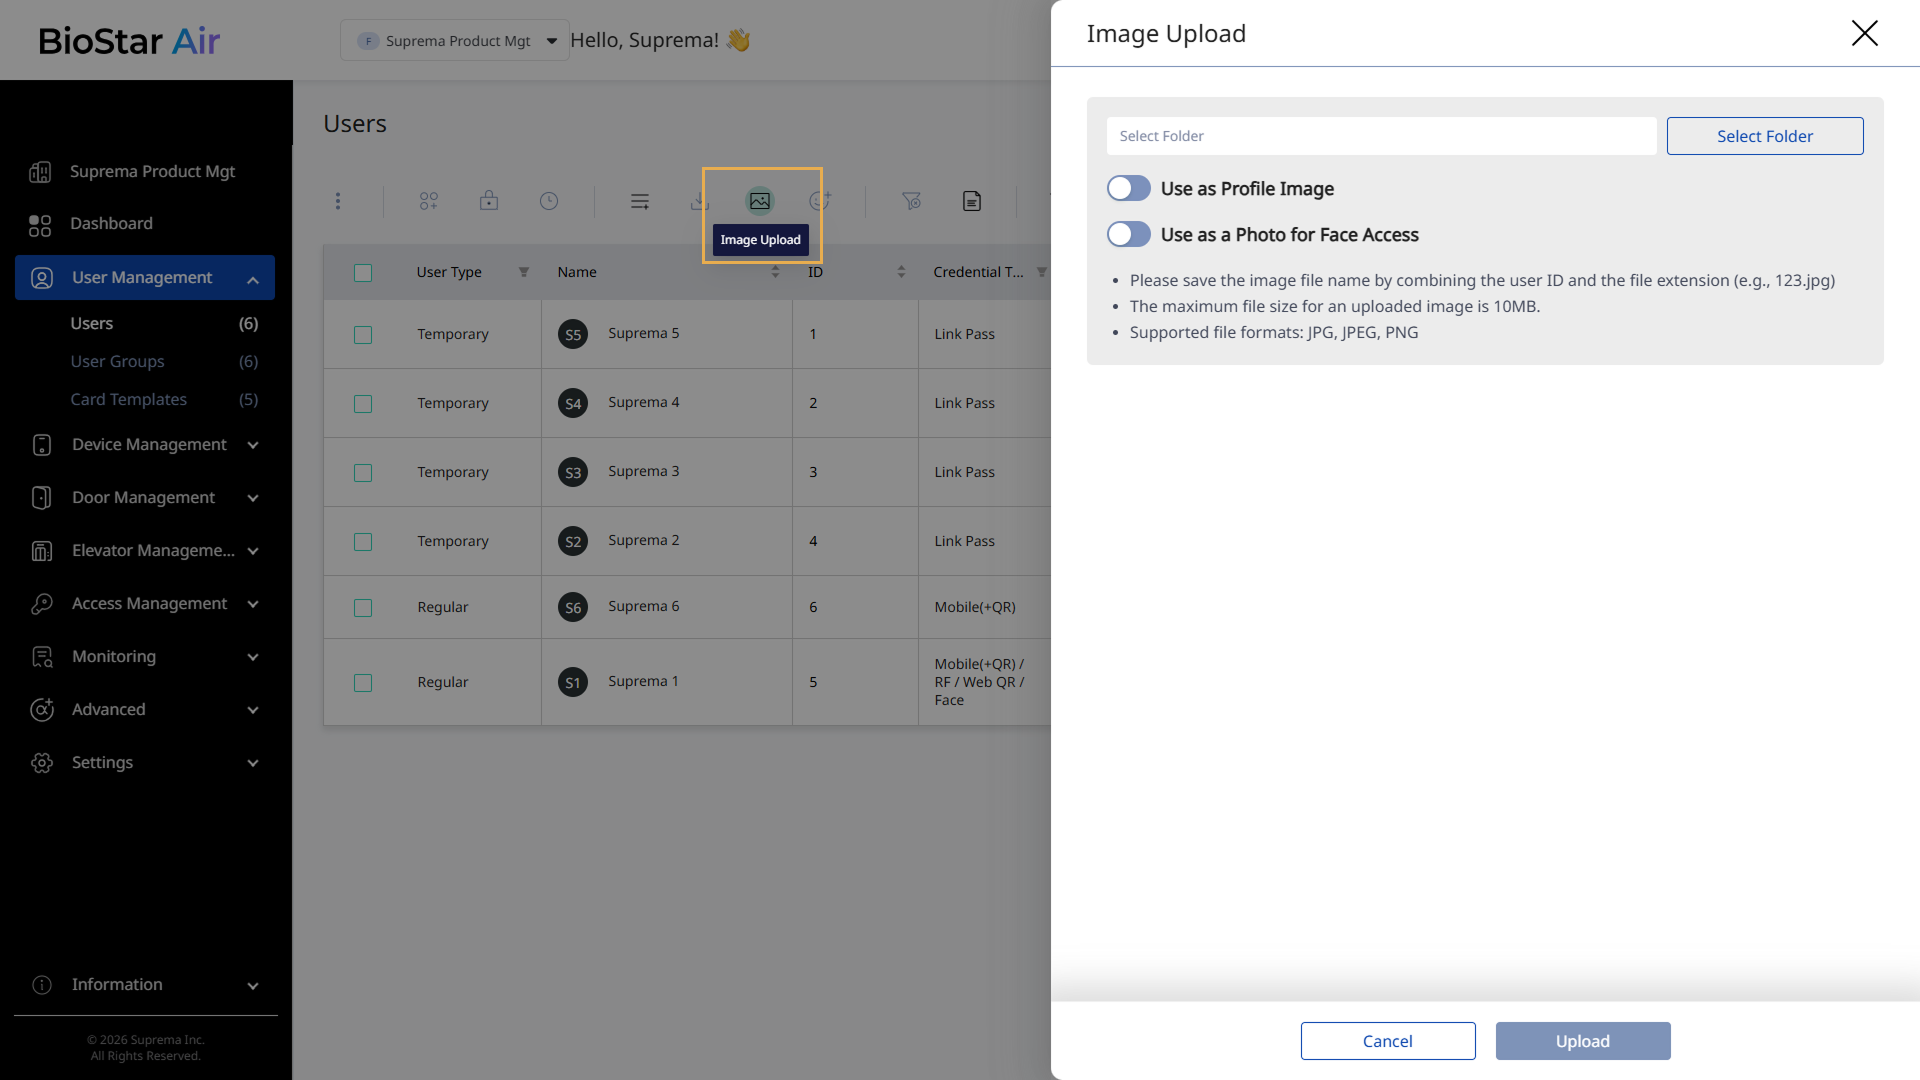
If profile images were not ready when the CSV file was uploaded, use Image Upload() in the user list to add them later.
Finalize the bulk upload
After all user data and images are uploaded, the system processes the entries, and the new users appear in the list with their assigned credentials.
Troubleshooting
If you encounter issues with CSV upload, see Fix Bulk User Addition Issues for help troubleshooting common problems. The document also includes Excel formulas that help validate data and remove duplicates.