Customize Email Templates
Use the email template feature to customize emails sent to site users so they reflect your company's brand and messaging. Email templates include invitations, activation emails, and other notifications.
Watch the following video to learn how to configure email templates.
Add email templates
-
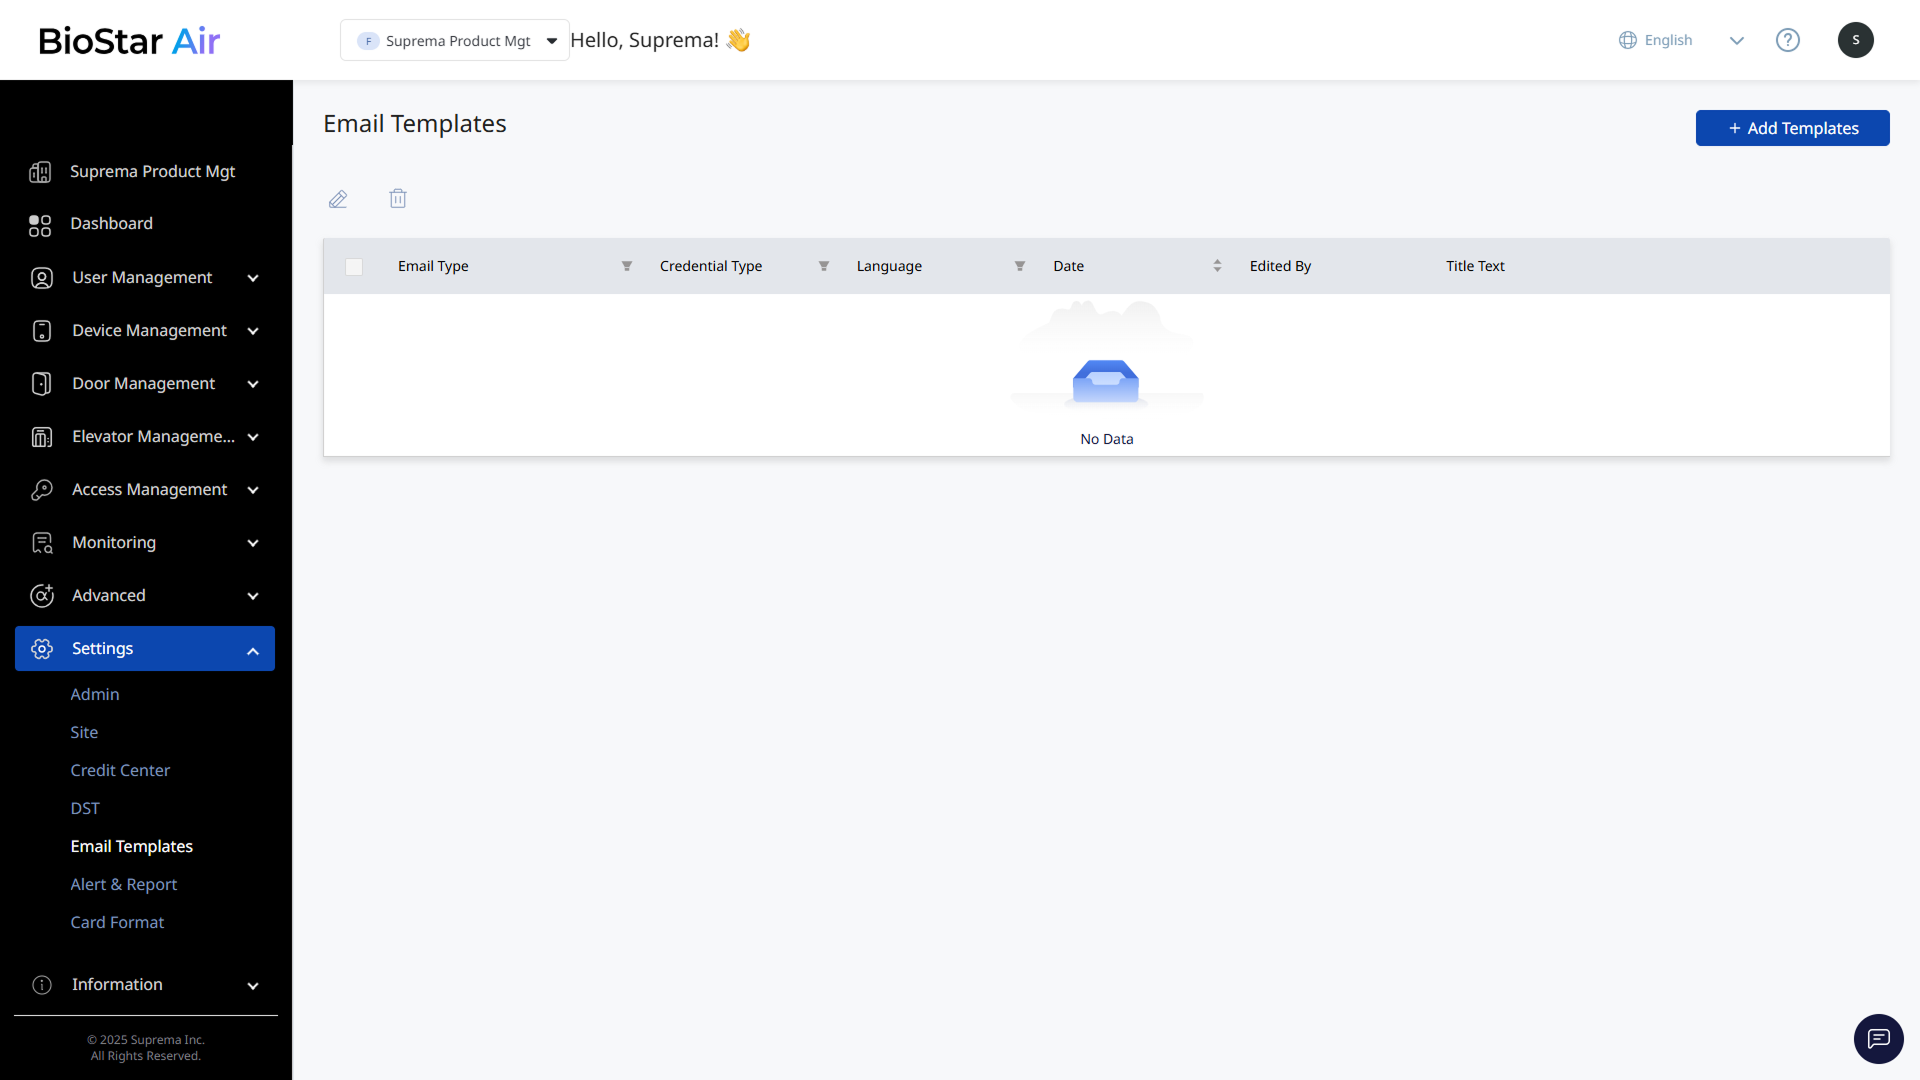
Click Settings → Email Templates in the left sidebar.
-
Click Add Templates at the top right of the screen.
-
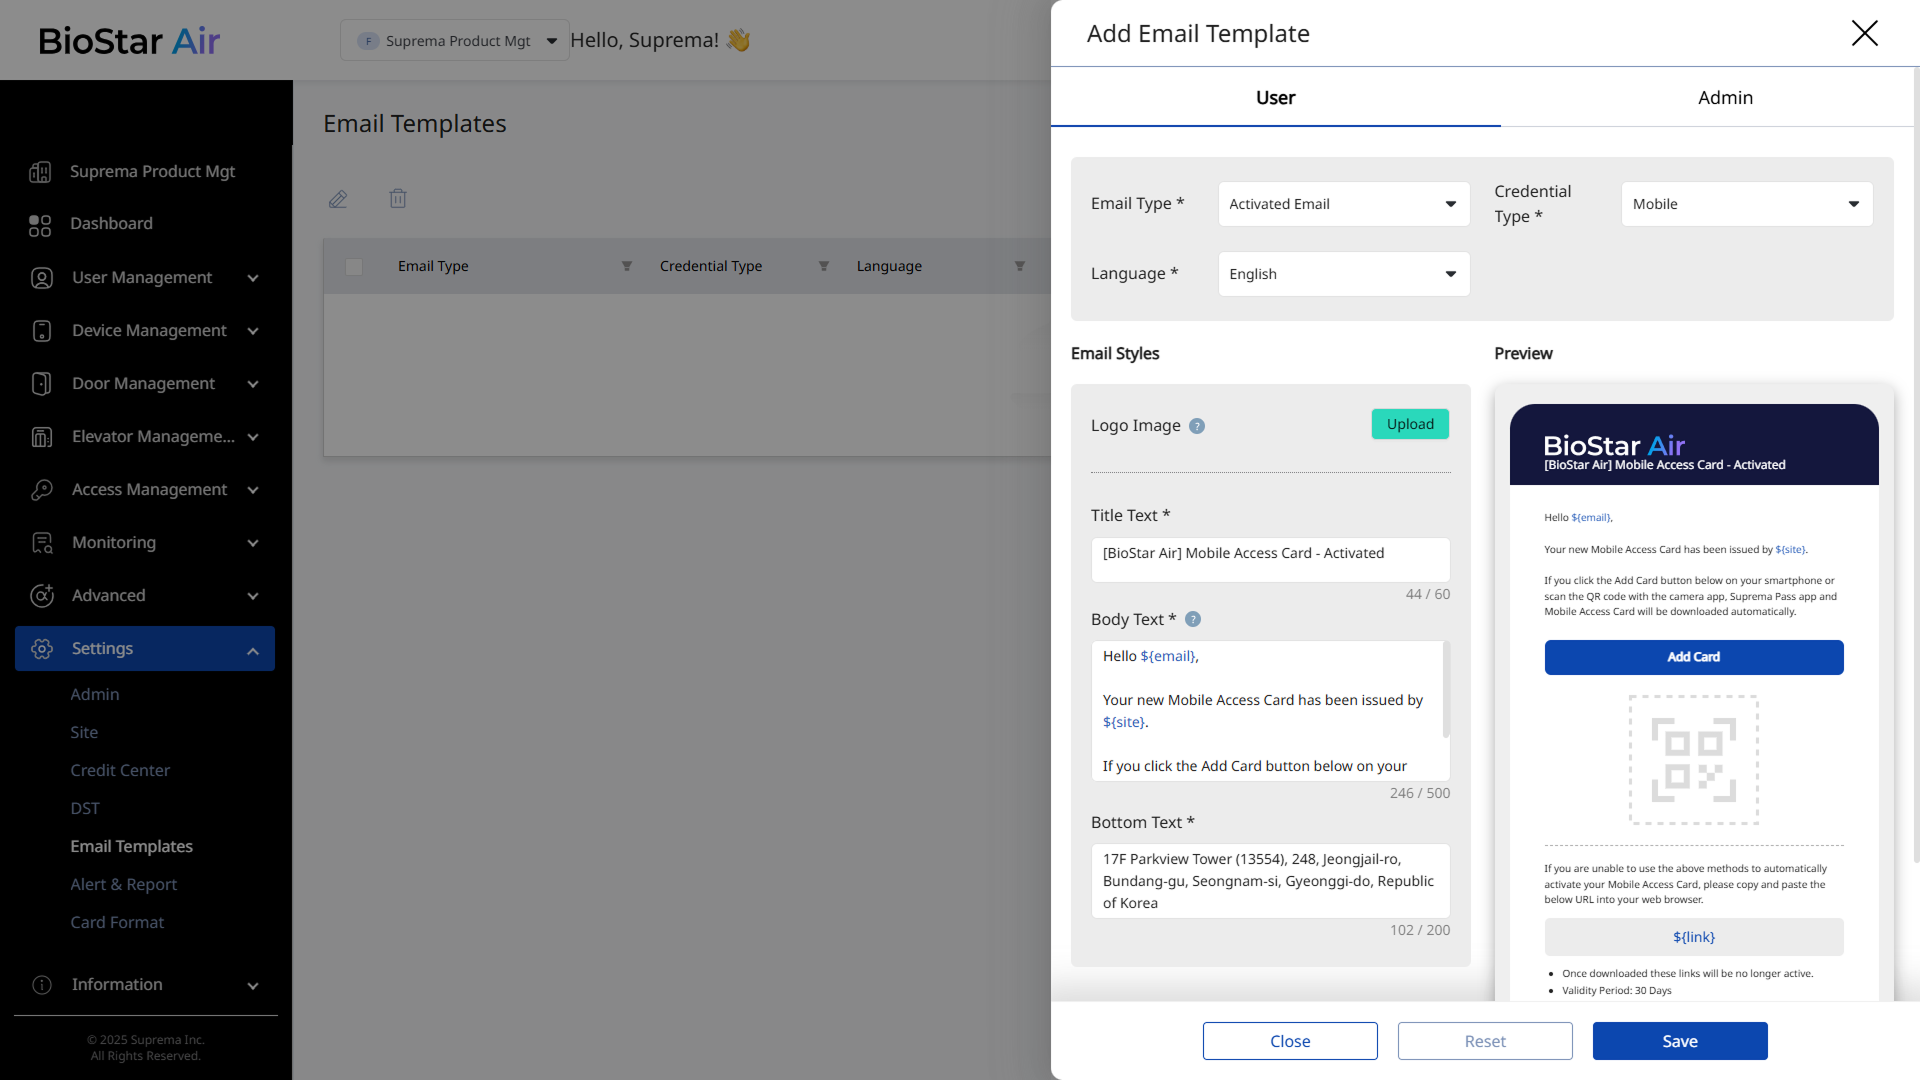
When the Add Email Template panel appears, set each item. Select the User or Admin tab to configure user or administrator email templates.
Create separate email templates for each language. Select the language in Language. Supported languages are as follows:
English, 한국어, 日本語, Nederlands, Español, Português
More languages will be supported.
User
Customize the email templates sent to users.
-
Email Type: Select the email template type to create. Available options are as follows:
-
Activated Email: Typically used as an invitation to download a mobile card.
-
Reactivated Email: Sends a notification to the user that the mobile card has been reactivated.
-
Reissued Email: Used when issuing a new mobile card.
-
Delete Email: Sends a notification to the user about card deletion.
-
Suspended Email: Notifies the user that the card has been suspended.
-
Face Registration Request Email: Used to request that the user upload a face photo.
-
-
Credential Type: Can be selected for email types that allow mobile card downloads, such as Activated Email and Reissued Email.
- Mobile
- Web QR
- Link Pass
For more information about credential types, see User Card and Credential Types.
Admin
Customize the email templates sent to administrators.

Email Type: Select the email template type to create. Available options are as follows:
-
Event Alert Email: Sends administrators notifications about events occurring on the site.
-
System Alert Email: Sends system alerts to administrators.
-
Report Alert Email: Sends administrators a download link after generating a report.
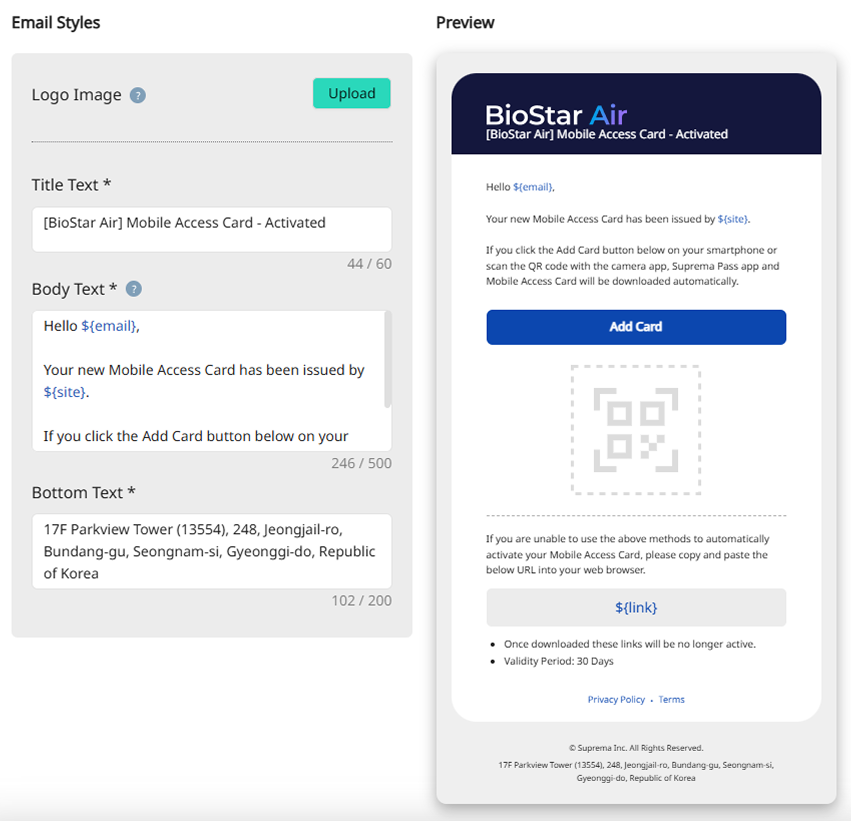
Email Styles
Customize the email logo and content. View changes in real time in Preview.
-
Logo Image: Upload the logo image to appear in the email.
-
File types: JPG, JPEG, PNG
-
Minimum resolution: 200 x 60
-
File size: 1 MB or less
-
-
Title Text: Enter the email subject.
-
Body Text: Enter the message to display in the email body.
The email body must include HTML keys. Each key is replaced with the recipient's email address, the site name, and other values. Available keys may vary according to the value selected in Email Type.
-
User tab
-
${email}: Email address -
${siteName}: Site name -
Administrator tab
-
${email}: Email address -
${siteName}: Site name -
${alertType}: Alert type -
${alertDetails}: Alert details -
${frequency}: Alert frequency -
${location}: Alert location -
${userInvolved}: User involved in the alert -
${deviceInvolved}: Device involved in the alert -
${dateTime}: Date and time of the alert
-
-
Bottom Text: Enter additional information to appear at the bottom of the email. Add the company address or contact information for compliance or to provide location details to users.
-
Verify that the logo image is in the proper format and size so that it appears correctly in the email.
-
If the current language is not supported, check future updates. More languages will be added.
-
The address field is important for regulatory compliance and clarity, so enter it accurately.
-
Click Save at the bottom to save the email template.
-
Click Reset at the bottom to restore the original content after making changes.
Edit email templates
-
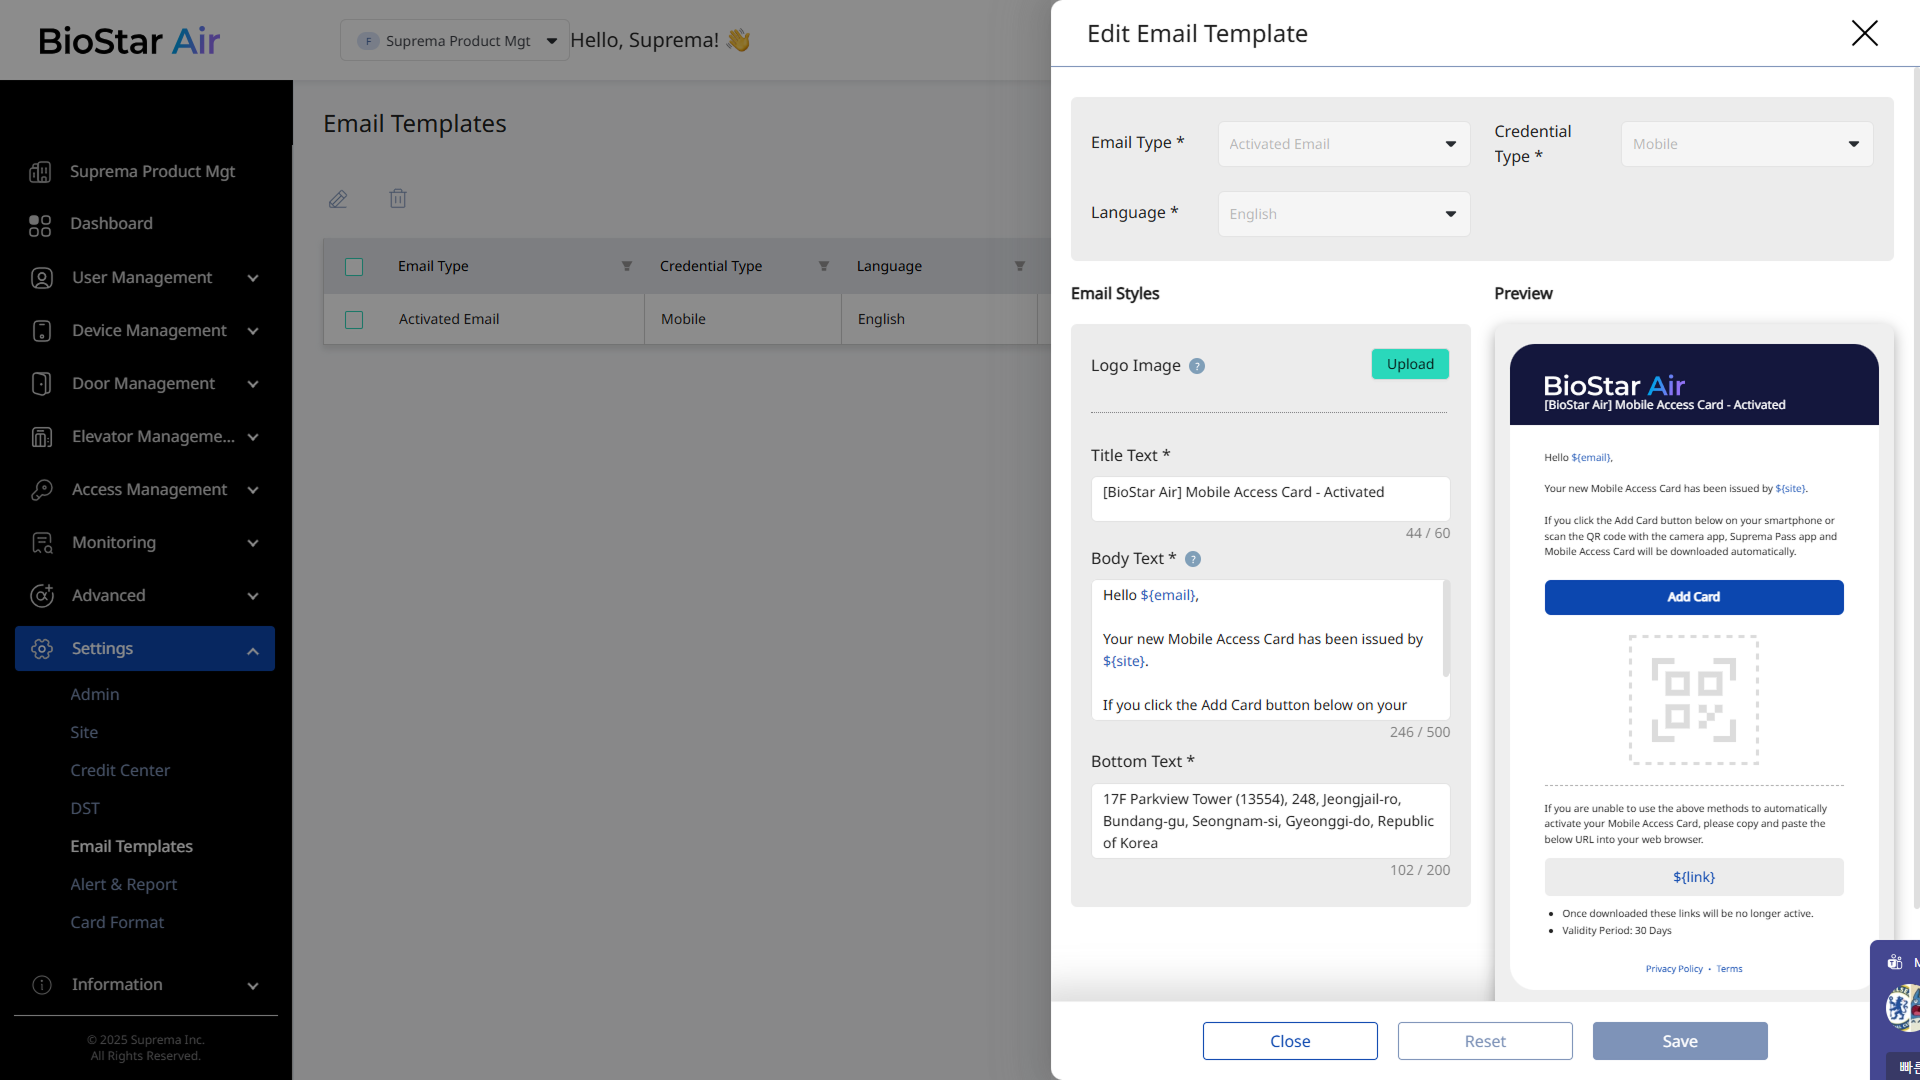
Click Settings → Email Templates in the left sidebar.
-
Click the email template you want to edit from the list. Alternatively, select the checkbox and click at the top.
-
When the Edit Email Template panel appears, edit the necessary items.
-
Click Save at the bottom to save the changes.
Delete email templates
-
Click Settings → Email Templates in the left sidebar.
-
Select the checkbox of the email template you want to delete from the list. You can select more than one template.
-
Click at the top of the list.
-
Click Delete when the message window appears.