Manage Access Levels
Use access levels to precisely control user access. Access levels define who can access where and when. An access level consists of the following elements.
-
Door / door group: Location where access is allowed
-
Schedule: Time when access is allowed
-
Holiday group: Dates or periods that restrict or adjust access
Set up access levels before adding users to streamline the user management process.
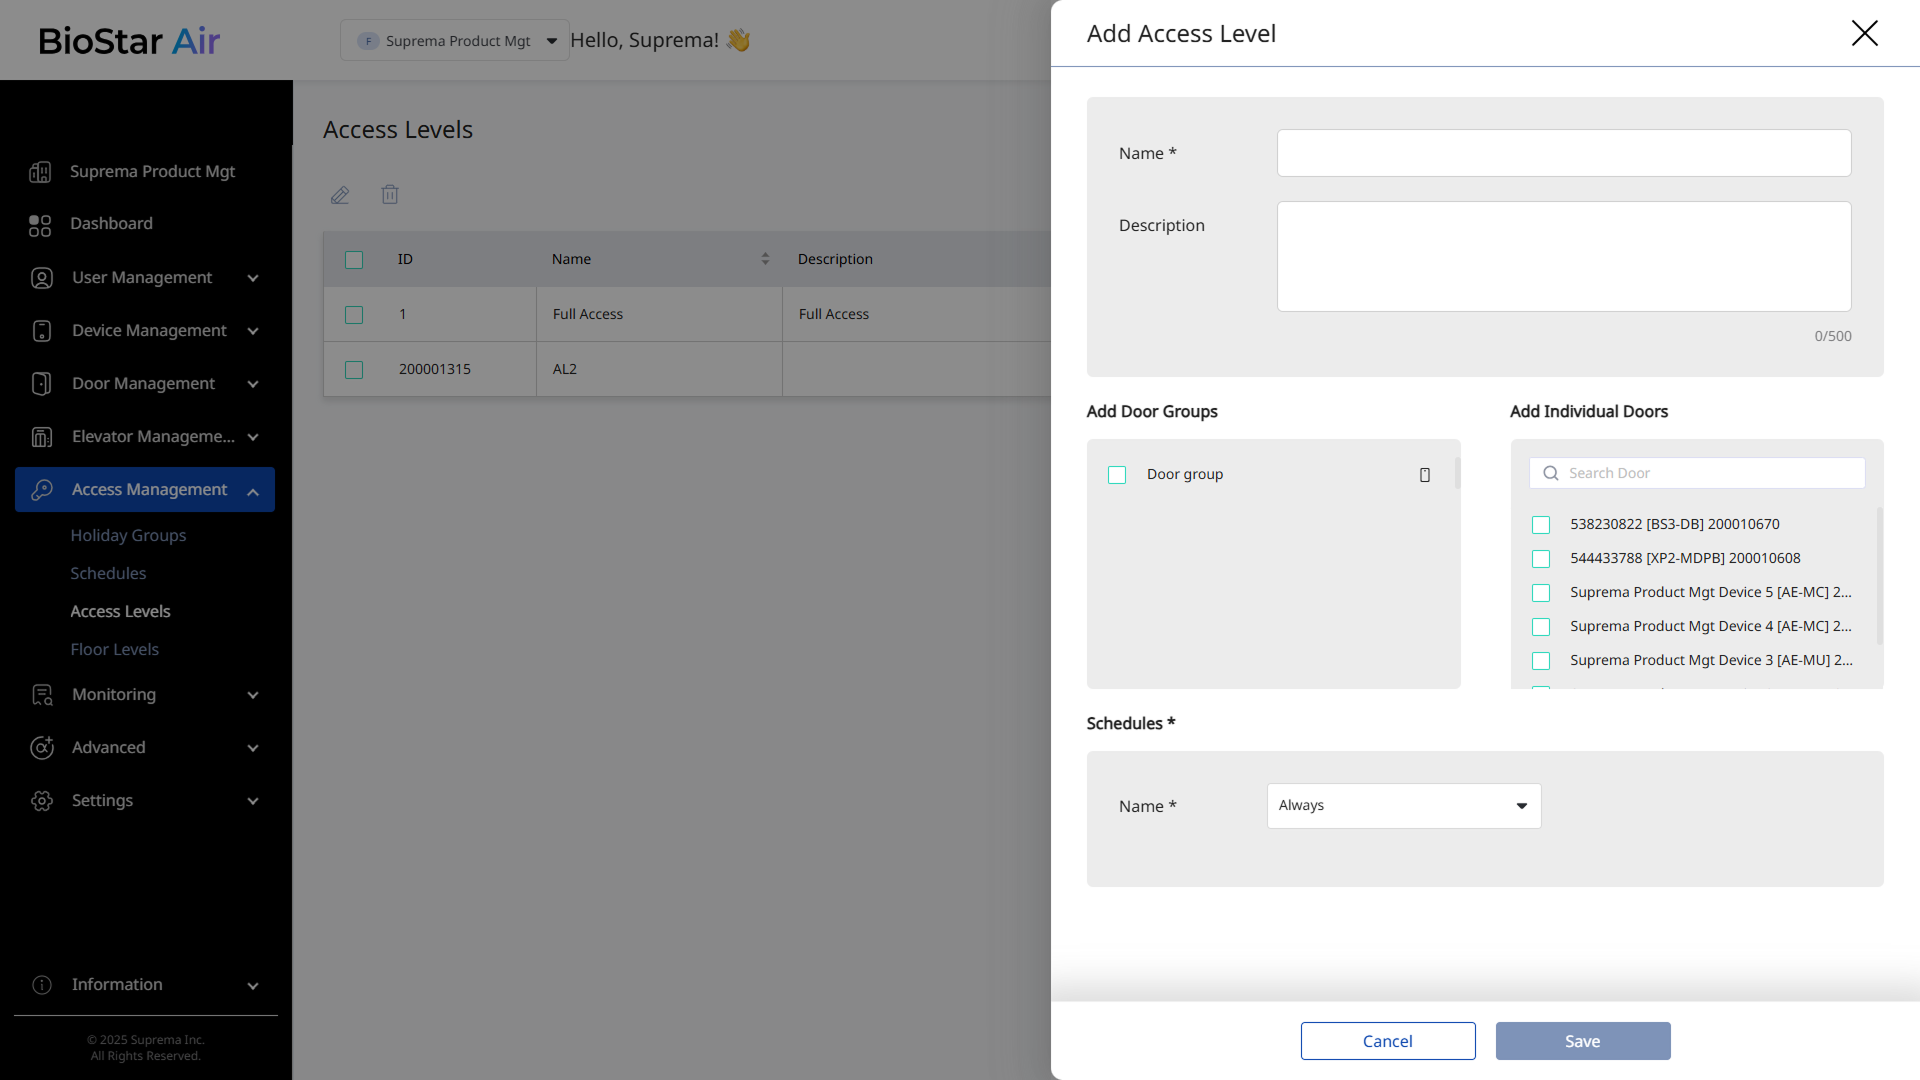
Add access level
Use access levels to set user permissions by door, schedule, and holiday.
-
Click Access Management → Access Levels in the left sidebar.
-
Click Add Access Level at the top right of the screen.

-
When the Add Access Level panel appears, enter Name and Description (optional).
-
In the Add Door Groups or Add Individual Doors section, select door groups or individual doors.
-
In the Schedules section, select the schedule to apply to the access level. Select Always to allow unrestricted access.
-
Click Save to add the access level.
Edit access level
-
Click Access Management → Access Levels in the left sidebar.
-
Click the access level you wish to modify from the access level list. Alternatively, select the checkbox of the access level you wish to modify and click at the top of the list.

-
When the Edit Access Level panel appears, edit the required information or change the settings.
-
Click Save to save the changes.
Delete access level
-
Click Access Management → Access Levels in the left sidebar.
-
Check the checkbox of the access level you wish to delete from the access level list. You can select more than one access level.
-
Click at the top of the list.
-
When a warning message appears, click Yes.