Manage Registered Devices
View the connection status of registered devices at a glance, change biometric and card settings, or update firmware. Manage a few devices individually and many devices in bulk to operate your security system efficiently.
-
Devices can be registered only in the BioStar Air mobile app for iOS or Android. You cannot register devices from the web portal. For detailed instructions on registering devices using the mobile app, refer to Register and Delete Devices.
-
Internet access is required to use certain features, such as remote access, biometric authentication, QR code access, and firmware updates.
Refer to the following video to watch the device registration and management guide.
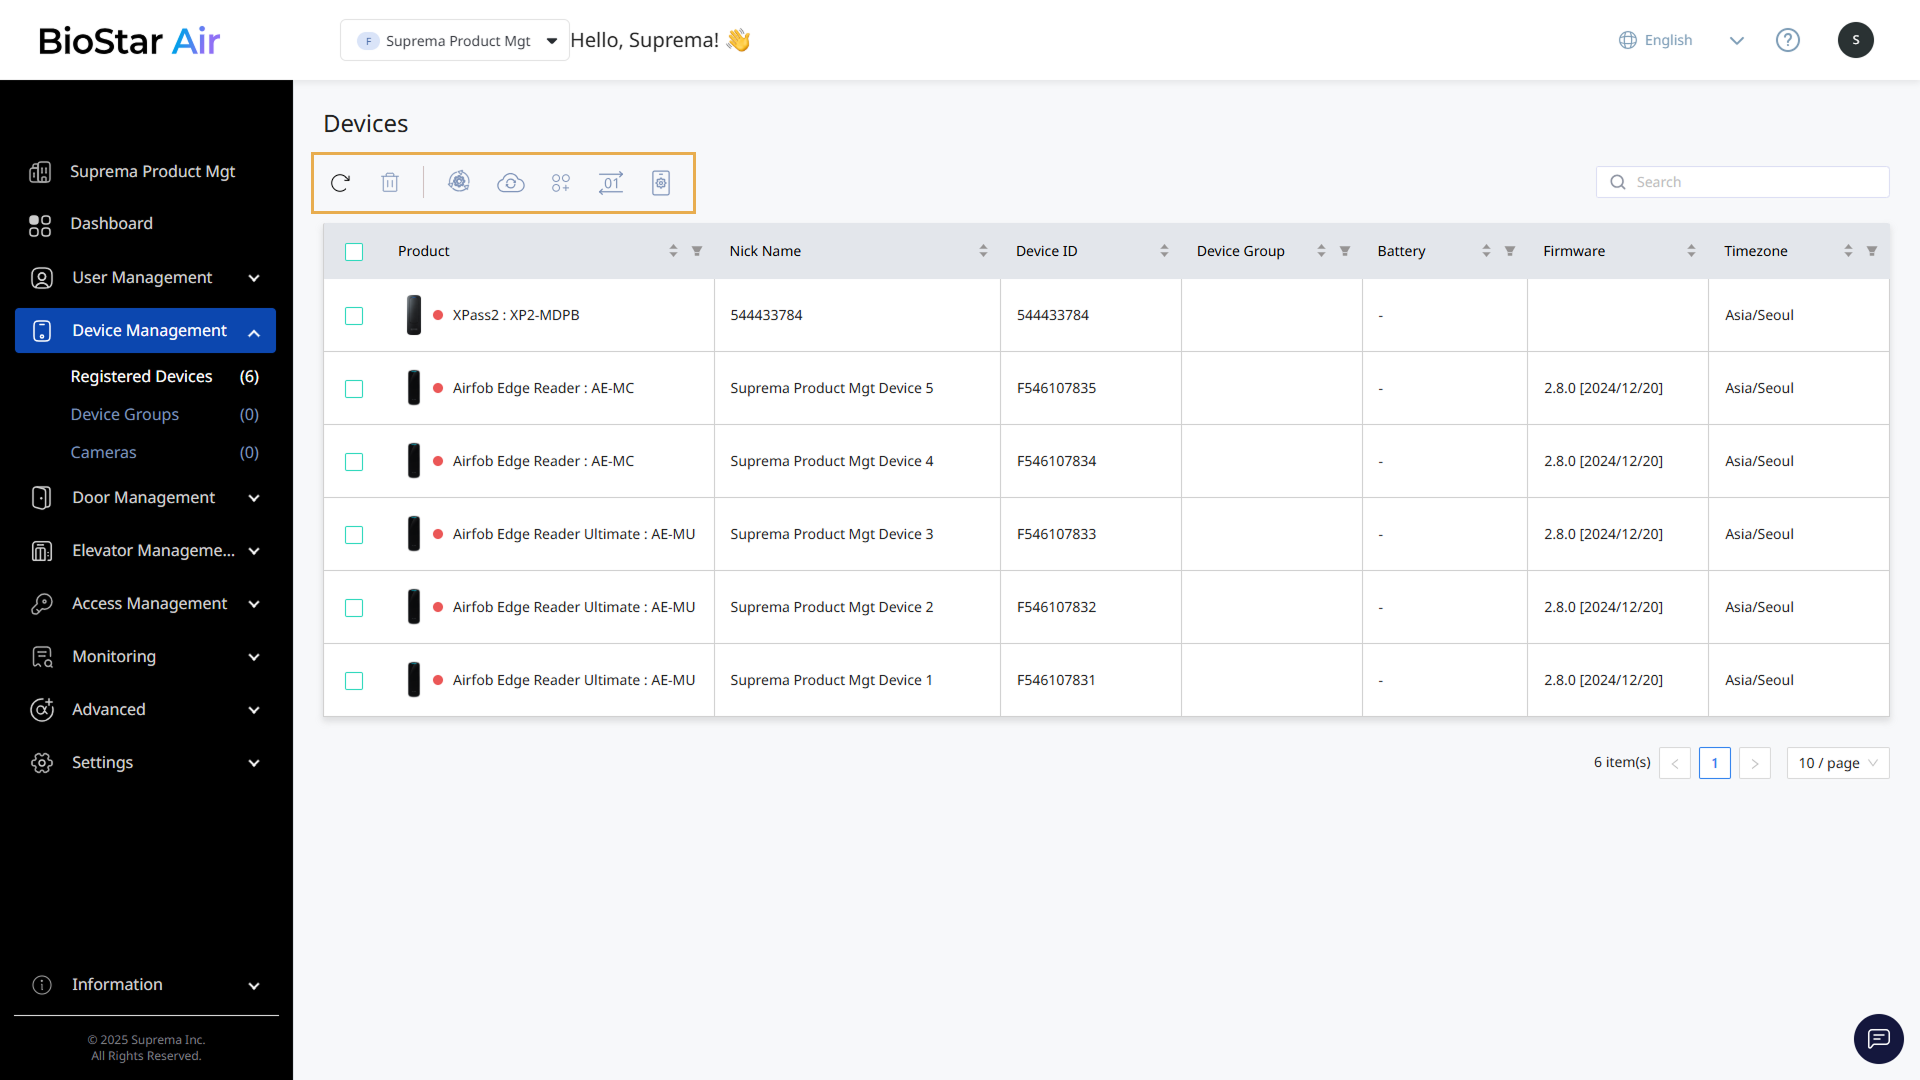
View the device list
The device list lets you see all devices registered in BioStar Air at a glance. View key information for each device at a glance, such as connection status, model name, and firmware version. Click a device to view details and modify settings.
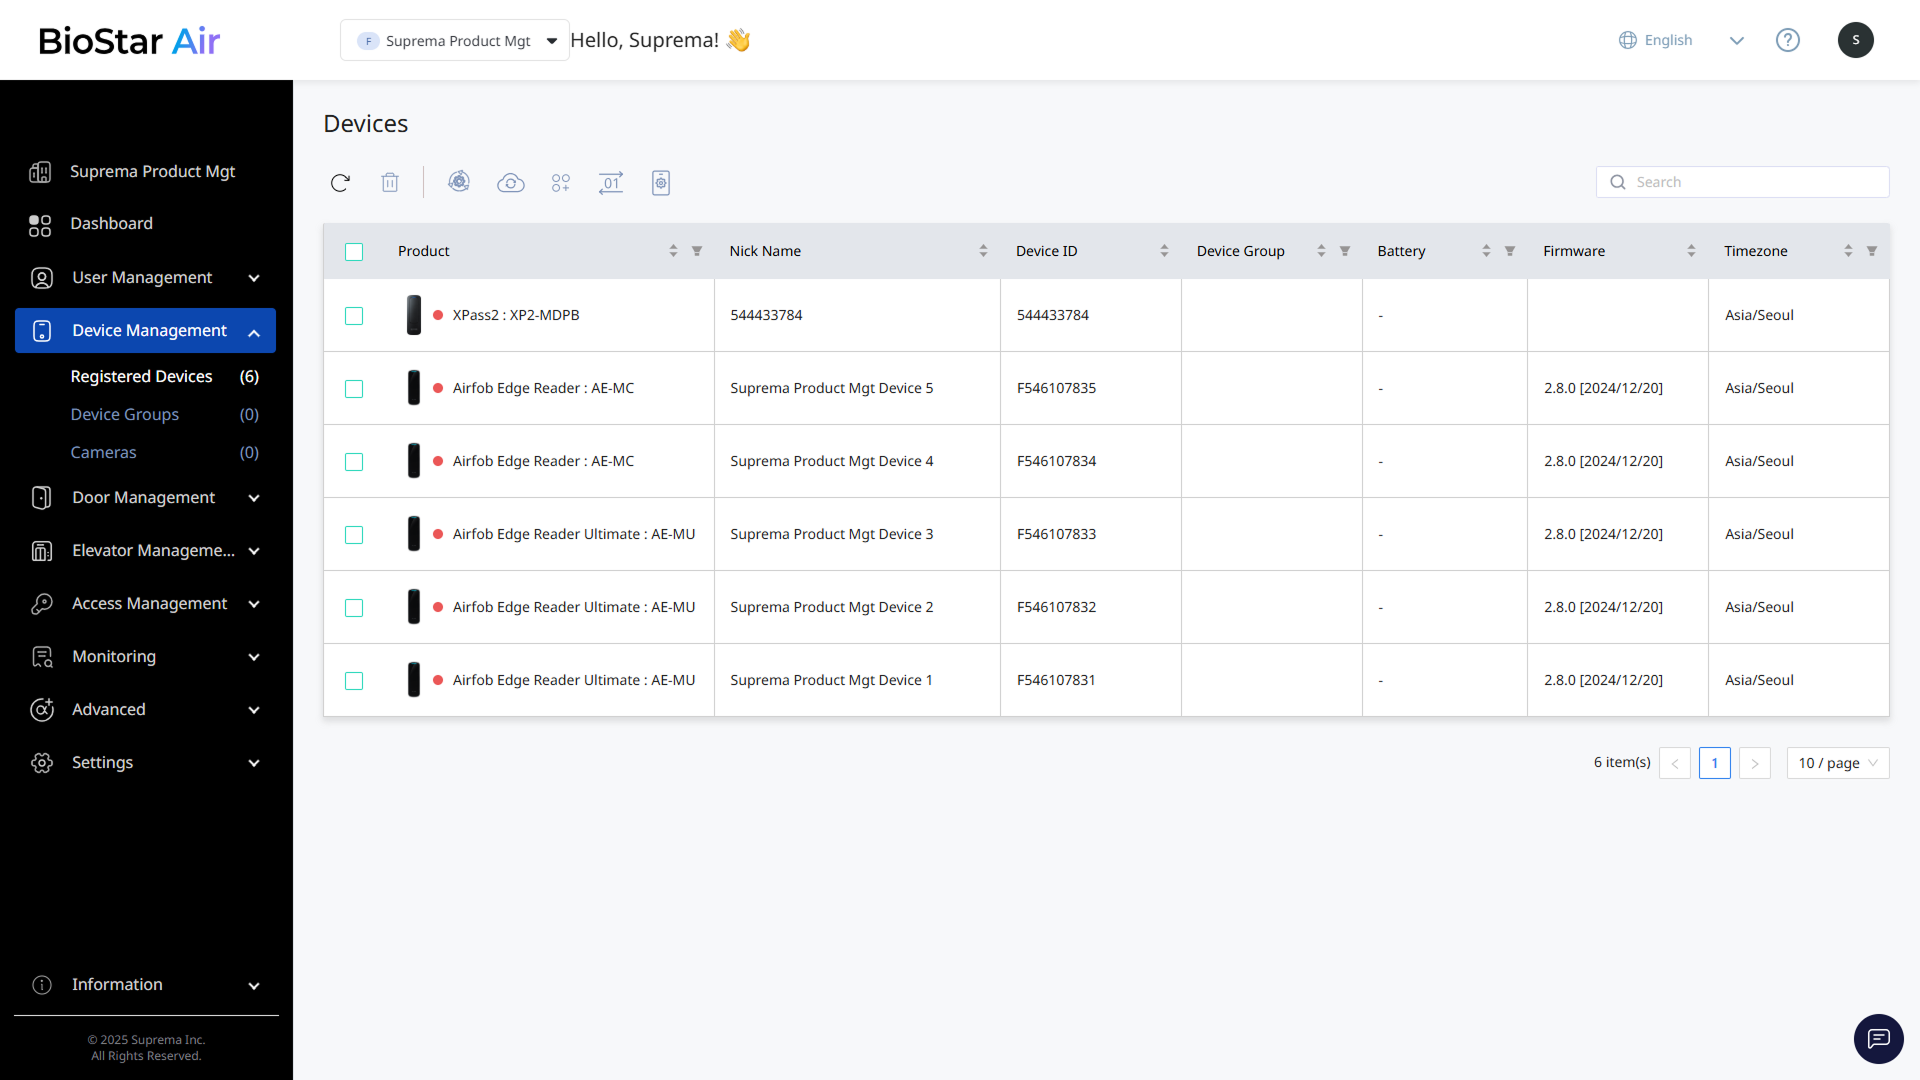
Click Device Management → Registered Devices in the left sidebar.
Device connection status
Check each device’s connection status from the status icons in the device list.
- Green: The device is online, can be controlled remotely, and can accept and update QR authentication.
- Red: The device is offline.
- Orange: Firmware is updating.
-
⚪ Not connected: The device has no network connection. (e.g., Airfob Patch)
-
Warning: Synchronization is required between the server and the device.
Device information
Each column in the device list includes the following information.
-
Product: The device name and model retrieved from the Suprema database.
-
Nick Name: A user-editable field for easier identification. Edit it in the Edit Device window that appears after clicking the device in the list.
-
Device ID: The unique identifier assigned to the device.
-
Device Group: The group to which the device belongs.
-
Battery: Available only on battery-powered devices. Supported only by AirPop Tag (AirFob Tag) devices.
-
Firmware: The currently installed firmware version.
-
Timezone: The time zone set on the device.
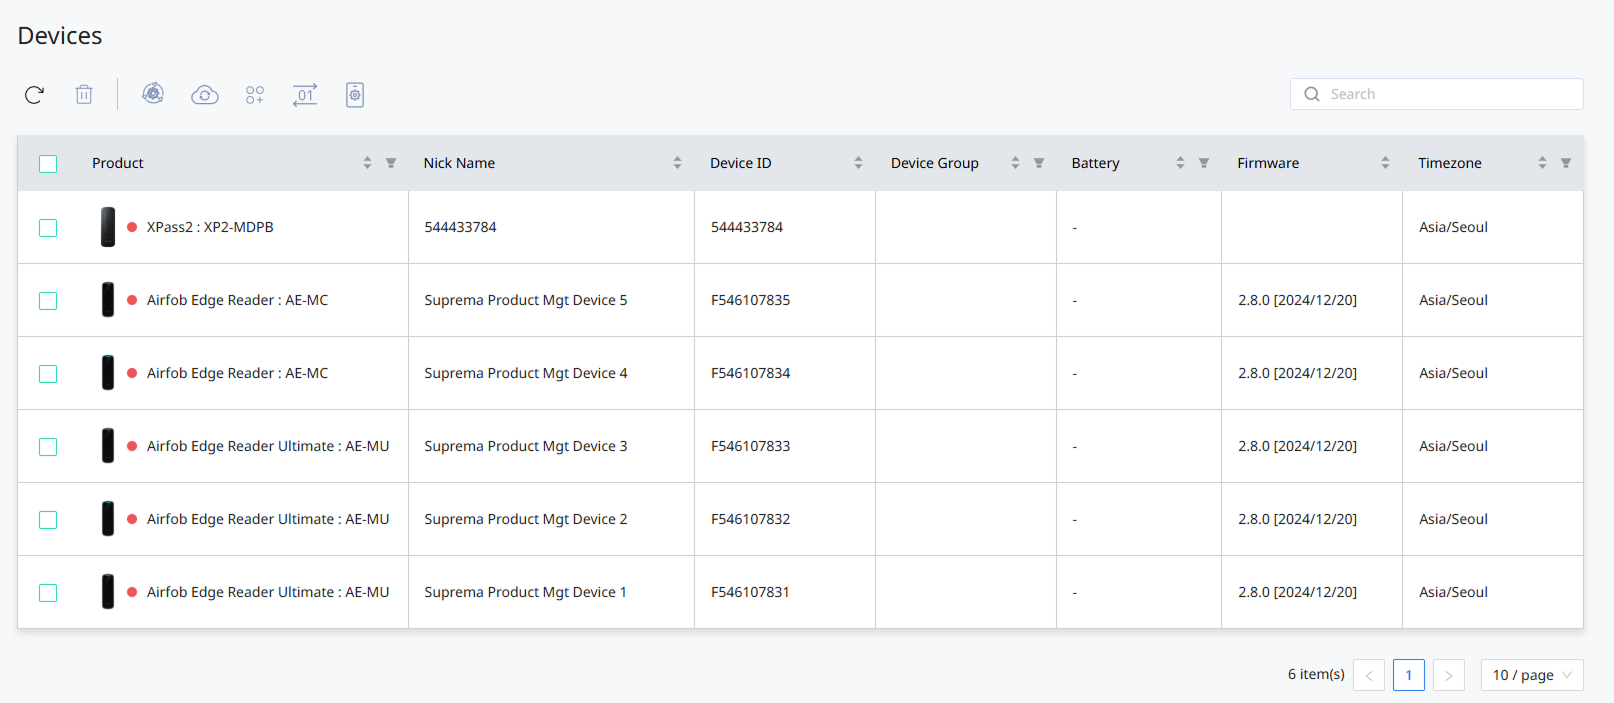
Filter
You can use the filter feature in the top header of the device list. Click in the header to set the desired conditions.
To reset the applied filters, click and select Reset.
Edit individual device information and settings
-
Click Device Management → Registered Devices in the left sidebar.
-
Click the device you want to edit in the list.
-
The Edit Device window appears.
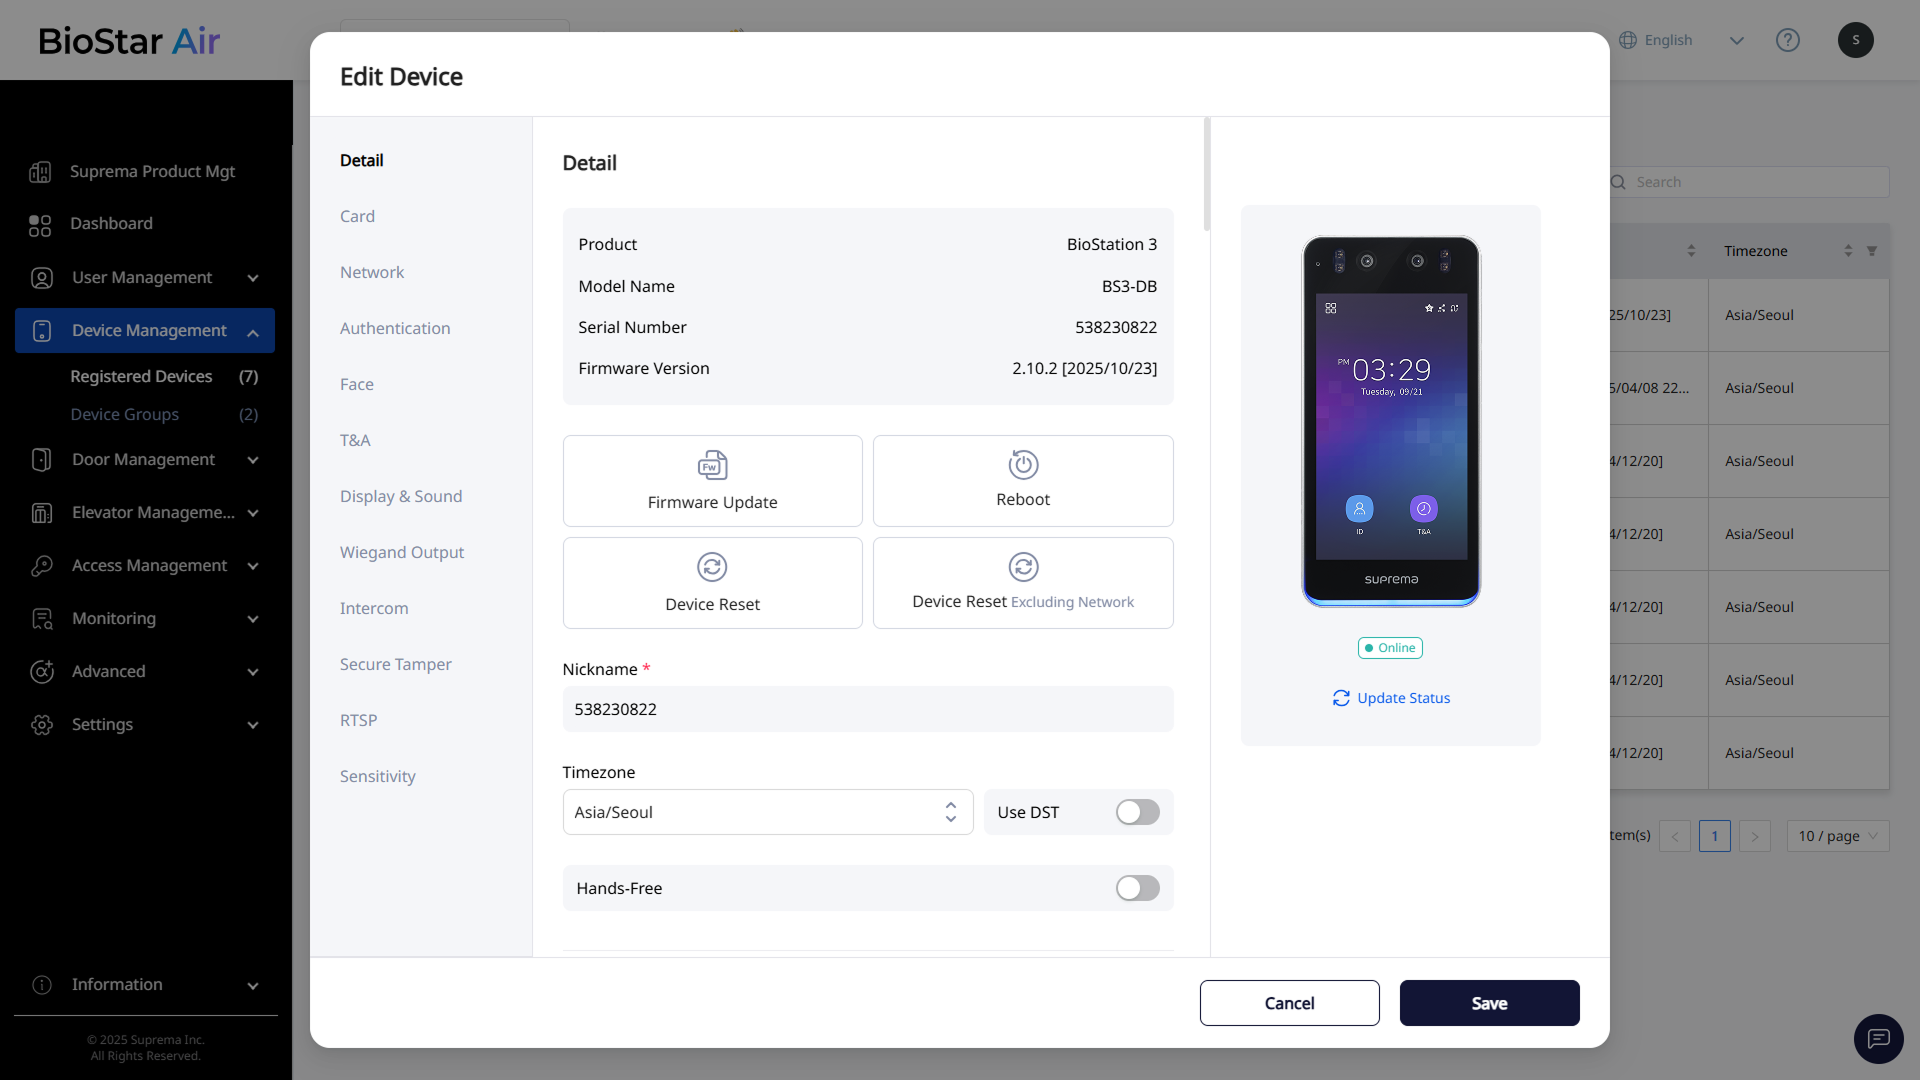
The image above is an example screen and may differ from the actual screen. -
Edit the device’s details or settings.
-
Click Save at the bottom to save the changes.
For more information on editing fields and setting options for each section, see Device Information and Configuration Options.
Bulk device actions
Use the controls at the top of the device list to manage multiple devices at once.
-
: Refresh the device list and device status.
-
: Delete devices registered to the site.
WarningOnly online devices can be deleted permanently. If the device is offline, delete it first in the BioStar Air mobile app before adding it to another site. For more information on deleting devices using the mobile app, see Register and Delete Devices.
-
: Update the firmware of selected devices. For more information about firmware upgrades, see Firmware upgrade.
-
: Synchronize biometric templates from selected devices to the server.
-
: Assign selected devices to a group. For more information about device group management, see #device_group_in_device_list.
-
: Switch the RF card byte order of the selected device in the list to MSB or LSB.
-
MSB: Processes card data in order from large byte units to small byte units, sequentially storing the card serial number (CSN) from left to right.
-
LSB: Processes card data in order from small byte units to large byte units, storing the card serial number (CSN).
-
-
: Import the device settings originally configured in standalone mode.
-
: Update the status of the selected devices in the device list.
Device group management
From the device list, select individual devices to add them to a device group or remove them from an existing group.
-
Click Device Management → Registered Devices in the left sidebar.
-
Select the checkbox for the device to add to or remove from a group.
-
Click at the top of the device group list.
-
When the Manage Device Groups window appears, add or remove the selected devices from the group.
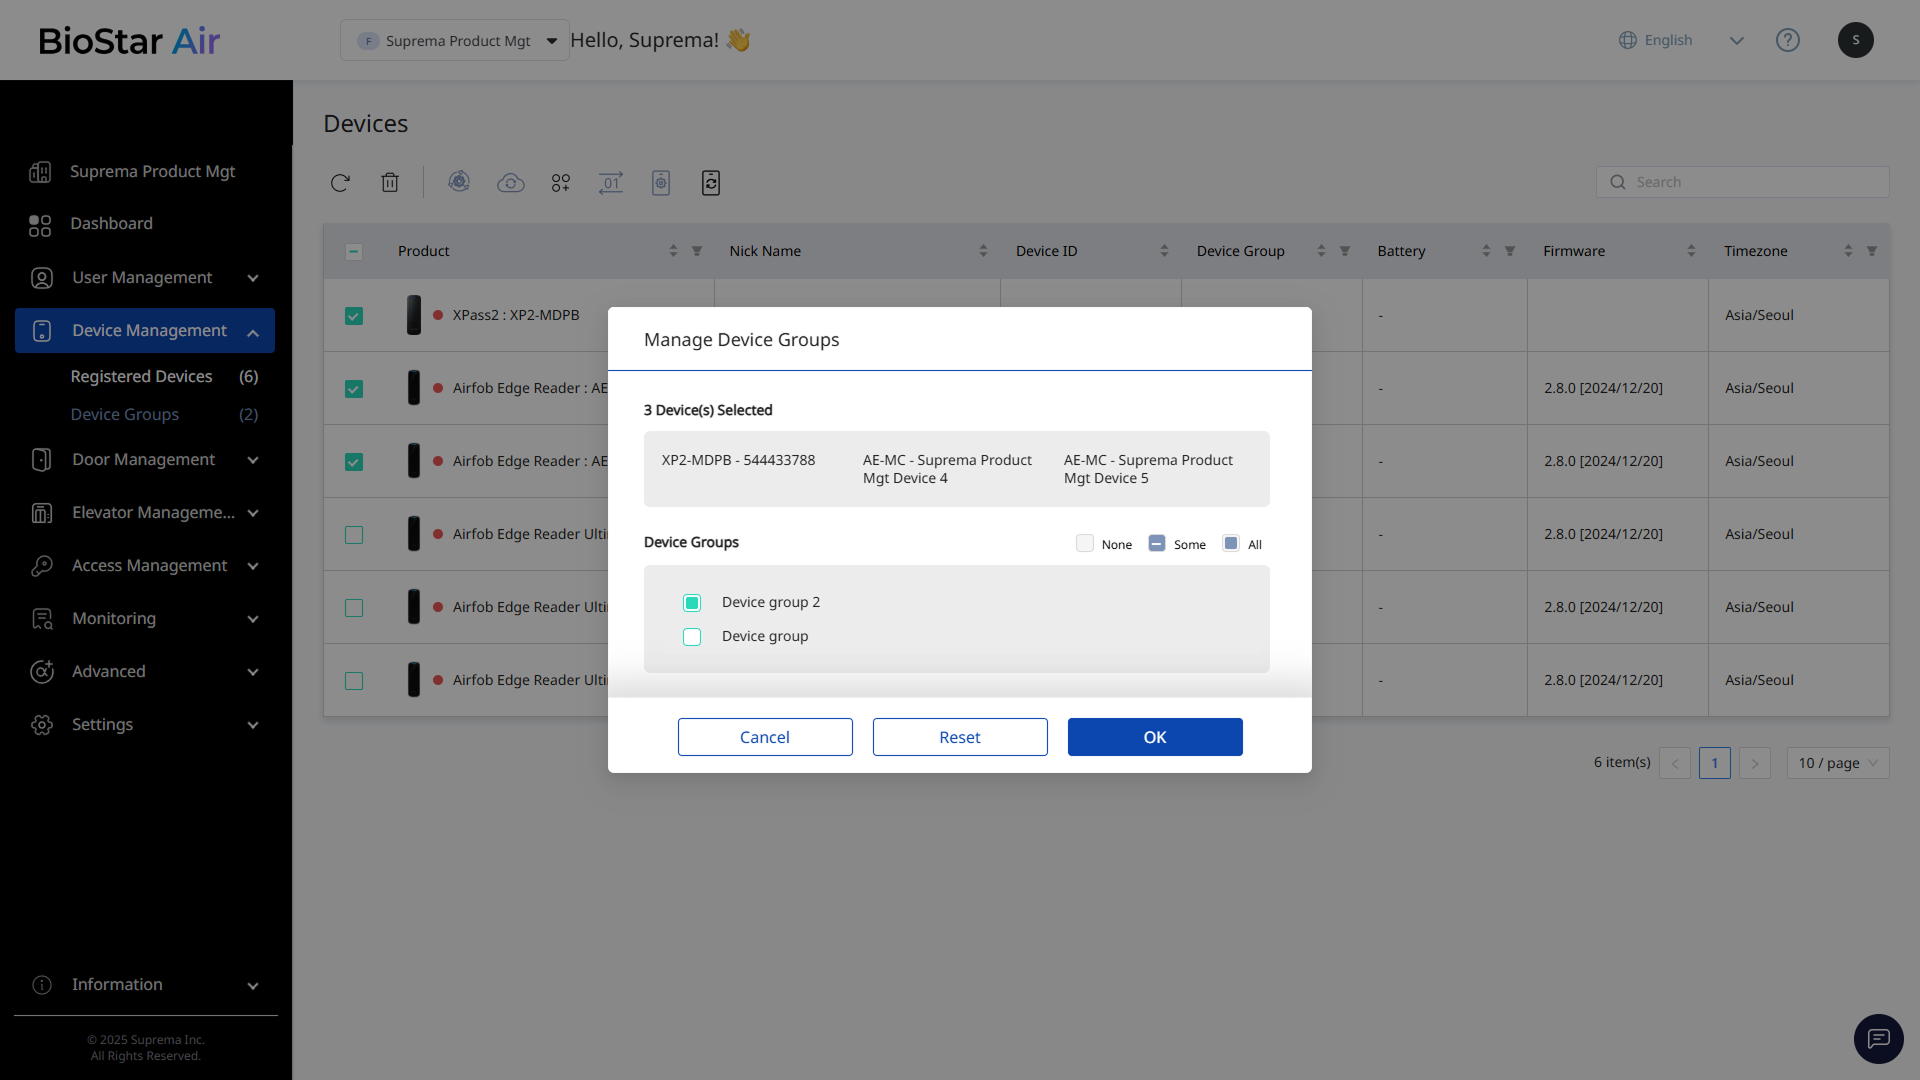
Device Groups checkboxes have the following meanings:
-
None: Removes the selected devices from the group.
-
Some: Certain selected devices are currently in the group.
-
All: Adds the selected devices to the group.
-
-
Click OK to save the changes.
-
Selecting another group in the Manage Device Groups window moves the selected devices to that group.
-
A device can belong to multiple groups. A single device can be assigned to multiple groups.
-
Click Reset to initialize the changes.