Manage User Groups
Use user groups to classify and manage users by department, role, location, and more. BioStar Air user groups are non-hierarchical, so a user can belong to multiple groups simultaneously, allowing you to freely combine department, role, and location groups. Groups let you manage access levels centrally and efficiently handle event log filtering, report generation, and assigning devices to muster areas.
Refer to the following video to watch the guide on managing user groups.
Before start
User group composition
User groups are not organized hierarchically.
-
Users in a subgroup do not automatically appear in the parent group.
-
The parent group’s total user count does not include subgroup members unless they are added manually.
-
Selecting a subgroup shows only the users assigned to that subgroup.
Configure multiple user groups
Users in BioStar Air can belong to multiple user groups.
In BioStar 2, user groups were typically linked to a single department. BioStar Air separates these, allowing more dynamic use.
-
Filter the user list by group to quickly manage access levels.
e.g., HR department
-
Create context-specific groups that span multiple departments.
e.g., men’s locker room
-
User groups are used for event log filtering and report generation.
-
Assign user groups to muster zone devices or device groups to enforce specific safety protocols.
This flexibility makes it easier to manage overlapping user roles and access scenarios.
Create group
Create user group
Create a new user group.
-
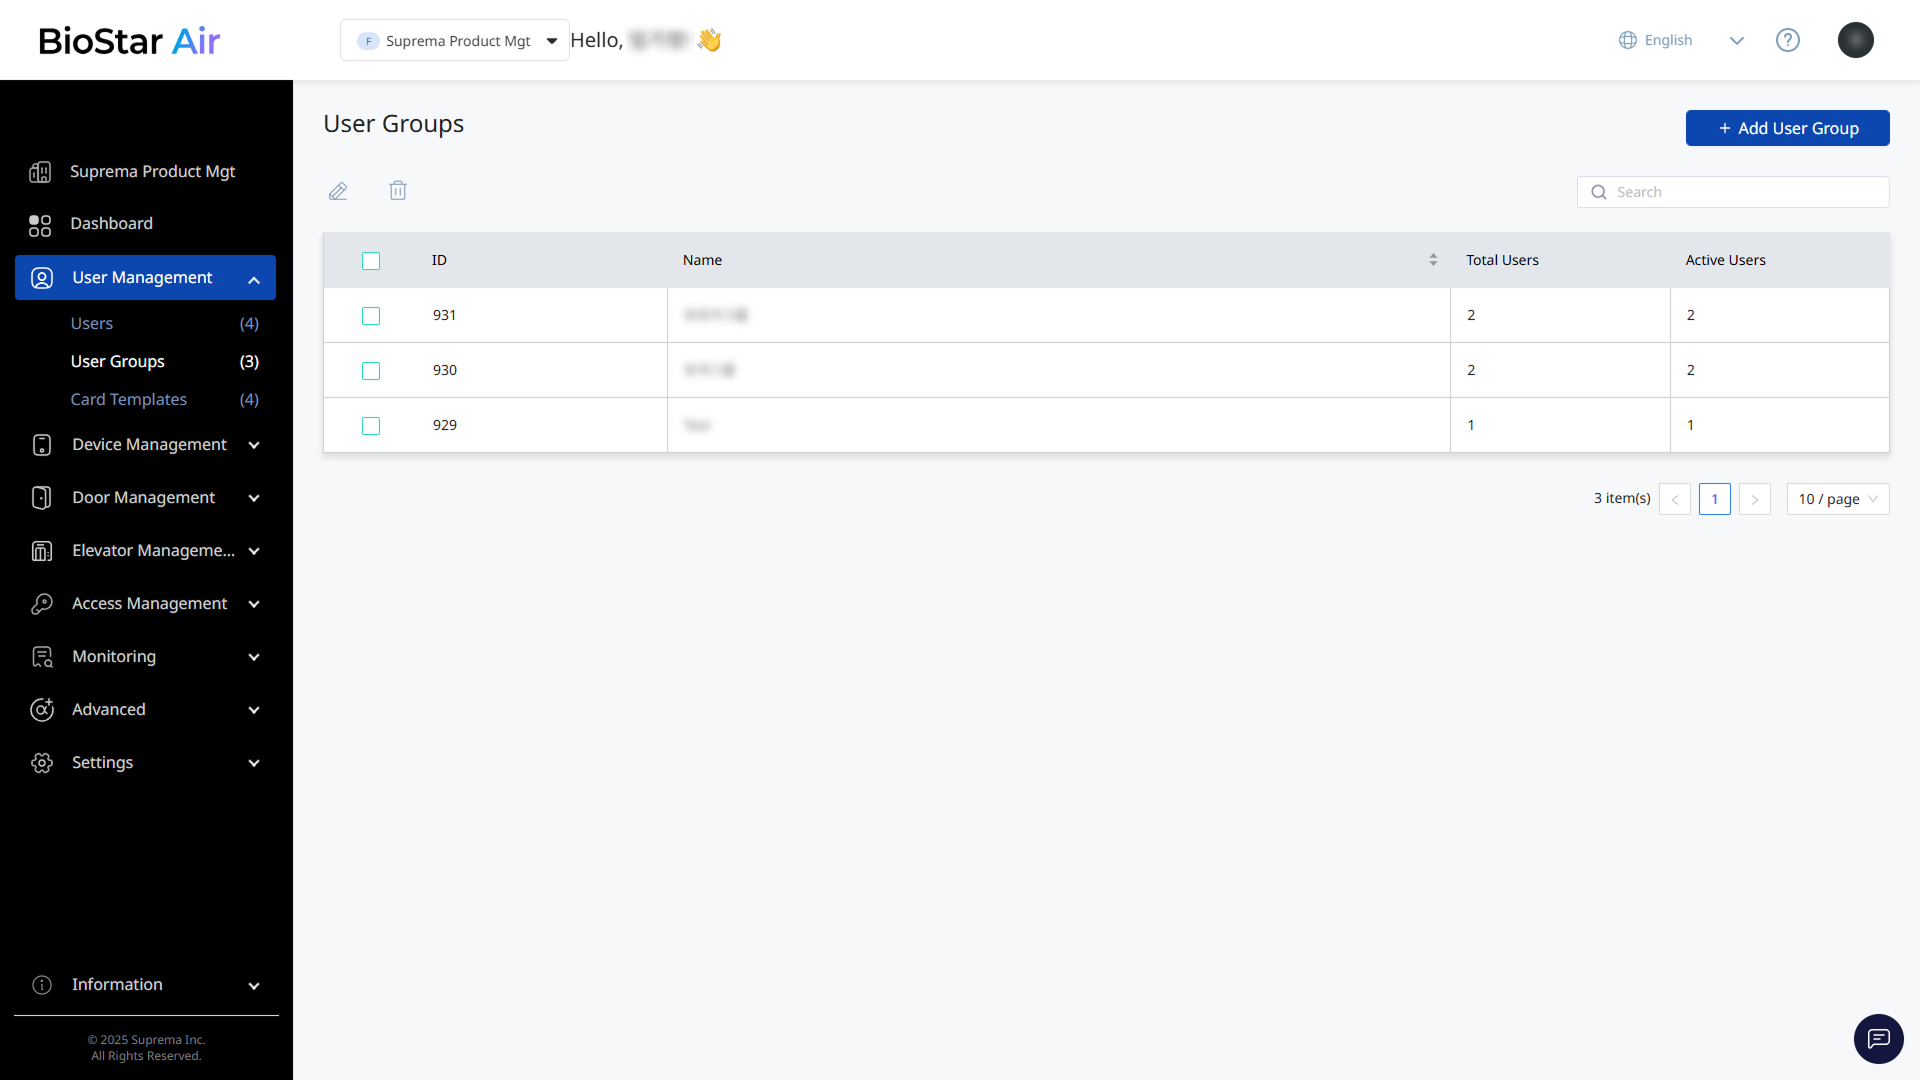
Click User Management → User Groups in the left sidebar.
-
Click Add User Group at the top right of the screen.
-
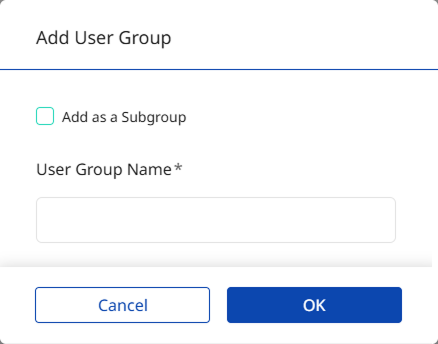
When the Add User Group window appears, enter the user group name.
-
Click OK to create the group.
-
Deleting a group does not delete the users in that group. The users are only removed from the group.
-
For more information about assigning users to groups, see Manage Users.
Create subgroup
You can use subgroups to further classify user groups. However, subgroups are not hierarchical. This means users in a subgroup are not automatically included in the parent group.
-
Click User Management → User Groups in the left sidebar.
-
Click Add User Group at the top right of the screen.
-
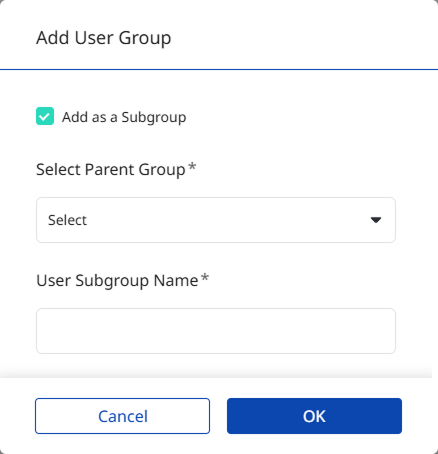
When the Add User Group window appears, click the Add as a Subgroup option.
-
From Select Parent Group, select the parent group.
-
Enter the group name in User Subgroup Name.
-
Click OK to create a subgroup.
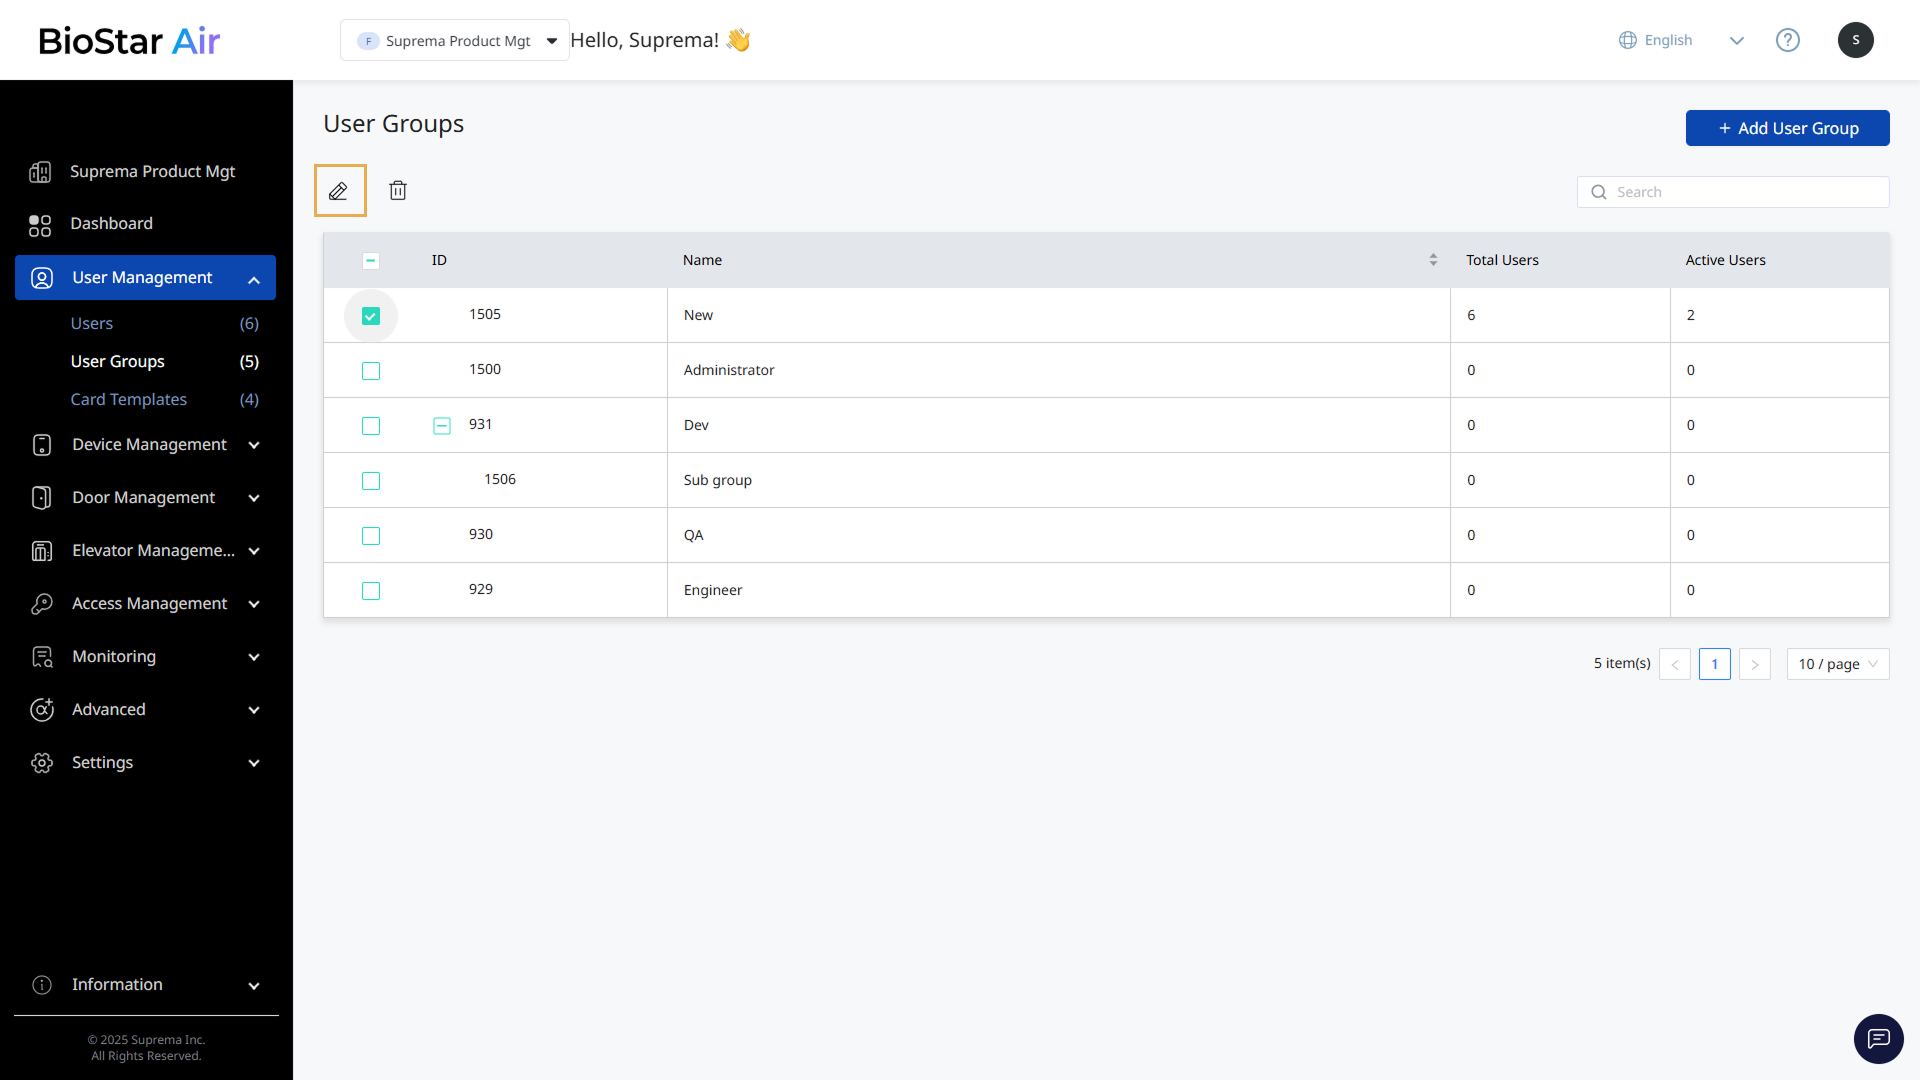
The newly created subgroup appears indented under the parent group in the user group list.

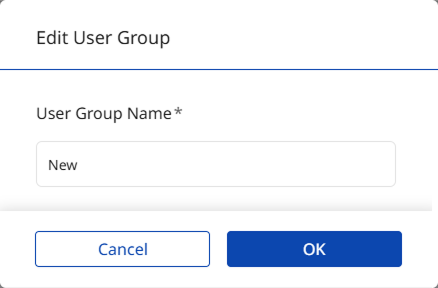
Edit group name
Modify the name of an existing user group.
-
Click User Management → User Groups in the left sidebar.
-
Click the checkbox for the user group to edit in the list.
-
Click at the top left of the user group list.
-
When the Edit User Group window appears, edit the group name.
-
Click OK to save the changes.
The group name can be edited only when a single group is selected.
Delete group
Delete any user groups that are no longer needed.
-
Click User Management → User Groups in the left sidebar.
-
Click the checkbox for the user group to delete in the list.
-
Click at the top left of the user group list.

-
When a warning message appears, click Yes.