Manage Users
The user list is an essential management tool for administrators responsible for access control in an organization. You can perform all user management tasks, including organizational management through user grouping, immediate response to new or departing employees with real-time activation/suspension, integrated management of various credentials, enhanced security through validity period monitoring, and preparation for reporting and auditing through filtering and report generation.
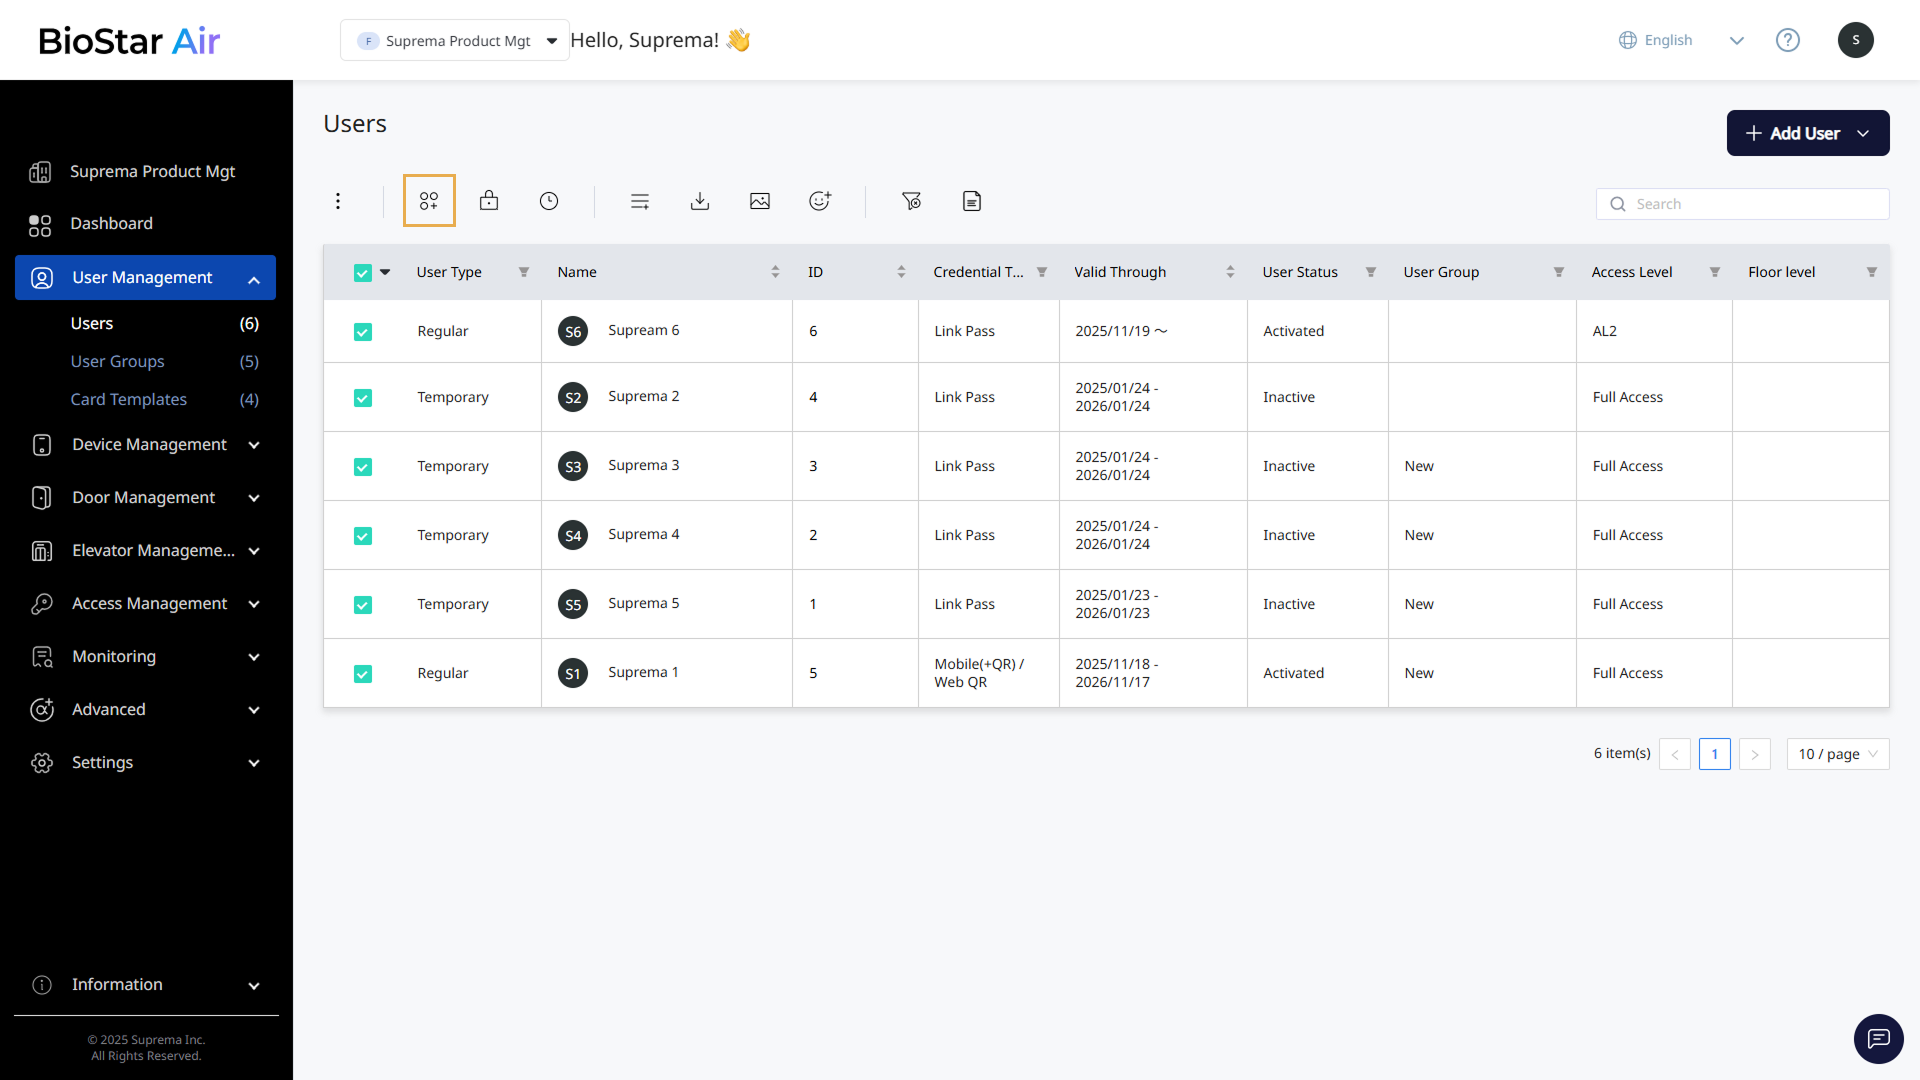
View the user list
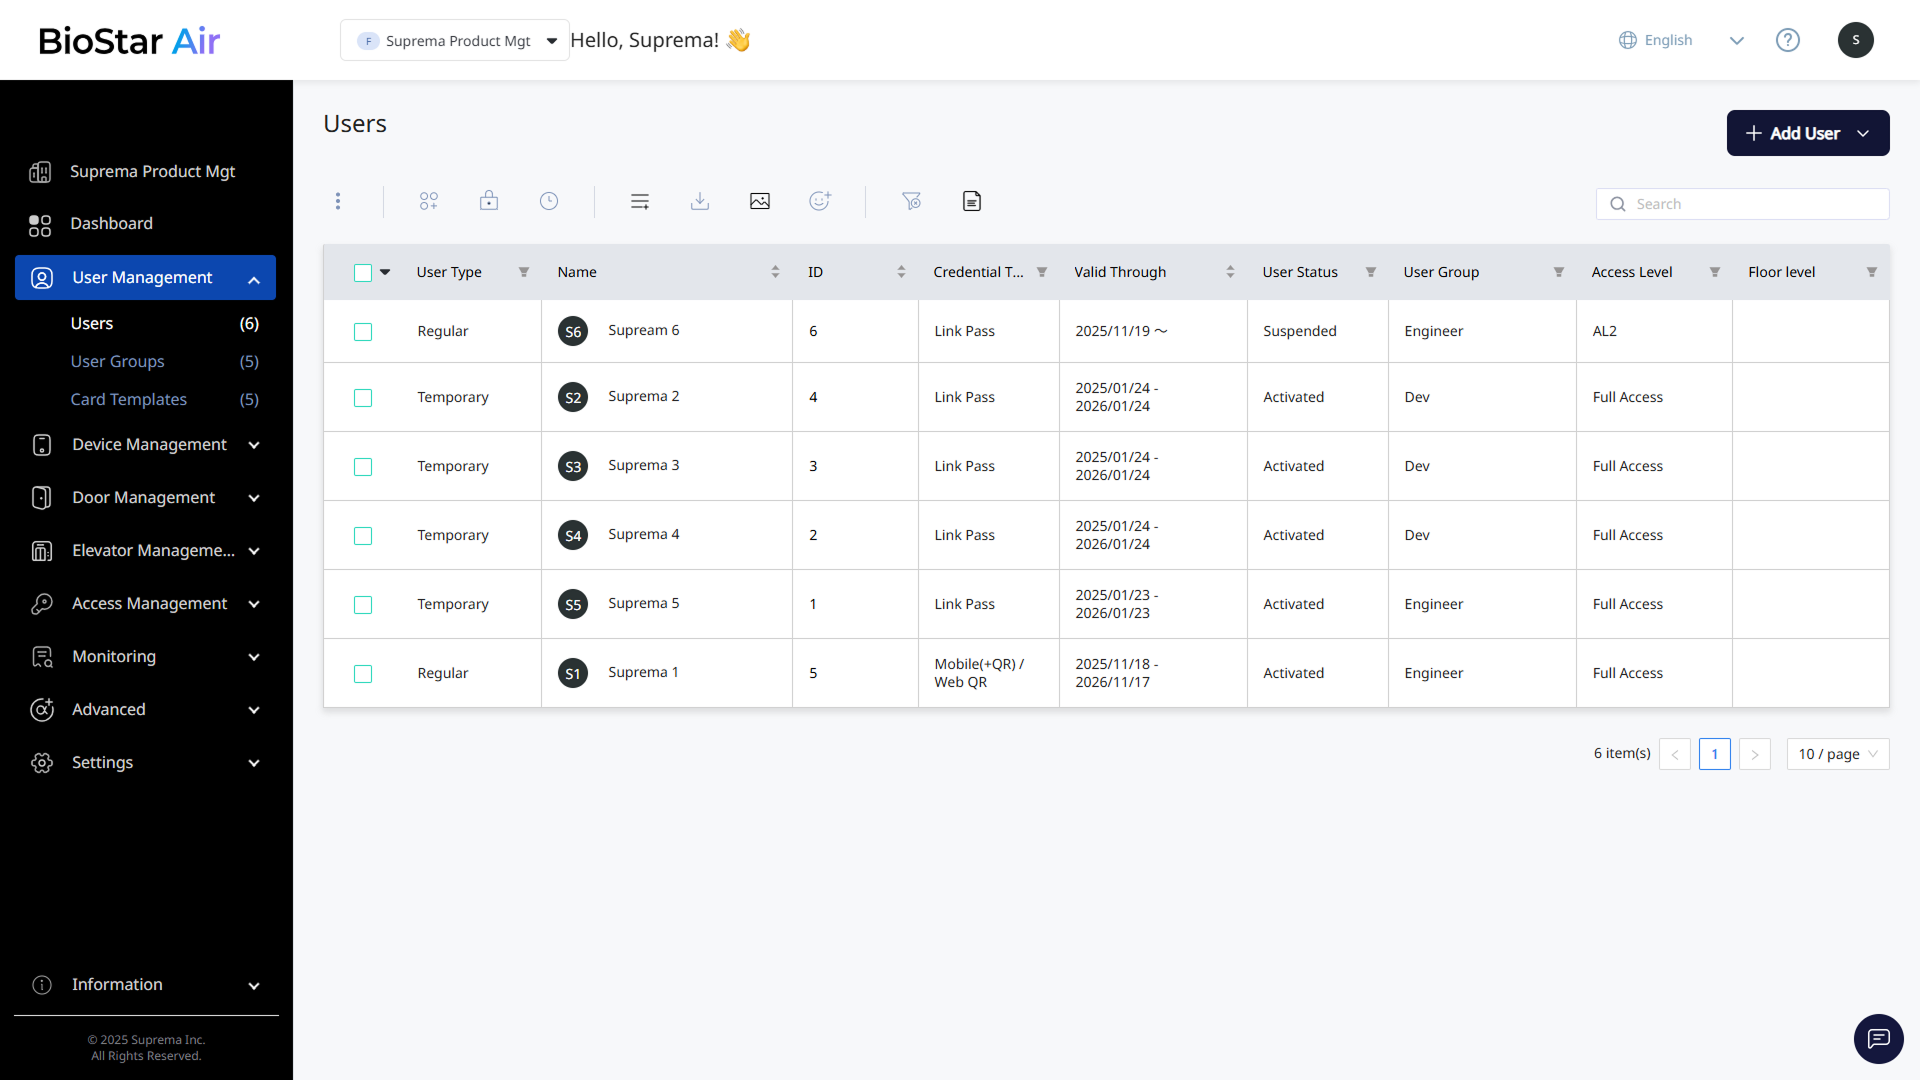
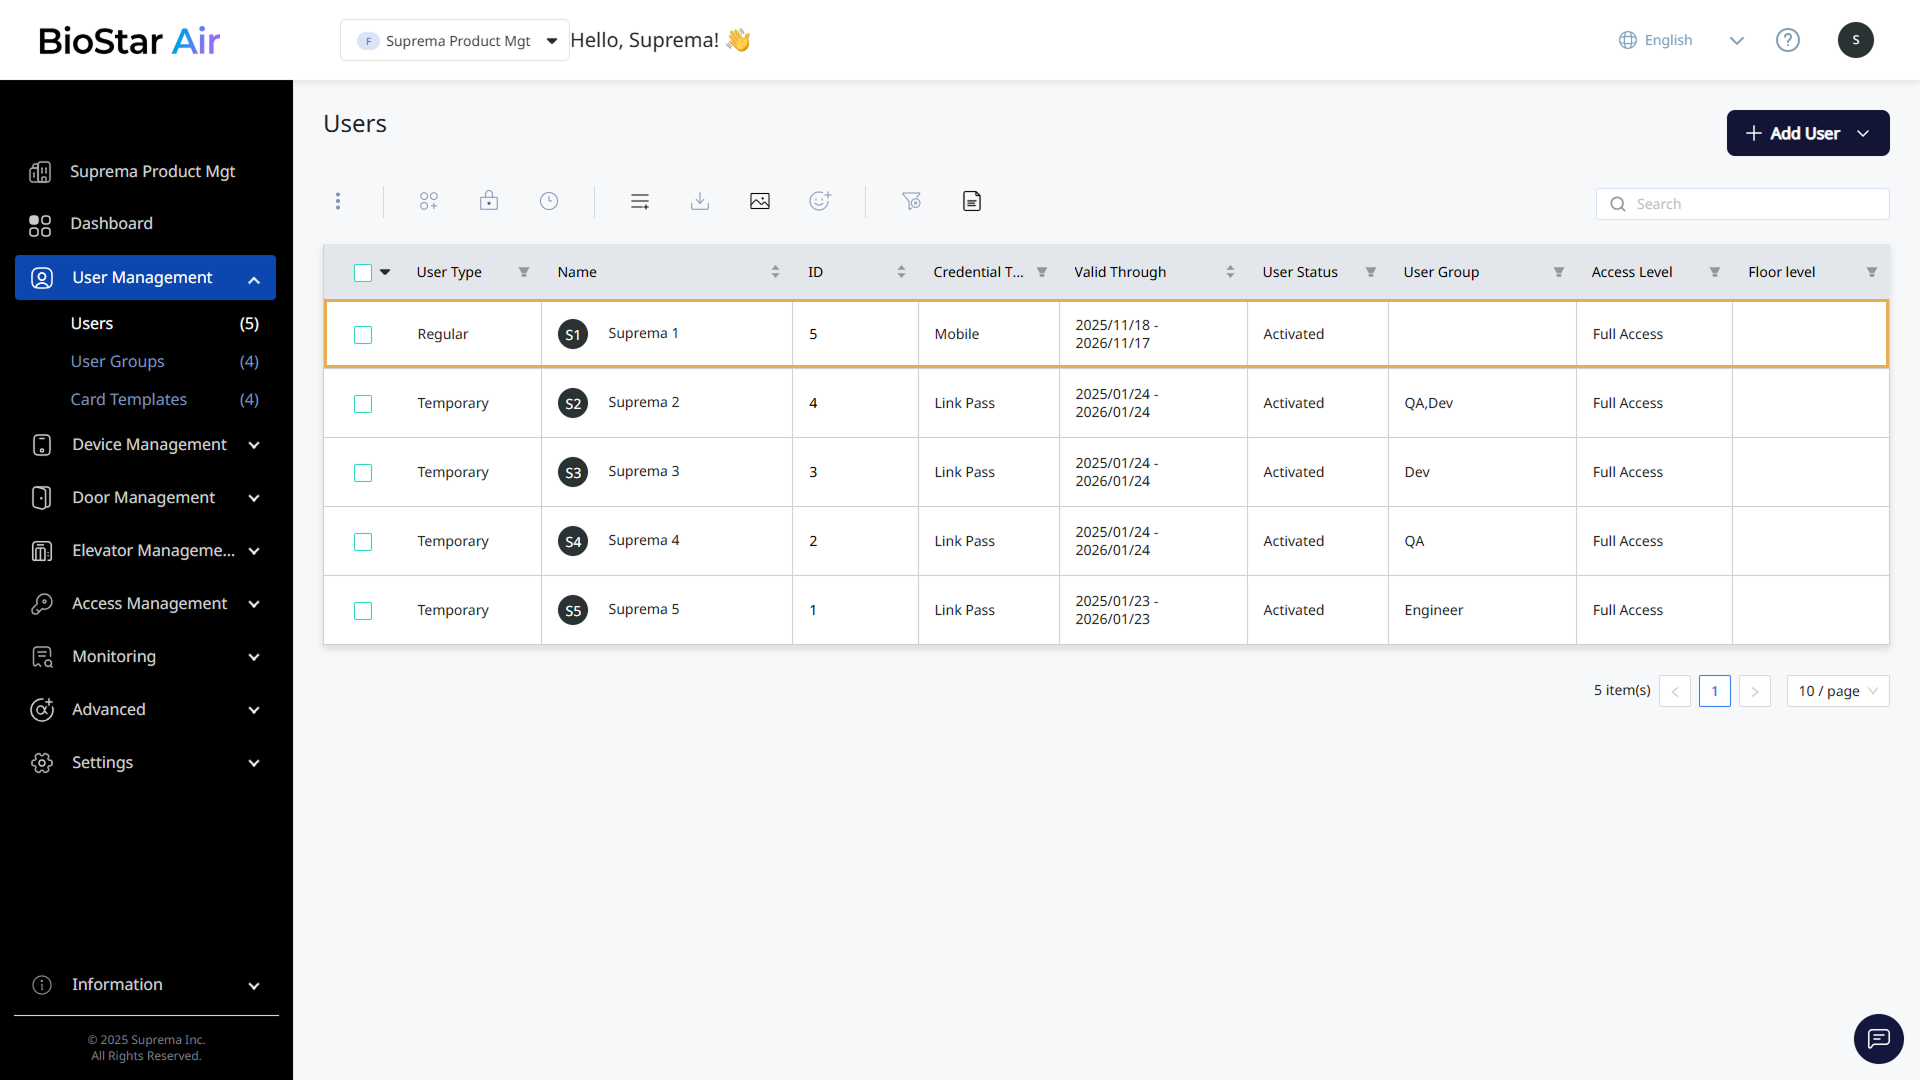
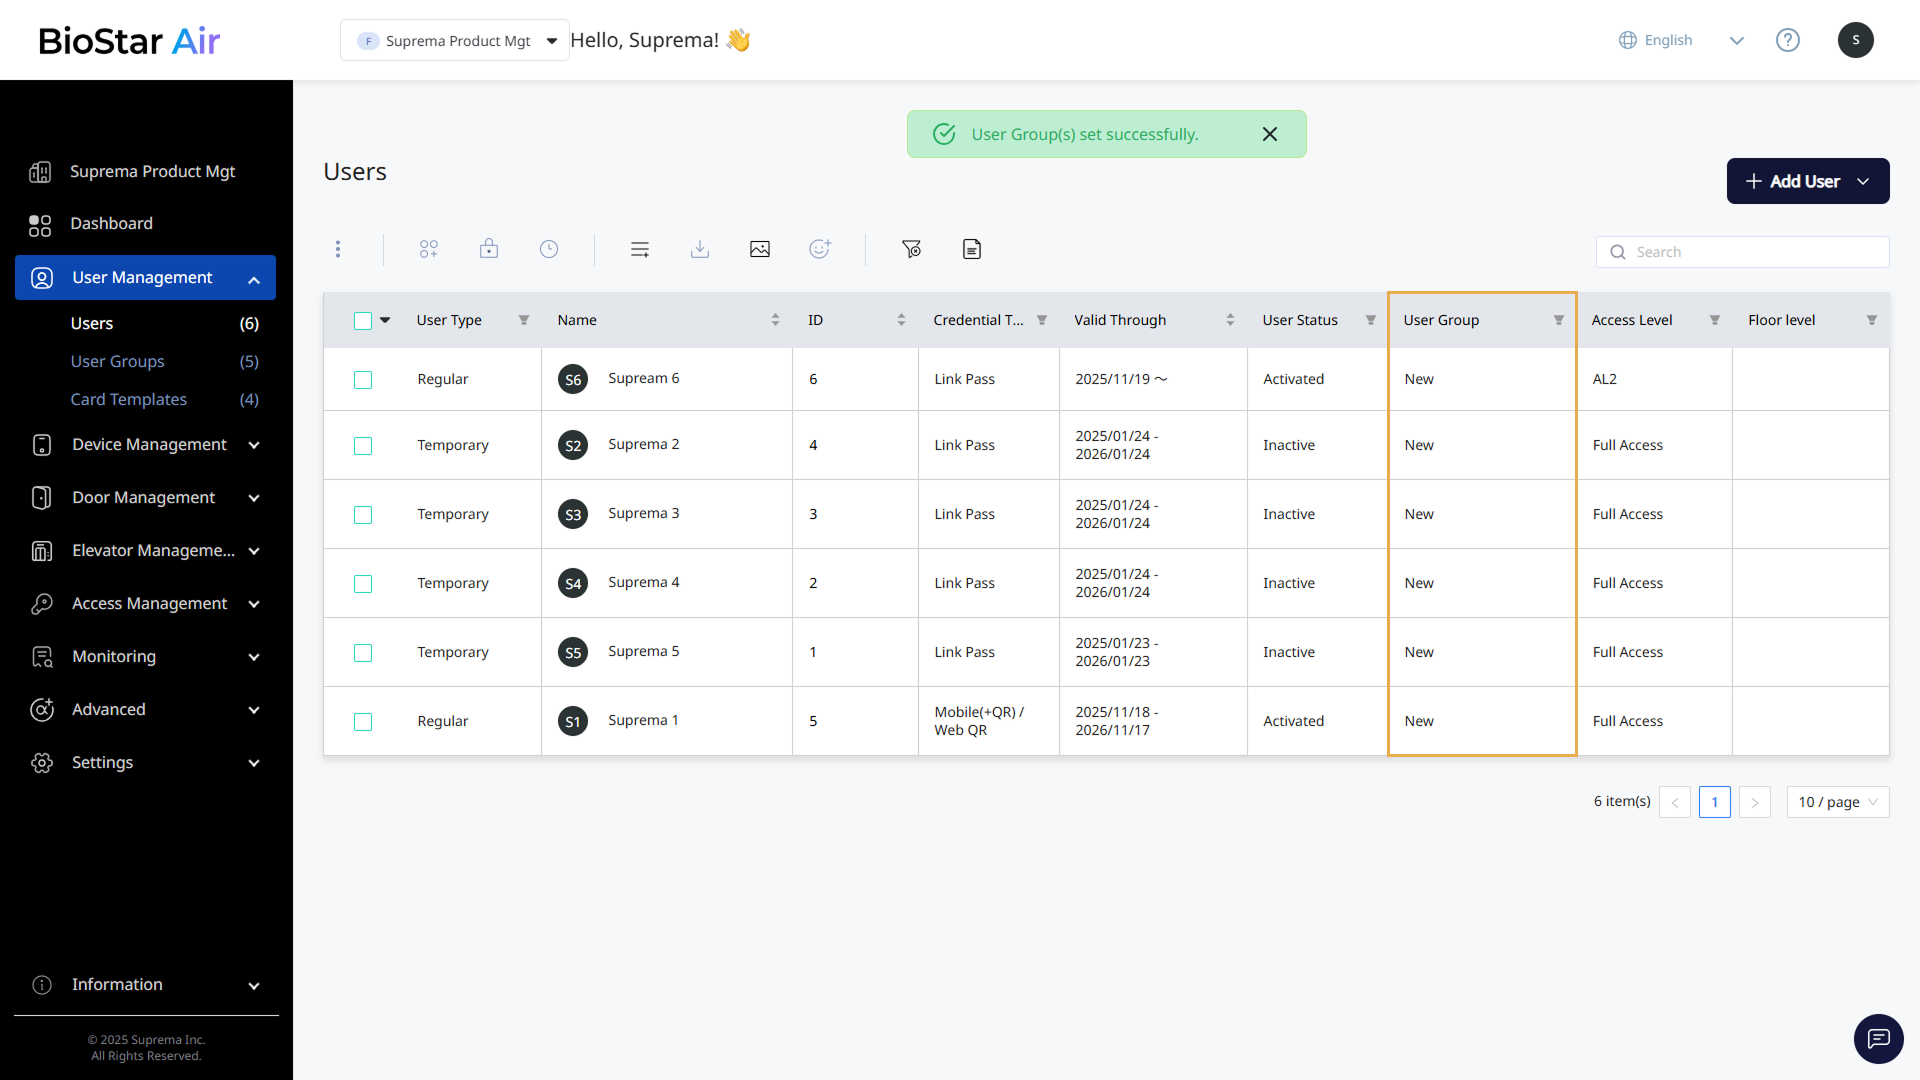
The user list shows all users registered in BioStar Air at a glance. View each user's details and use the filter and sort features to quickly find specific users. Edit, delete, and assign groups to users directly from the user list.
- Web
- Mobile
Click User Management → Users in the left sidebar.
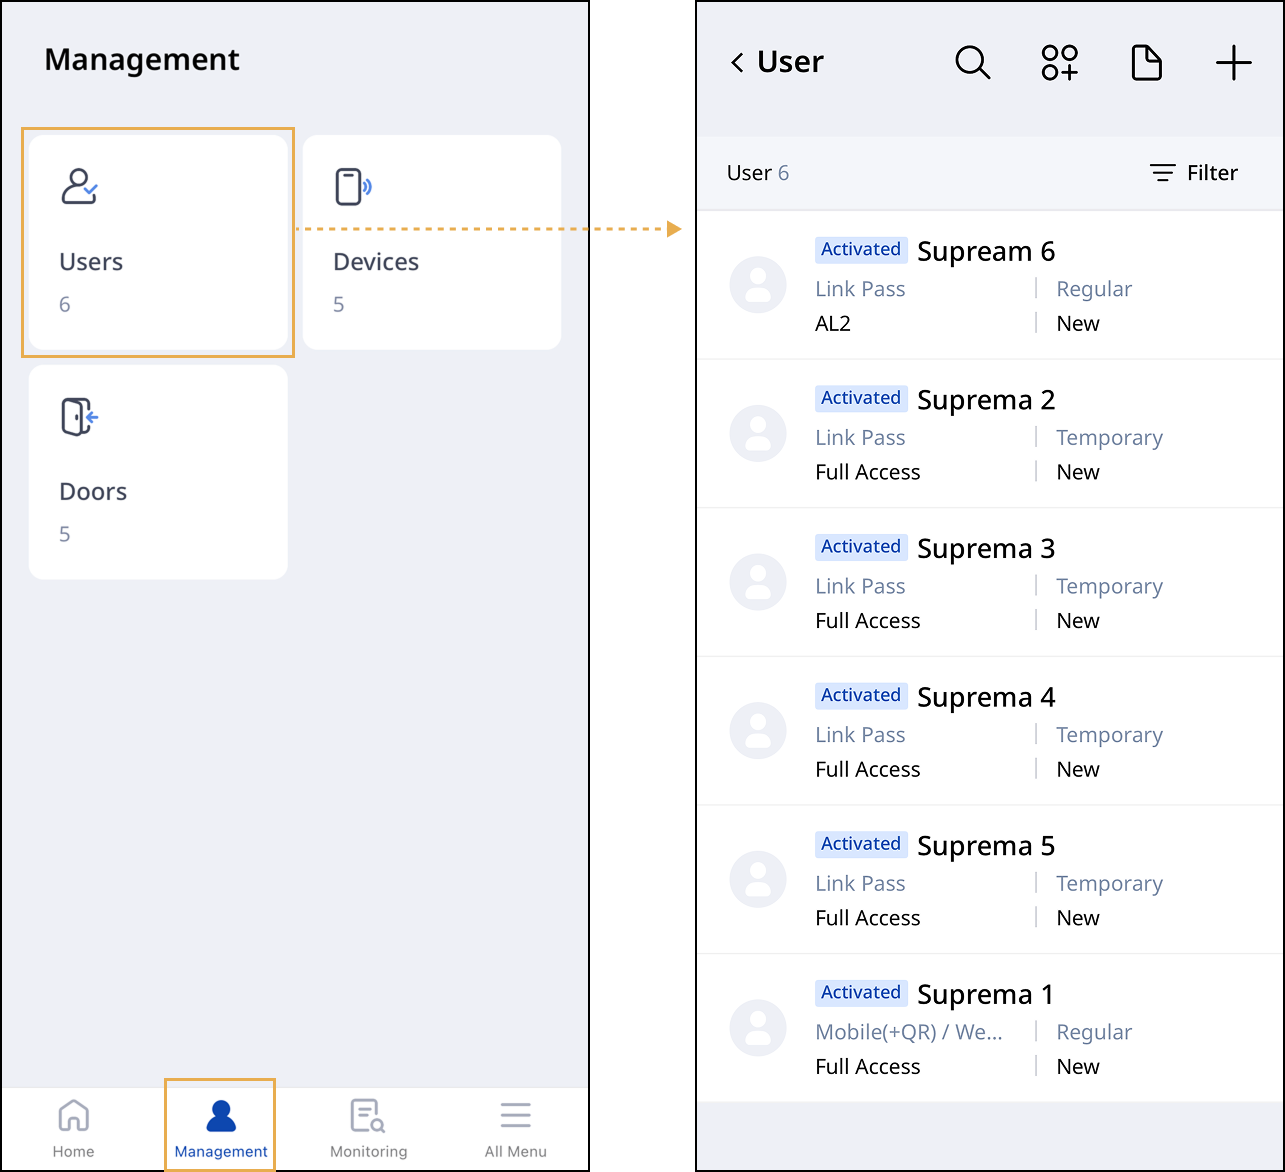
Use the user management feature in the BioStar Air app.
-
Run BioStar Air on your mobile device.
-
Tap Management in the bottom navigation bar.
-
Tap Users.
A list of users appears. Add new users or edit existing user details.
User information
The table in the user list provides the following information.
-
User Type: Indicates whether the user is a regular or temporary user. For more information on regular and temporary users, refer to User Card and Credential Types.
-
Name: The user's name.
-
ID: The user's unique ID.
-
Credential Type: Shows the credentials issued to the user. For more information on the types of credentials, refer to User Card and Credential Types.
-
Valid Through: The validity period of the credentials issued to the user.
-
User Status: Indicates whether the user is active or inactive.
-
User Group: The group to which the user belongs. For more information on user groups, refer to Manage User Groups.
-
Access Level: The access level assigned to the user. For more information on access levels, refer to Manage Access Levels.
-
Floor level: The user's permissions for floors they can access. For more information on floor levels, refer to Manage Floor Levels.
Filter
- Web
- Mobile
Use the filter feature in the top header of the user list. Click in the header to set the desired conditions.
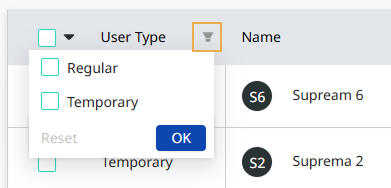
Click at the top of the user list to reset the applied filter conditions.
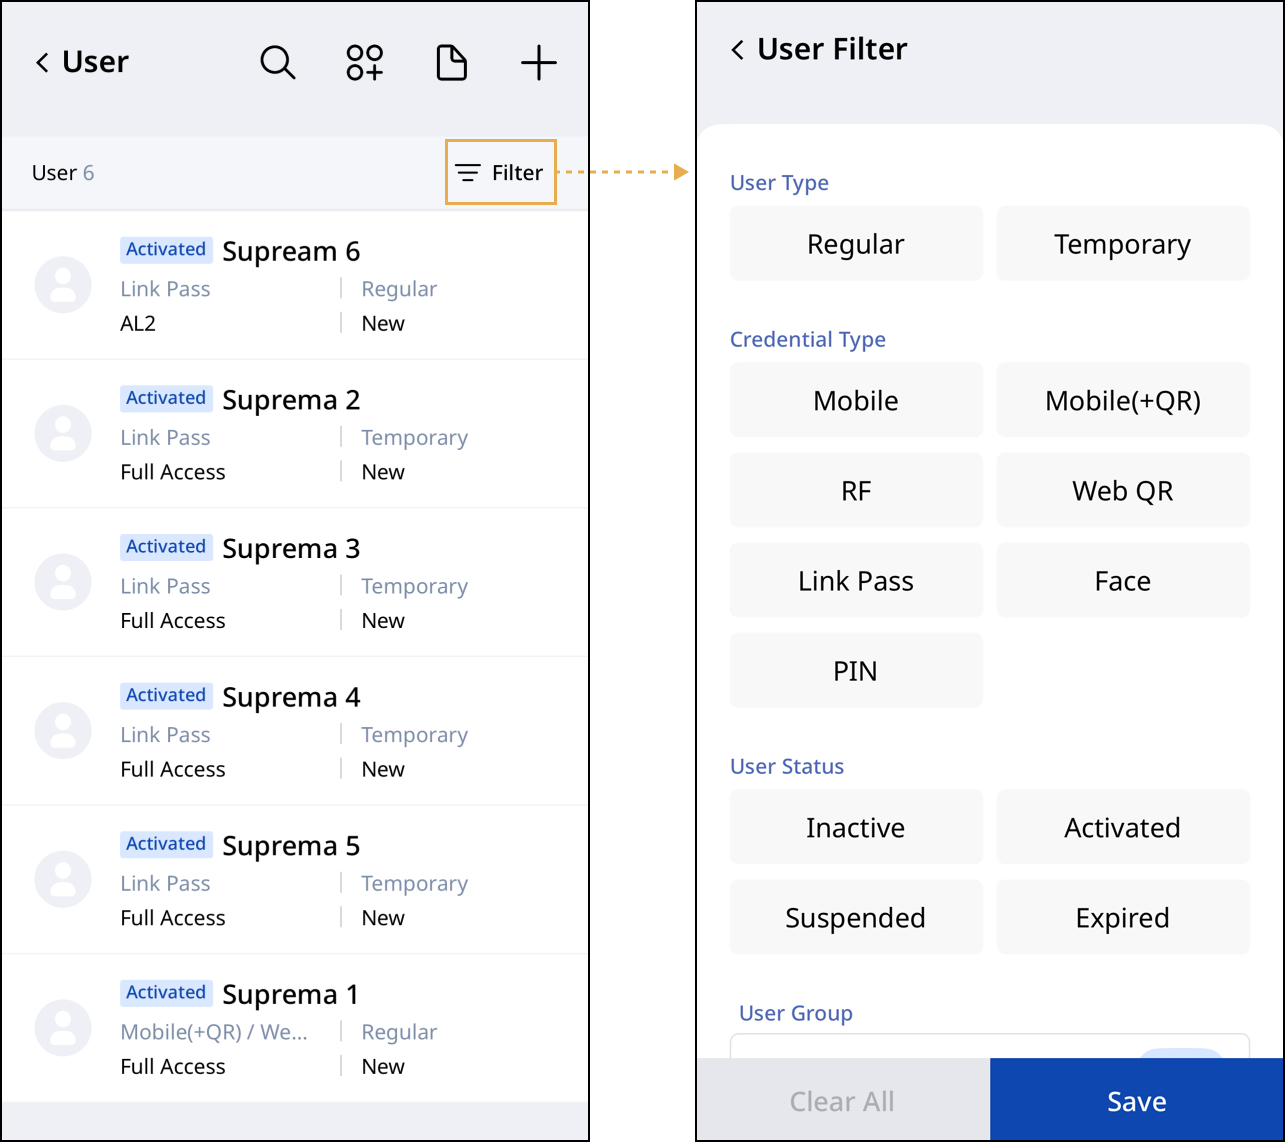
In the mobile app, you can filter and view users in the user list by the desired criteria. Tap Filters at the top right of the user list. Users can be filtered by the following criteria.
-
User Type: Filters by user type (regular or temporary).
-
Credential Type: Filters by credential type.
-
User Status: Filters by activation status.
-
User Group: Filters by user group.
Additional features
The features available at the top of the user list are as follows.
-
: Assign, remove, or move the selected users to a group. For more information, refer to #manageUserGroups.
-
: Change the access level of the selected users. For more information about access levels, see Manage Access Levels.
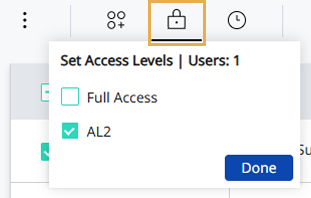
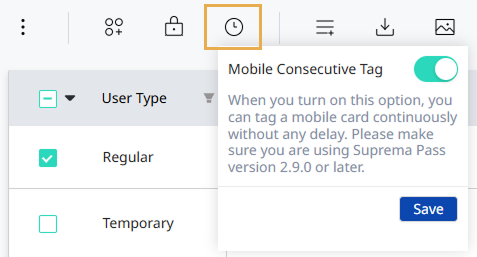
-
: Allow the selected users to tag mobile cards consecutively without waiting time. The Suprema Pass app supports this starting from version 2.9.0.
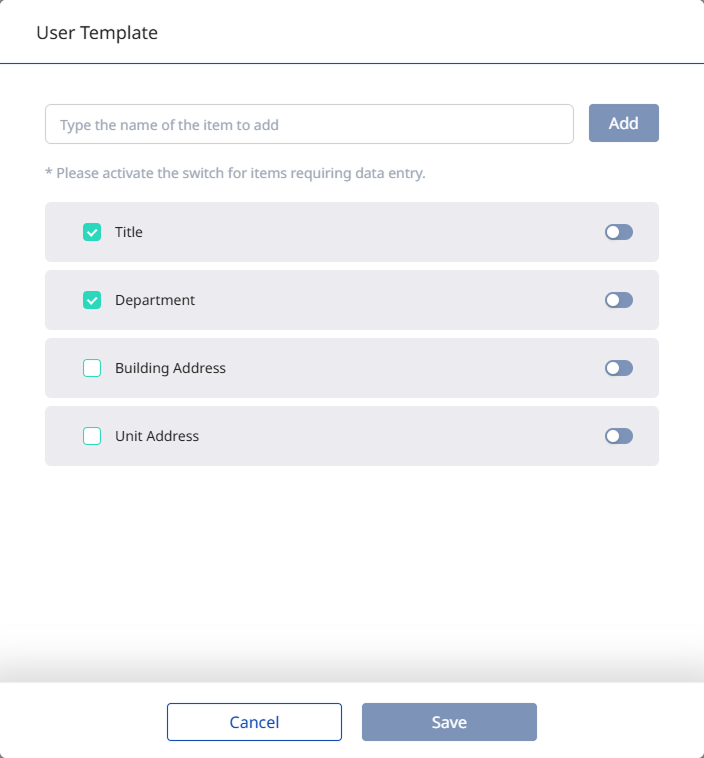
-
: Apply a user template to the selected users. Add any other information needed in addition to the default user information.
-
: Export the selected user information to a PDF or CSV file.
-
: Upload user images in bulk. The name of each image file to upload must match the user's ID.
For example, the file 601.jpg corresponds to user ID 601.
File format requirements
-
Supported formats: .jpg, .jpeg, .png
-
File size limit: 1 MB per image
-
-
: Send a face enrollment link to the selected users by email or text message. When a user clicks the link and enrolls their face on the webpage, they are granted access via facial authentication.
The link cannot be sent to users without a registered email address or phone number.
-
: Reset all filters applied to the user list. This feature is available only when filters are applied. For more information on applying filtering, refer to #userFiltering.
-
: Configure user reports. After a report is generated, it is sent to the administrator's email. For more information on report configuring, refer to #userReport.
-
: Mask(
***) the information such as name and ID in the user list to protect privacy. This feature is useful in environments requiring privacy. Select the toggle button to enable this feature, and click Save.
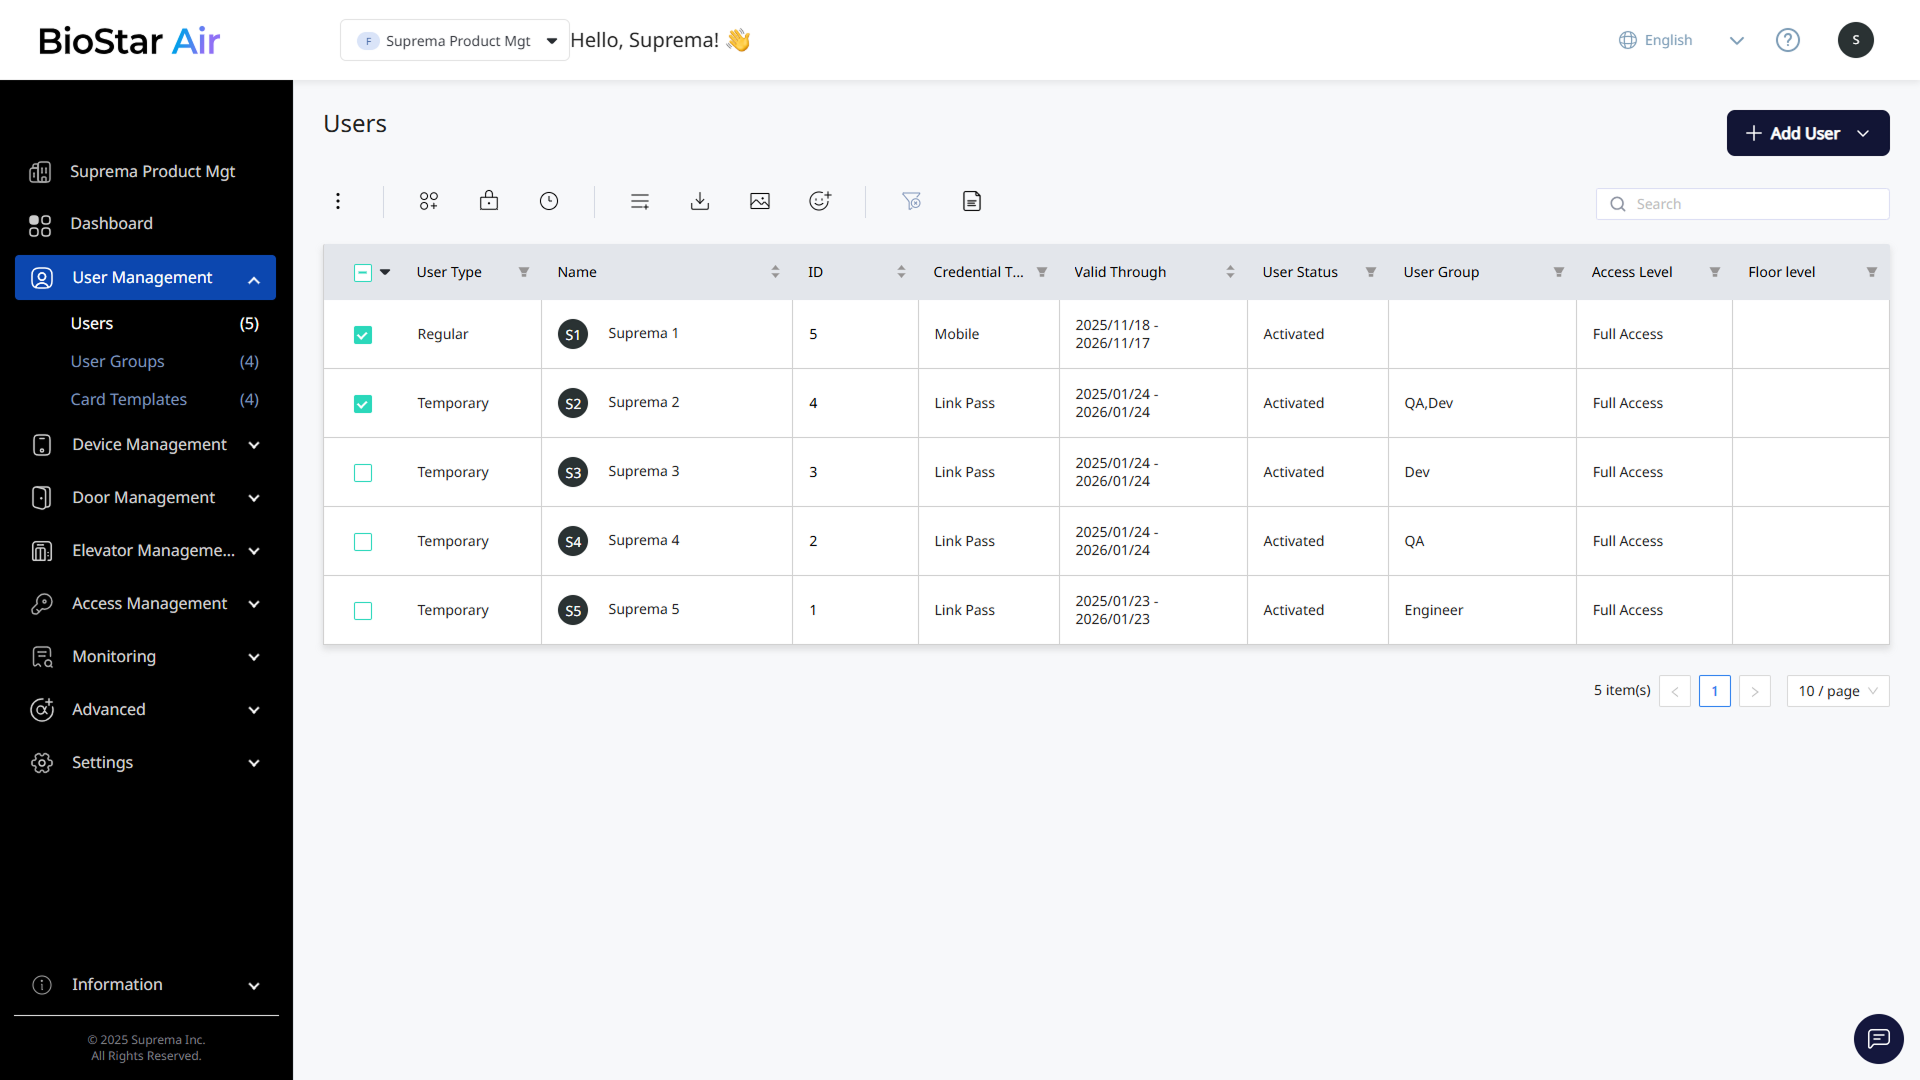
Edit user information
- Web
- Mobile
Follow these steps to edit a user's details or change their credentials.
-
Click User Management → Users in the left sidebar.
-
Click the user you want to edit in the list.
-
Click in the top right of the user details.

-
Edit the required details when the Edit User window appears.
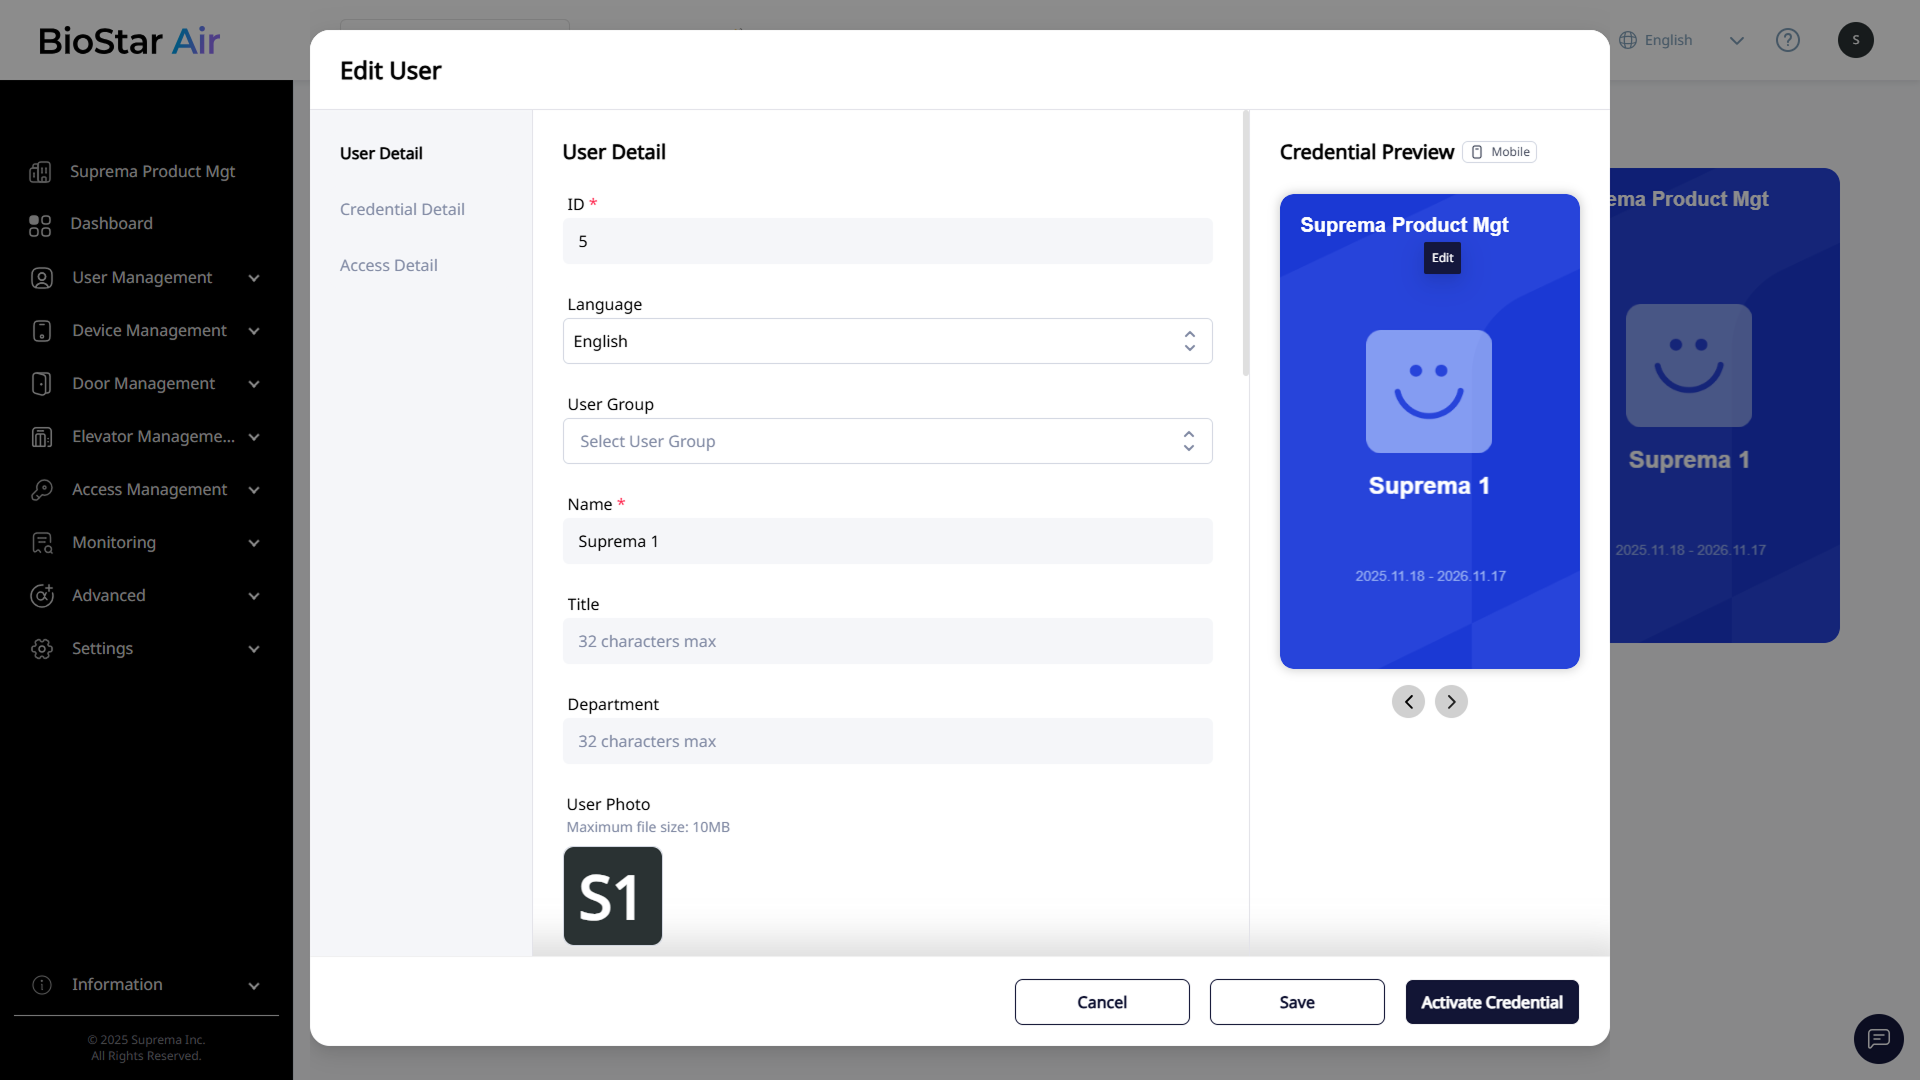
-
After editing, click Save at the bottom right.
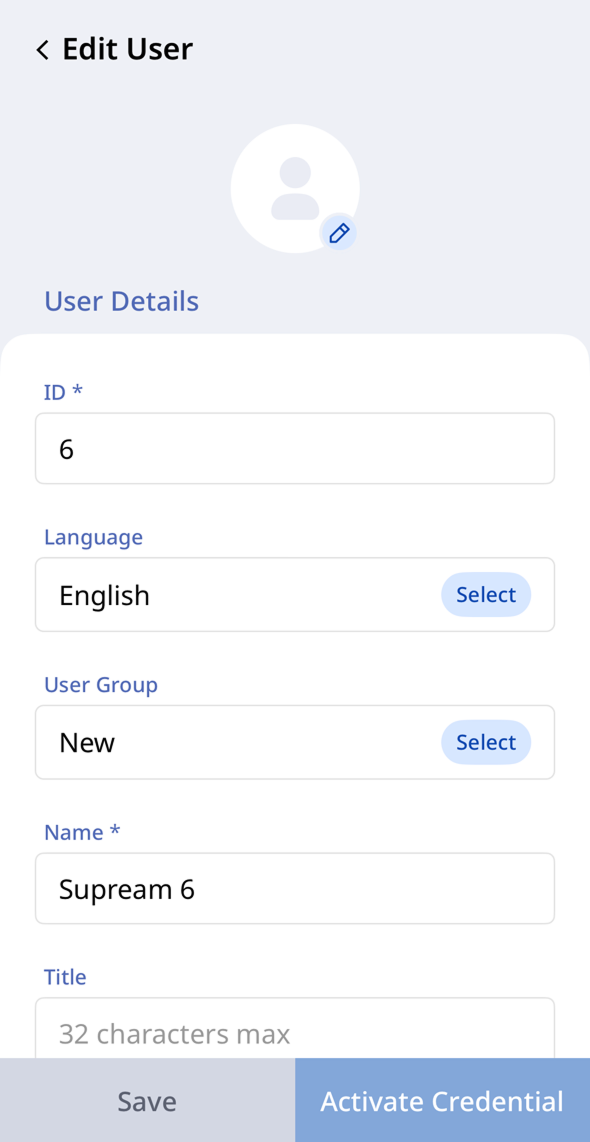
To edit the detail information of user in the mobile app, follow these steps.
-
Tap the user to edit in the user list.
-
Tap in the top right.
-
Edit the necessary information on the Edit User screen.
-
To save the changes, tap Save.
Use Activate Credential to issue credentials.
For more information on user information, refer to Add Users.
Manage user groups
This guide describes how to assign or move, exclude user from user group. For more information on creating and managing user group, refer to Manage User Groups.
- Web
- Mobile
Assign users to a group
After creating a user group, you can add users to the group from the user list.
-
Click User Management → Users in the left sidebar.
-
Click the checkbox next to the users to assign to the group in the user list.
-
Click at the top left of the user list.
-
When the Manage User Groups window appears, select the parent group or subgroup to assign the users.
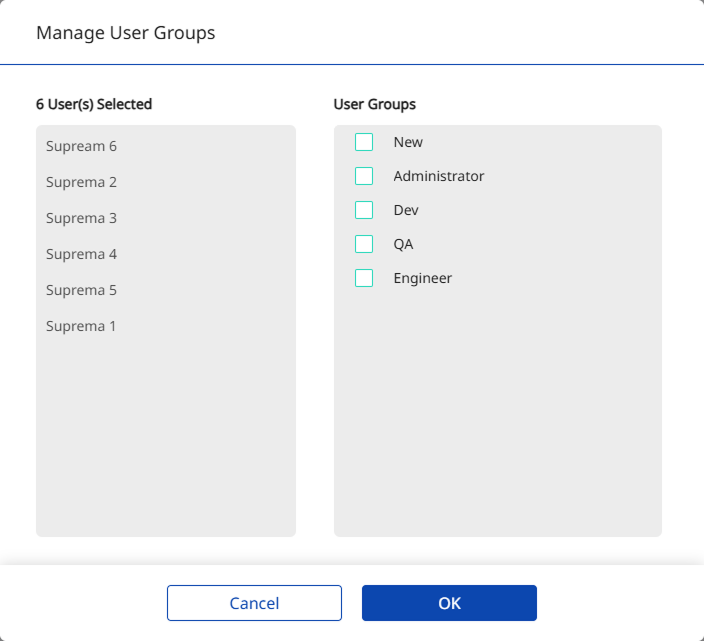
-
Complete the selecting, and save group settings, click OK.
Confirm that the users are assigned to the new group in the User Group column of the user list.
Return to User Groups to confirm that the group's Total Users is updated.
Remove or move group
You can exclude users from a user group or move them to another group.
-
Click User Management → Users in the left sidebar.
-
Click the checkbox next to the users to remove from or move between groups in the user list.
When moving users, first select users from the same group, then proceed.
-
Click at the top left of the user list.
-
When the Manage User Groups window appears, perform one of the following:
-
To unassign the group, clear the selected group's checkbox.
-
To move the group, select the checkbox for the current group and then choose the target group.
-
-
Click OK to save the group settings.
Confirm the group changes in the User Group column of the user list.
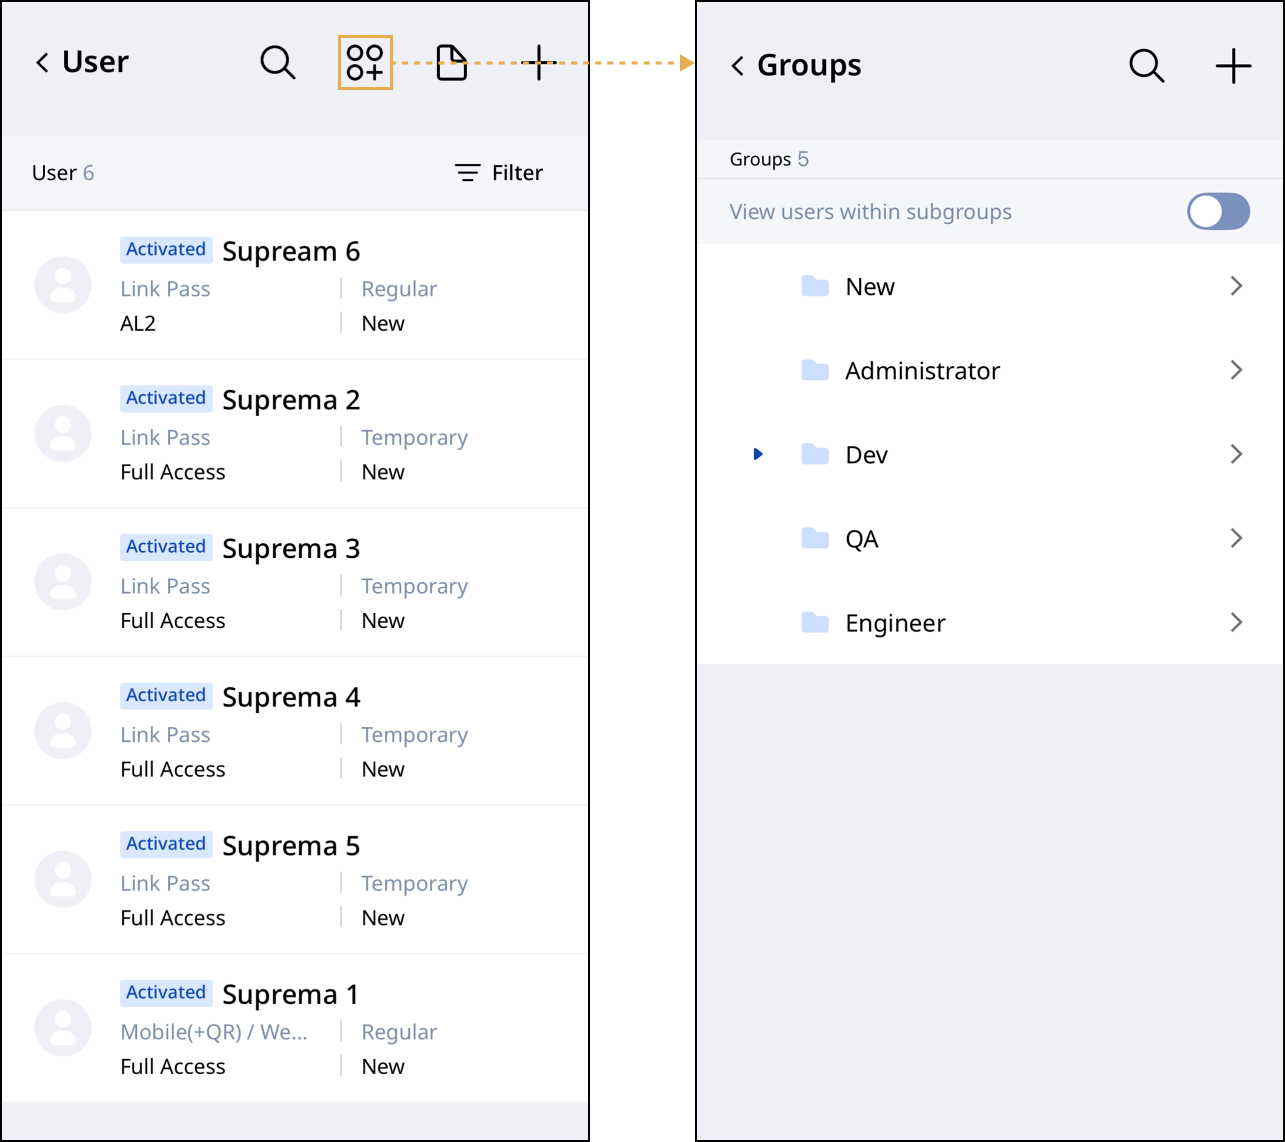
You can manage user groups in the mobile app. Tap at the top of the user list. The user group list appears.
-
To view users in a group, tap to the right of the desired group.
-
To add a new group, tap in the top right.
-
To edit a group name, long-press the desired group and tap at the bottom.
-
To delete a group, long-press the desired group and tap at the bottom. Select one or more groups to delete them.
For more information on managing user group, refer to Manage User Groups.
Manage user status
Activate or suspend a user's access permissions. Reissue credentials as well.
Individual user
- Web
- Mobile
-
Click User Management → Users in the left sidebar.
-
Click the user in the list to change their status.
-
Select the desired action at the top of the user details.

-
: Activate the user's access permissions. Use this feature for initial activation of new users or reactivation of suspended users.
-
: Reissue credentials. Use this feature when the user's credentials have expired or are unavailable.
-
: Block the user's access. Use this feature when the user is active.
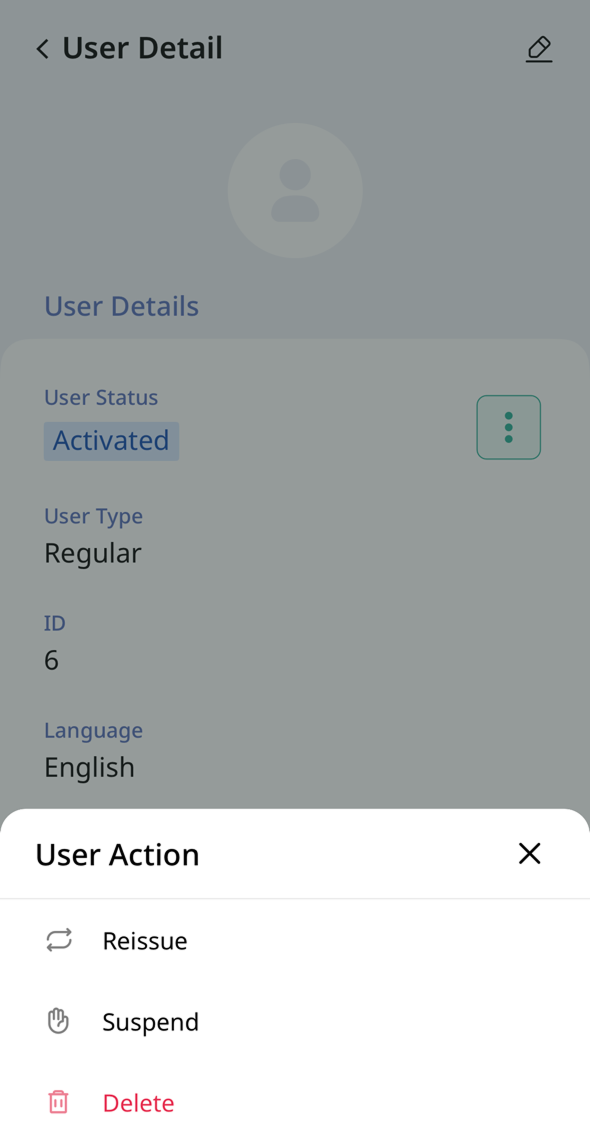
In the mobile app, tap a user in the list. In the User Detail screen, tap . The User actions menu appears.
-
Activate / Reactivate: Activate the user's access permissions. Use this feature for initial activation of new users or reactivation of suspended users.
-
Reissue: Reissues the user's credentials.
-
Suspend: Temporarily deactivates the user. Suspended users cannot access.
-
Delete: Deletes the user from the system.
The Reactivate option appears only for suspended users.
Batch actions
- Web
- Mobile
-
Click User Management → Users in the left sidebar.
-
Click the checkbox of each user in the list to change their status. You can select more than one user.
-
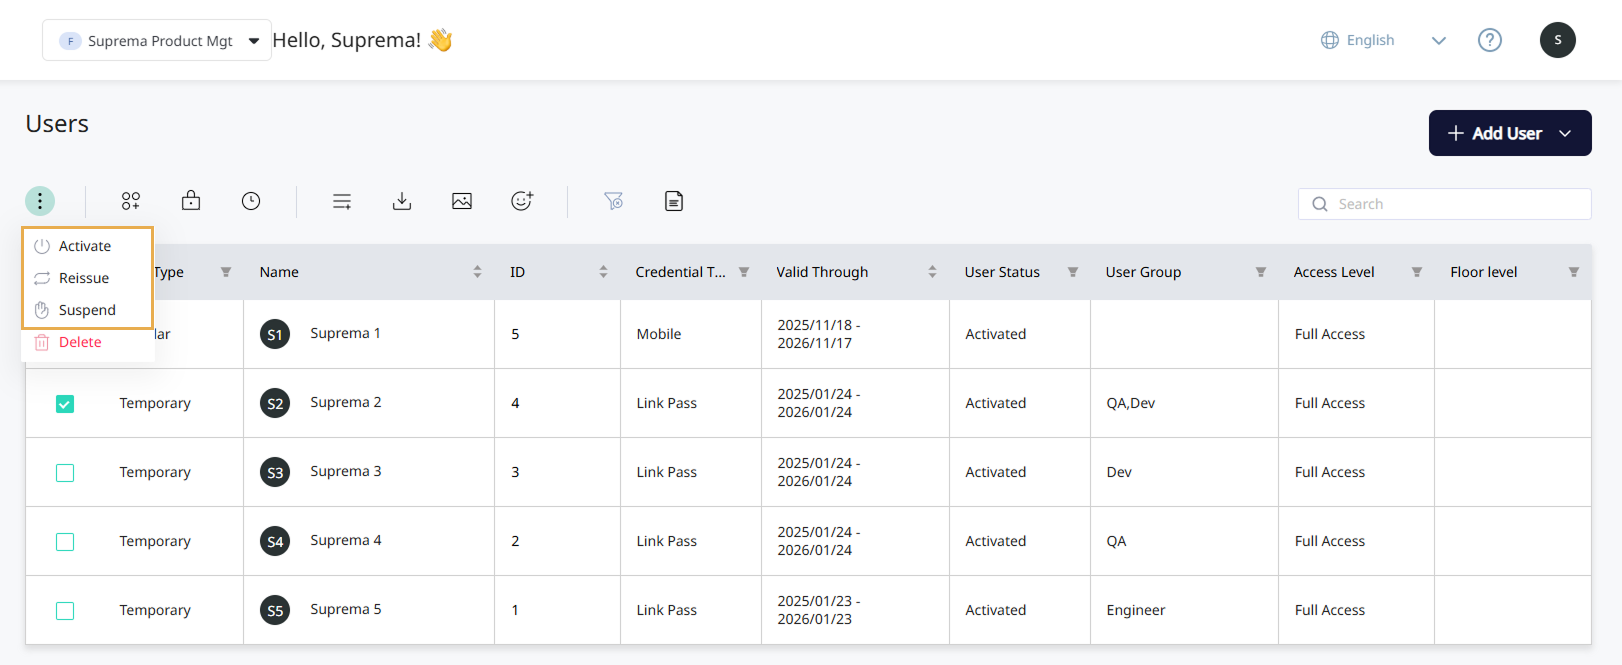
Click at the top left of the screen and select the desired action from the pop-up menu.
-
Activate / Reactivate: Activate the user's access permissions. Use this feature for initial activation of new users or reactivation of suspended users.
-
Reissue: Reissue credentials. Use this feature when the user's credentials have expired or are unavailable.
-
Suspend: Block the user's access. Use this feature when the user is active.
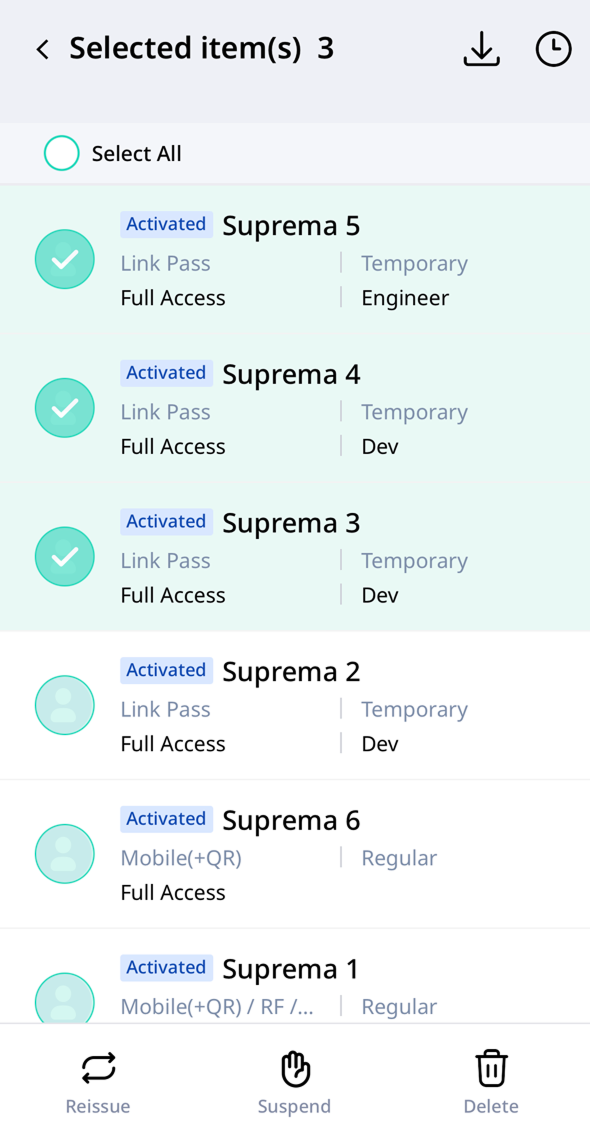
In the mobile app, long-press a user in the list to change their status. Select any additional users whose status you want to change. Tap the desired action in the User actions menu at the bottom of the screen.
-
Activate / Reactivate: Activate the user's access permissions. Use this feature for initial activation of new users or reactivation of suspended users.
-
Reissue: Reissues the user's credentials.
-
Suspend: Temporarily deactivates the user. Suspended users cannot access.
-
Delete: Deletes the user from the system.
The Reactivate option appears only for suspended users.
Delete users
Deleted users cannot be recovered. Be sure to verify before deleting.
Individual user
-
Click User Management → Users in the left sidebar.
-
Click the user you want to delete in the list.
-
Click in the user details.
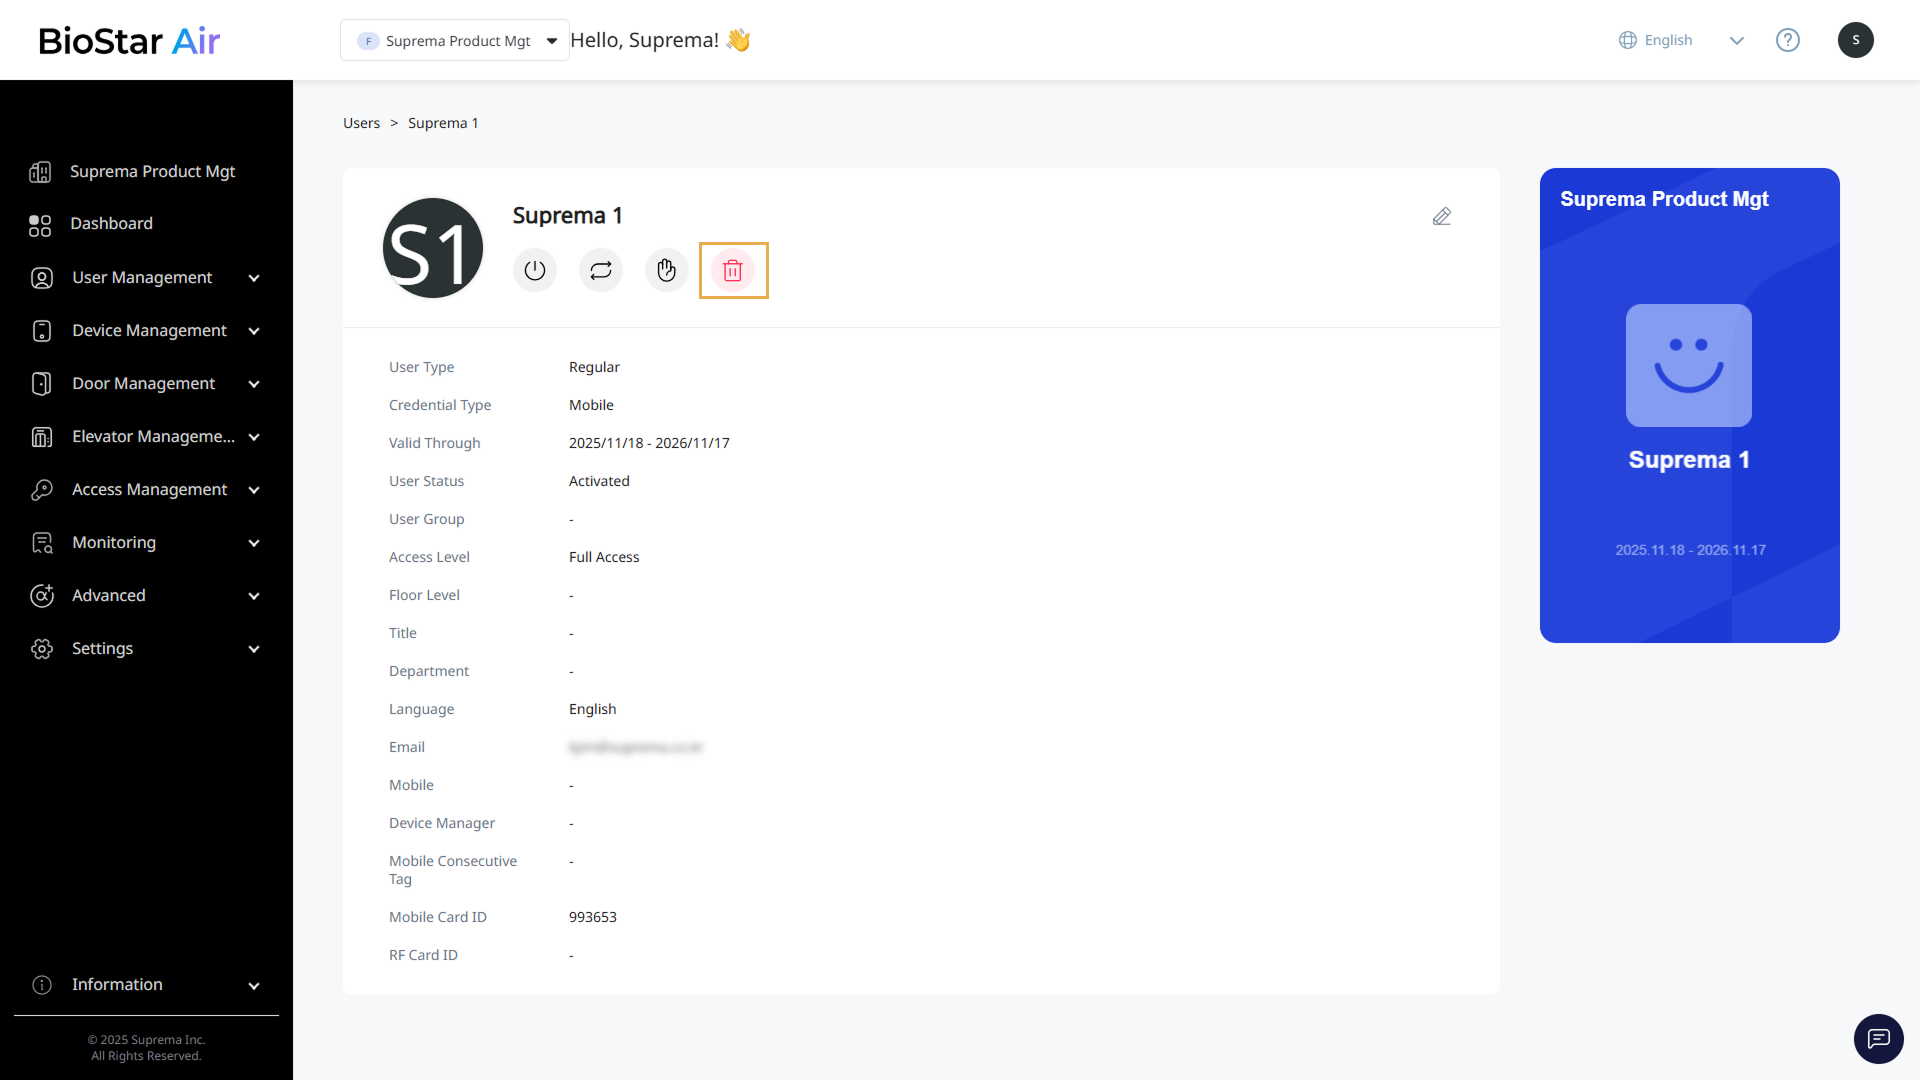
-
When a warning message appears, click Yes.
Delete multiple users
-
Click User Management → Users in the left sidebar.
-
Click the checkbox of each user you want to delete in the list. You can select more than one user.
-
Click → Delete at the top left of the screen.
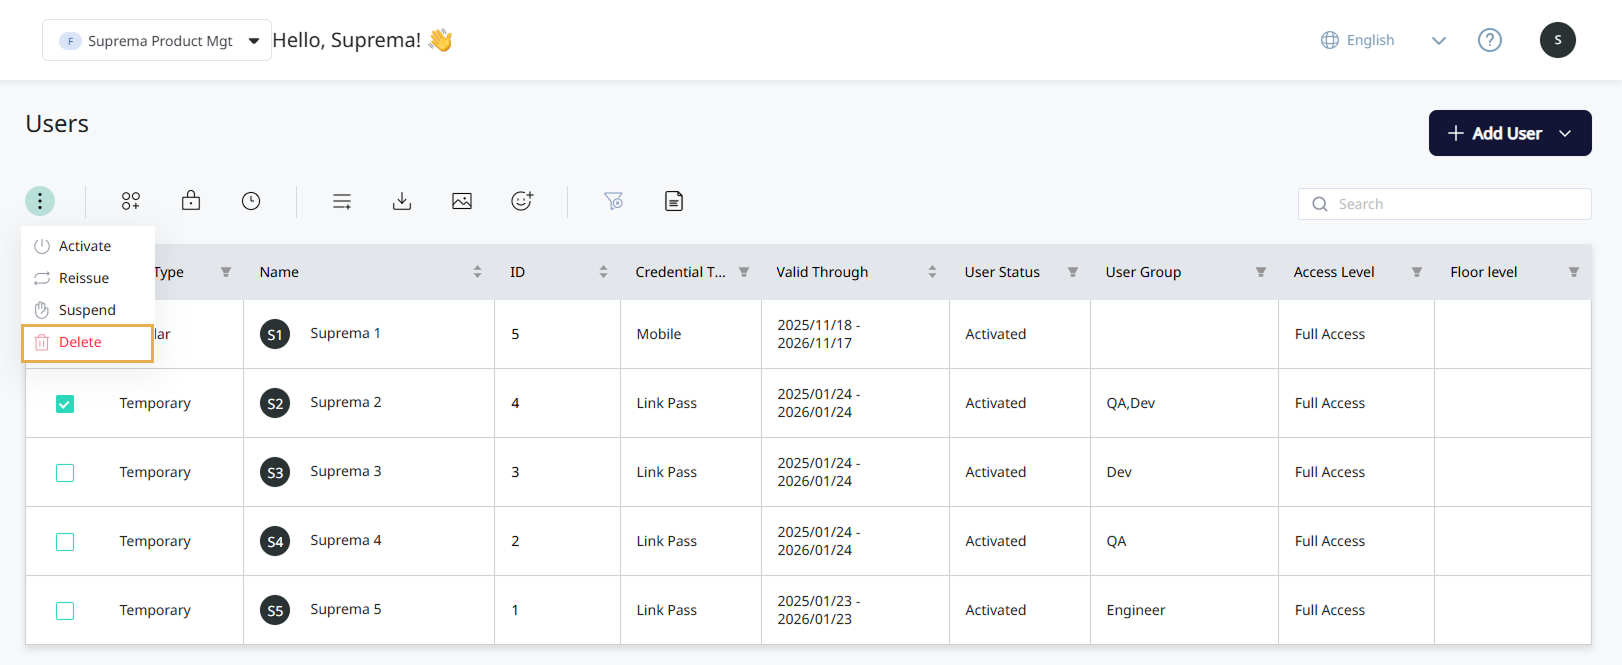
-
When a warning message appears, click Yes.
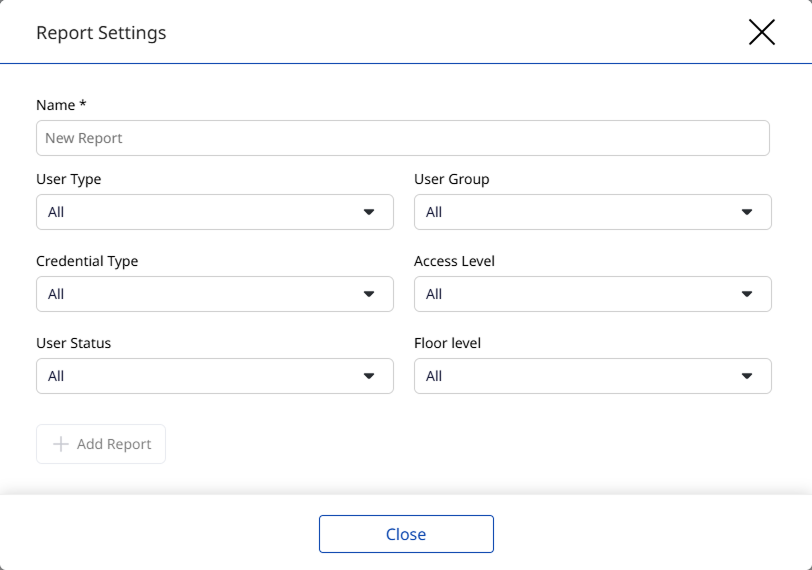
Create a user report
Create a user report and send it to the administrator's email.
-
Click at the top of the user list.
-
When the Report Settings window appears, enter a report name.
-
Select the items to include in the report from each filter option.
-
Click Add Report to save the report.
-
A Report List is created and a download link is sent to the administrator's email.
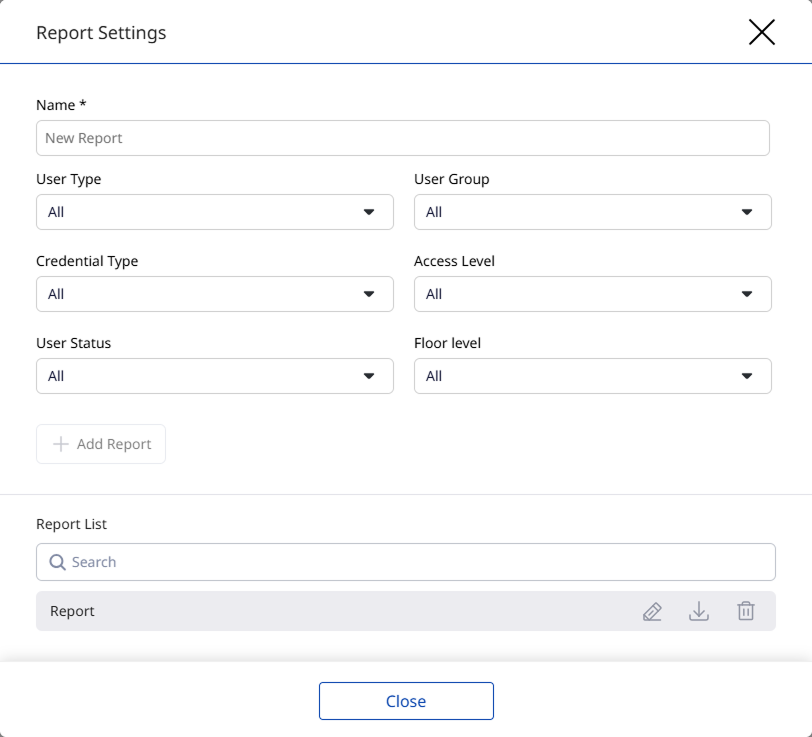
In Report List, search for, edit, download, or delete generated reports.
Search users
Use the search field in the top right of the user list to quickly find specific users. Search by user name, ID, or phone number.
