Change the Main Server IP Address
Refer to this document when the server's network environment changes or when you need to change the IP address after initial setup. This guide explains how to safely change the BioStar X main server IP address and reconfigure the connected Communication Server.
The main server IP address change feature is supported in BioStar X v1.0.2 and later.
IP address change
First, change the IP address on the server where BioStar X is installed. Change the IP address of the network adapter connected to the external network.
For more information on changing the IP address on Windows, please refer to Microsoft Customer Support.
Apply the new IP address
Follow the steps below to change the IP address on the server where BioStar X is installed.
-
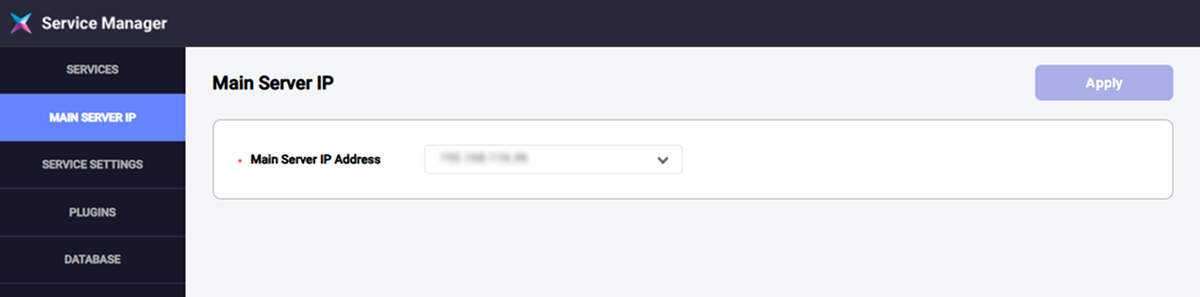
In Windows, click Start → BioStar X → BioStar X IP Setting.
-
When the BioStar X IP Setting window appears, select the IP address you want to use from Server Address.
-
Click the Apply button.
-
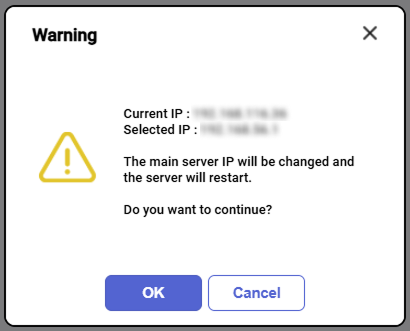
If a message about the IP address change appears, review it and click the Yes button.
-
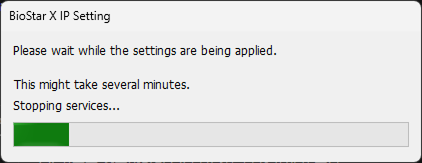
Wait until the IP address change process completes. When the process completes, a success message appears.
-
If the IP change applied successfully message appears, click the OK button.
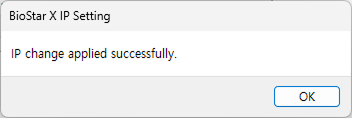
After the IP address change completes, restart all services. Open a web browser and verify that you can access the server using the new IP address.
-
The IP address cannot be entered manually; select one from the IP addresses listed in Server Address.
-
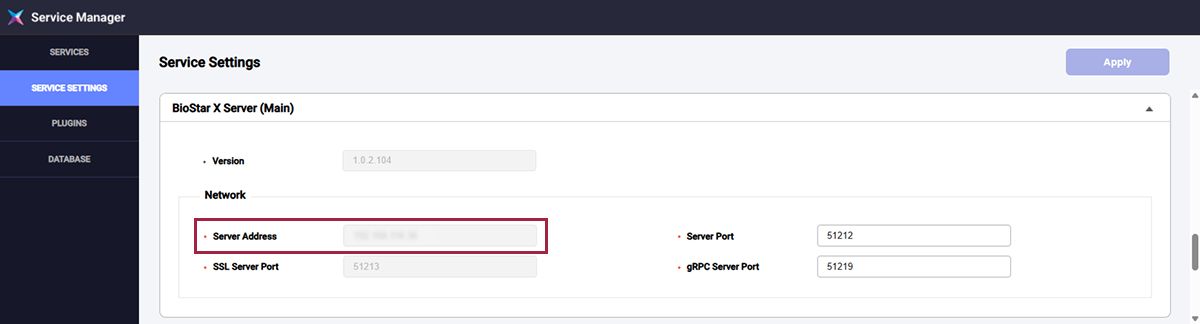
You can view the new IP address in BioStar X Service Manager → SERVICE SETTINGS → BioStar X Server (Main) under Server Address.
Communication server update
If you installed a Communication Server, update its settings to use the main server's new IP address. Run this on the server where you installed the Communication Server.
-
Navigate to C:\Program Files\BioStar X Communications Server.
-
Run biostar-device-cert-enroll.exe.
-
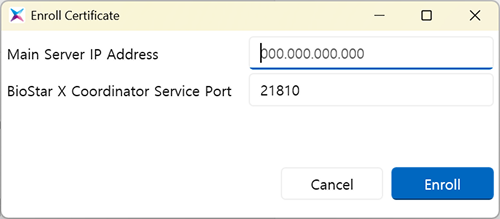
When the Certificate Enrollment window appears, enter the new IP address of the main server in the Main Server IP Address field.
-
If the main server's port number differs from the default (21810), enter the new port number in the BioStar X Coordinator Service Port field.
-
Click the Enroll button.
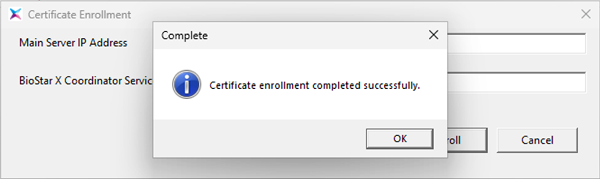
After updating the main server's IP address, a success message appears.
-
If you didn't install a Communication Server, skip this step.
-
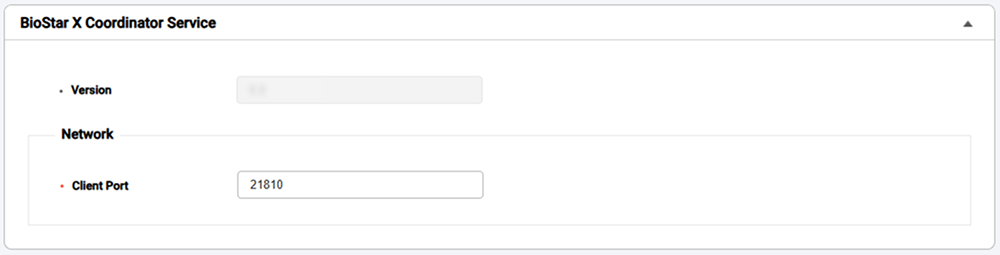
If you changed the port number on the main server where BioStar X is installed, run BioStar X Service Manager on the main server and check the Client Port value under SERVICE SETTINGS → BioStar X Coordinator Service.
-
For more information on installing the communication server, see Install Communication Server.