System Restore
You can restore using a system backup file when there is an issue with BioStar X or you need to revert to a previous state. Using the Restore feature, you can restore the database, settings, and license information to their state at the time of the backup.
Before start
Before starting the system restore, check the following.
-
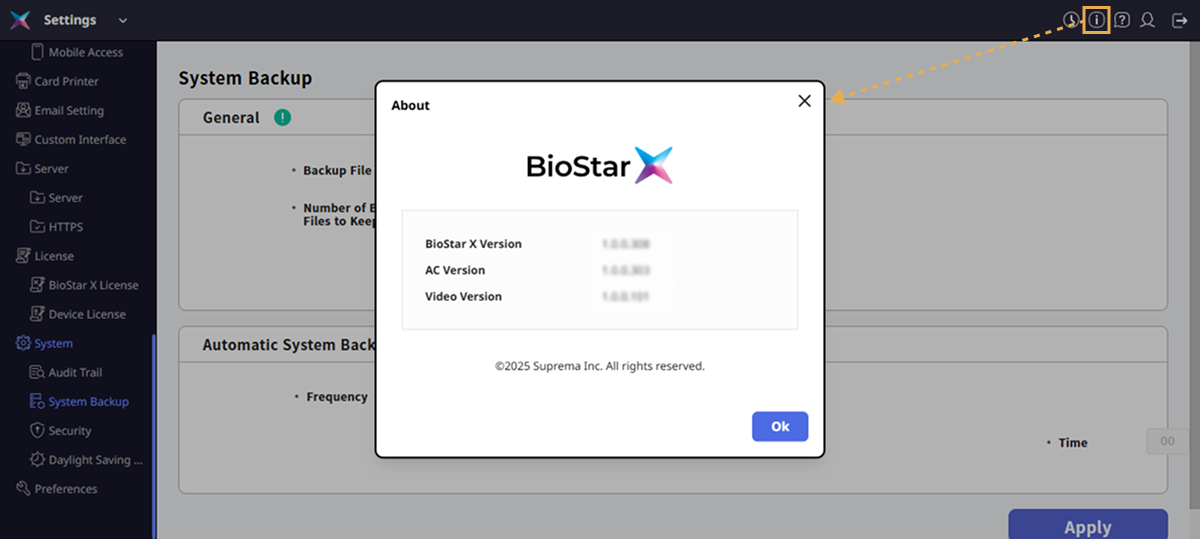
Restoration cannot proceed if the version of BioStar X at the time of the backup is different from the current version. To check the version of BioStar X, click the button at the top right of the screen.
-
To check the version of BioStar X at the time of the backup, extract the backup file and check the
biostarVersionvalue in the sysbackup.conf file. -
If the SQL Server database and BioStar X are installed on different servers, you cannot use BioStar X system backup and restore.
-
If the restore target server's IP address differs from the backup server's:
-
BioStar X v1.0.2 or later: During a restore, BioStar X detects the restore target's IP address and automatically reissues the certificate based on the new IP address. After the certificate is reissued, services that use the certificate automatically reconnect, so no additional action is required.
-
BioStar X v1.0.1 or earlier: The restore may fail. Verify the server IP address before proceeding with the restore.
-
-
Even if the encryption key or image log path has changed, the restore follows the current setting paths of the target BioStar X. If no custom path is specified, the restore will use the default path on the target BioStar X.
-
When you perform a restore, the current data is automatically backed up. If the restore fails, you can revert to the state prior to the restore.
For more information on creating a system backup, see System Backup.
System Restore
-
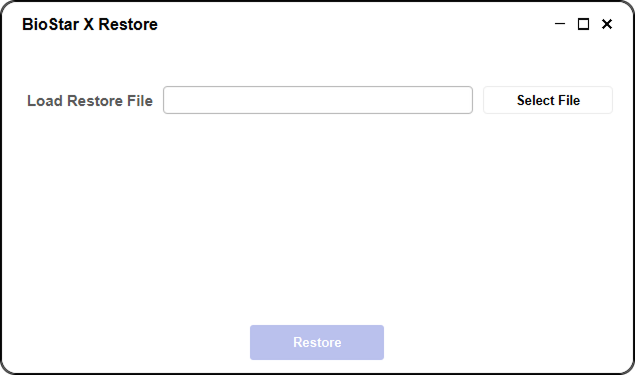
In Windows, run Start → BioStar X → BioStar X Restore.
Program path: C:\Program Files\BioStar X\biostar-restore.exe
-
Click the Select File button and choose the backup file to restore.
-
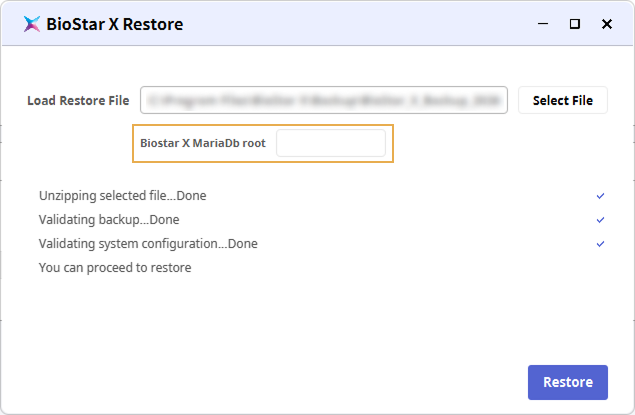
To start the restoration, click the Restore button.
-
Validate the backup file.
-
When the You can proceed to restore message appears, enter the database password and click Restore.
-
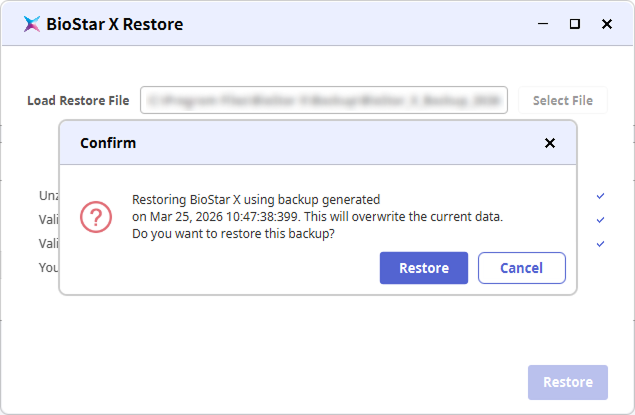
Click Restore to confirm and continue the restore.
-
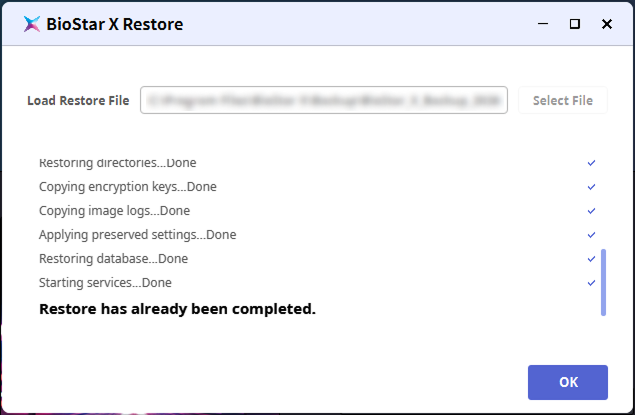
A message appears showing restore progress. Wait for the restore to complete.

If the Restore has already been completed message appears, the restore is complete. Access BioStar X to verify the restored data.
-
If the PC shuts down unexpectedly during the restore, run BioStar X Restore again to retry the restore.
-
If the restore target server's IP address differs from the backup server's and a communication server is connected, you must reissue the certificate. For more information on how to reissue the certificate for the communication server, see Change the Main Server IP Address.