View the Report
You can generate T&A reports from user attendance events collected through the system, and edit time records or export them as CSV or PDF files.
Easily use the pre-set 7 report filters, and administrators can set filters themselves.
Before start
Before using the multilingual report
BioStar X supports both Korean and English by default. To use multilingual reports, set your desired language according to the following instructions.
-
Navigate to the following path. C:\Program Files\BioStar X\plugin\ta\dist\setup\report_fonts
-
Create a folder with the name of the language you want to use. Refer to the ISO 639-1 standards for language names. For example, to use Spanish, create a folder named "es."
-
Copy and paste the fonts into the created folder. Only one TrueType font is supported.
Before updating the report,
BioStar X uses MariaDB as the default database. If you are using MS SQL Server database, please check the following items first.
When using BioStar X with MS SQL Server, if there are many registered users, the memory usage on the PC may accumulate each time the report is updated. Reset the maximum server memory of the MS SQL Server database.
-
Run Microsoft SQL Server Management Studio.
-
Right-click on the BioStar X database in the object explorer.
-
Click on Properties in the popup menu.
-
Click Memory and reduce the value of Maximum server memory item.
For more information on MariaDB and MS SQL Server settings during BioStar X installation, refer to Custom Installation.
Check the report
Generate the report
This provides instructions on generating attendance records reports for registered users.
-
Click T&A on the Launcher page.
-
Click the Report tab on the left sidebar of the screen.

-
Click the desired report filter item from the left sidebar of the screen.
-
In User Group or User, click the button, then specify the group or user.
-
To generate the report, click the Update Report button.
-
When the list of reports appears at the bottom of the screen, you can click the desired item to view details.
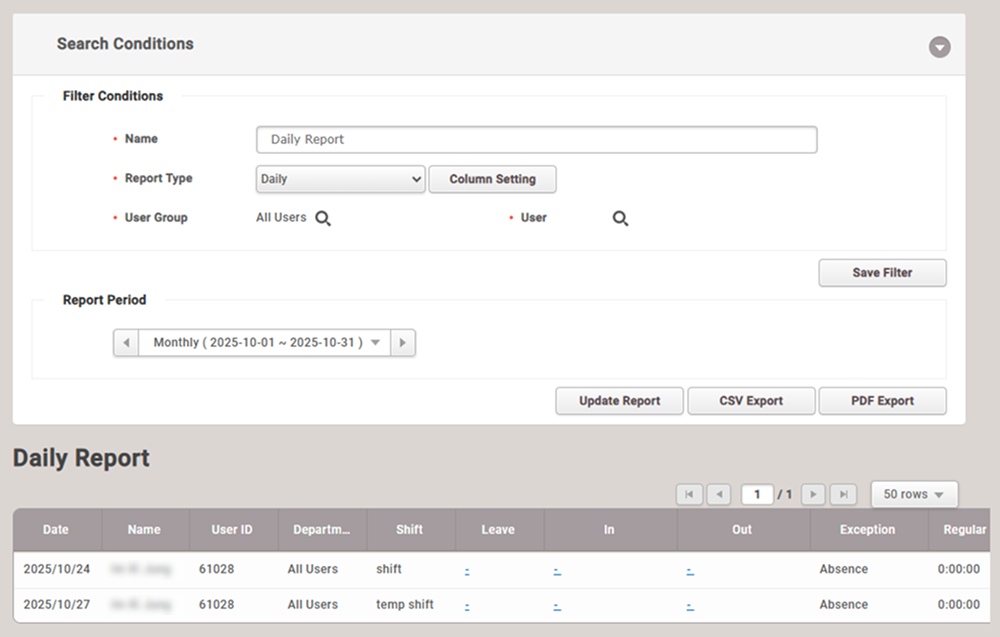
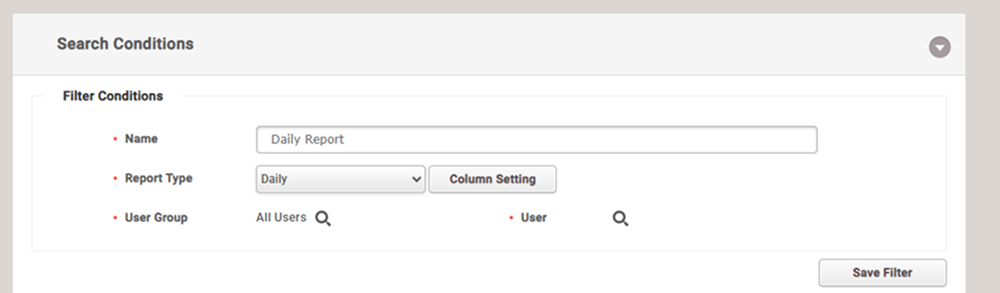
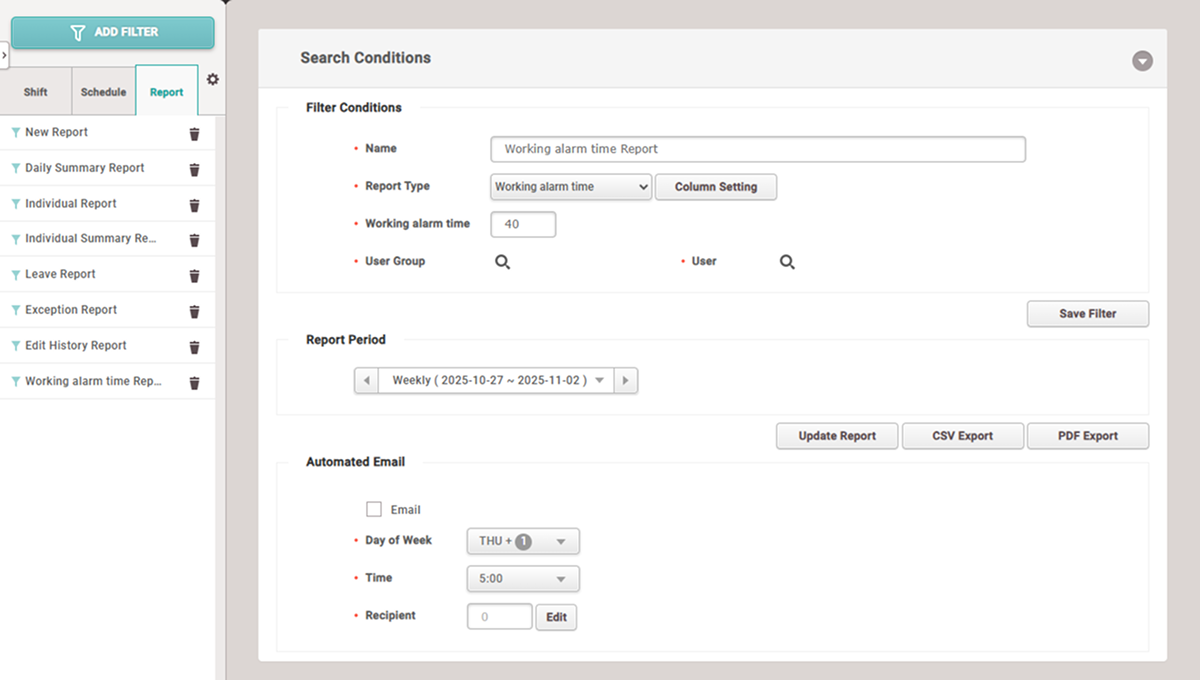
Set the filter conditions
You can set filter conditions to generate a new T&A record report.
-
Name: Enter the report name.
-
Report Type: Select the desired report type. The available report types are as follows.
- Daily, Daily Summary, Individual, Individual Summary, Leave, Exception, Modified Punch Log History, Working alarm time
InfoBy selecting Report Type as Individual, you can set whether to output user entry records.

-
In/Out Only: This outputs only the user's check-in and check-out records in the report.
-
All Punches: This outputs all user entry records in the report.
-
Column Setting: You can change the order of the report table columns or hide them.
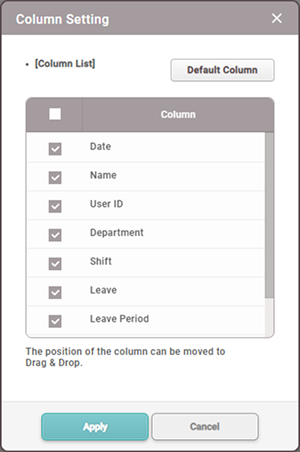 Info
InfoAfter changing the column order, click the Default Column button to restore to defaults.
-
Filter: This will only activate when Report Type is set to Leave or Exception, and you can choose specific conditions for absence or exception records.
-
User Group / User: Select the user group or user for report generation.
-
Save Filter: You can save the configured attendance report as a filter.
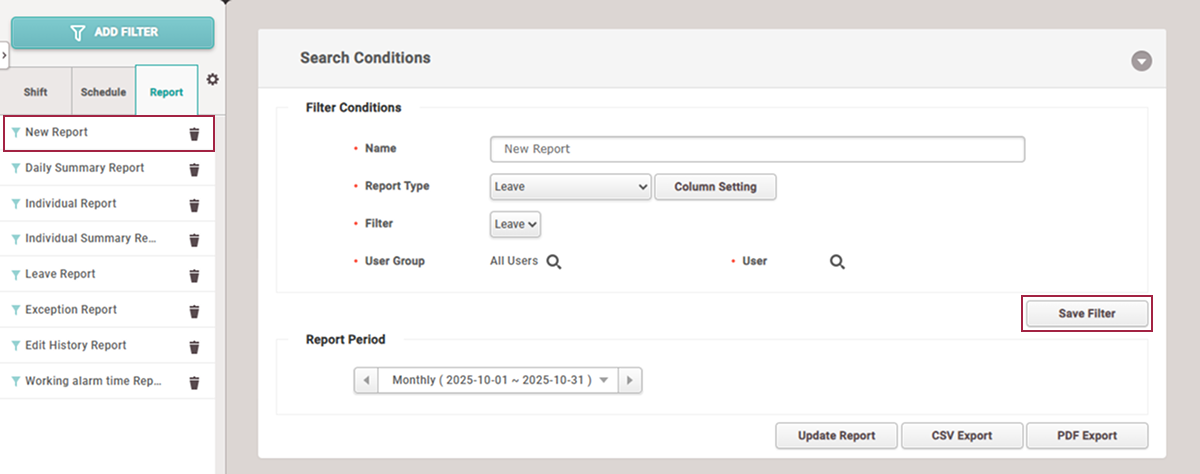
Set report period
This provides instructions on setting the report period.
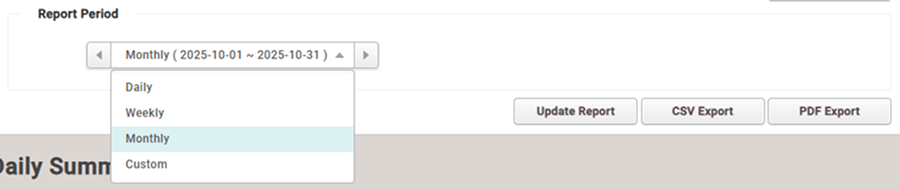
You can set the report period to Daily, Weekly, or Monthly. To generate a report for a specific period, select Custom.
Export report
-
CSV Export: You can save the generated report as a CSV file.
-
PDF Export: You can save the generated report as a PDF file.
Generate working alarm time report
You can generate T&A reports for users who have reached the designated working hours or notify the administrator via email. The alert working hours report is generated weekly.
-
Click T&A on the Launcher page.
-
Click the Report tab on the left sidebar of the screen.
-
Click Working Alarm Time Report in the filter list on the left sidebar.
-
Set each item in Filter Conditions and Report Period.
-
To generate the report, click the Update Report button.
To send notifications to the administrator via email for users who have reached the designated working hours, set Automated Email. For more information, see #autoEmail.
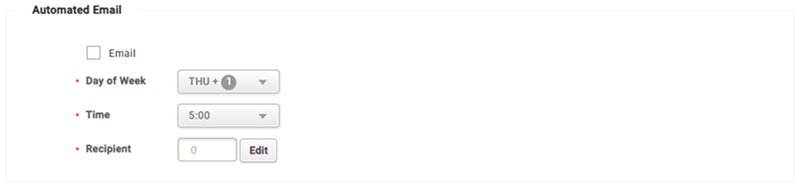
Automatic email sending settings
You can automatically send alarm emails to the administrator for users who have reached the designated working hours.
-
Email: Click the checkbox to automatically send emails to the administrator.
-
Day of Week: Select the day of the week to send emails to the administrator.
-
Time: Set the time to send emails to the administrator.
-
Recipient: You can specify the administrator who will receive the email. Click the Edit button to open the Recipient popup window. Enter the email address. You can specify more than one administrator.

-
To set the Automated Email feature, you must set filter conditions and then save the filter.
-
The sender information of automatically sent emails can be set in Setting() → Sender Information in the left sidebar of the screen. For more information, see Set Time & Attendance.