Set the Schedule
You can create work schedules by specifying the set Shift, Rule, duration, and holidays.
You can also add temporary schedules or personal leave to the created work schedule.
Before creating the schedule, ensure that you have correctly created the Time Code, Shift, Shift, and holidays.
-
For more information about work rule settings, refer to the following:
-
For more information on holiday settings, see Schedule Settings.
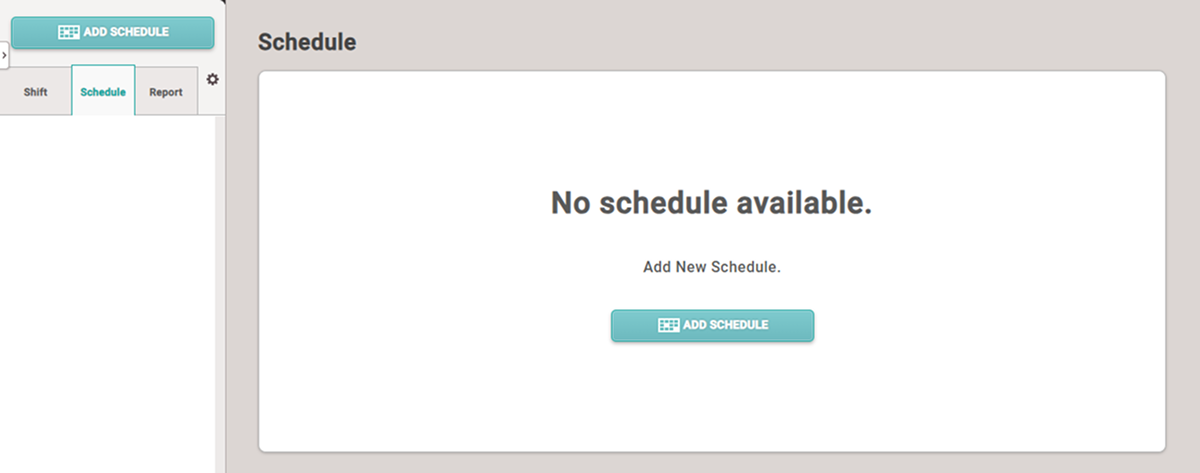
Work schedule
Add a schedule
Add the work schedule for the registered users as instructed below.
-
Click T&A on the Launcher page.
-
Click Schedule tab on the left sidebar of the screen.
-
Click ADD SCHEDULE button.
-
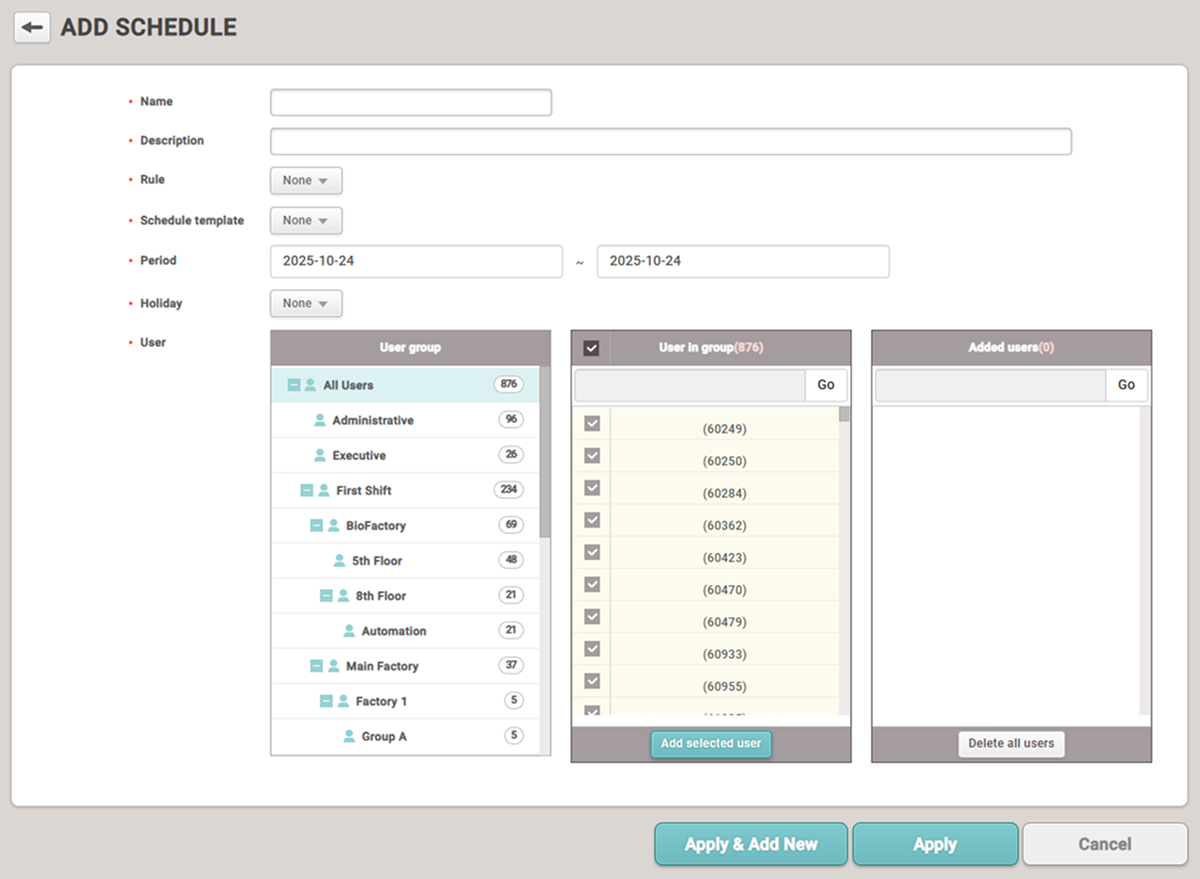
When the ADD SCHEDULE screen appears, set each item.
-
Click Apply at the bottom of the screen to save the settings.
-
After saving the settings, click Apply & Add New button to add another Schedule.
Setting options guide
Guide for work schedule configuration options.
-
Name: Enter the name of the work schedule.
-
Description: Enter a description for the work schedule.
-
Rule: Select the configured Rule. Setting Rule disregards the overtime rules set on Shift. Select None if not in use.
InfoIf the desired Rule is not available, you can add it. For more information, see Set Other Work Rules.
-
Schedule template: Select the configured Schedule template. Once set, Schedule template cannot be modified.
InfoIf the desired Schedule template is not available, you can add it. For more information, see Set Weekly Shifts.
-
Period: Set the period for collecting attendance events.
InfoThe start date cannot be changed once set. The end date can be changed later, and if it is changed to a date earlier than the set date, attendance events for the changed period will be deleted.
-
Holiday: Select the configured holiday schedule. Select None if not in use.
InfoIf the desired holiday schedule is not available, you can add it. For more information, see Schedule Settings.
-
User: Add users to apply the rules.
The number of users included in the overall work schedule cannot exceed the maximum supported by your registered attendance management license. The maximum number of users per license is detailed in License Policy.
Edit a schedule
Guide for modifying registered work schedules.
-
Click T&A on the Launcher page.
-
Click Schedule tab on the left sidebar of the screen.
-
Click the item to modify from the Schedule list. Alternatively, click the button for the item to modify on the left sidebar of the screen.
-
Modify the desired item and click the Apply button.
Delete a schedule
Guide for deleting registered work schedules.
-
Click T&A on the Launcher page.
-
Click Schedule tab on the left sidebar of the screen.
-
Click the checkbox for the item you want to delete from the Schedule list.

-
Click the Delete schedule button at the top right of the screen. Alternatively, click the button for the item to delete on the left sidebar of the screen.
-
When the confirmation message appears, click Yes.
Add a temporary schedule
If a schedule is already registered, a temporary different work rule can be applied to the user.
-
Click T&A on the Launcher page.
-
Click Schedule tab on the left sidebar of the screen.
-
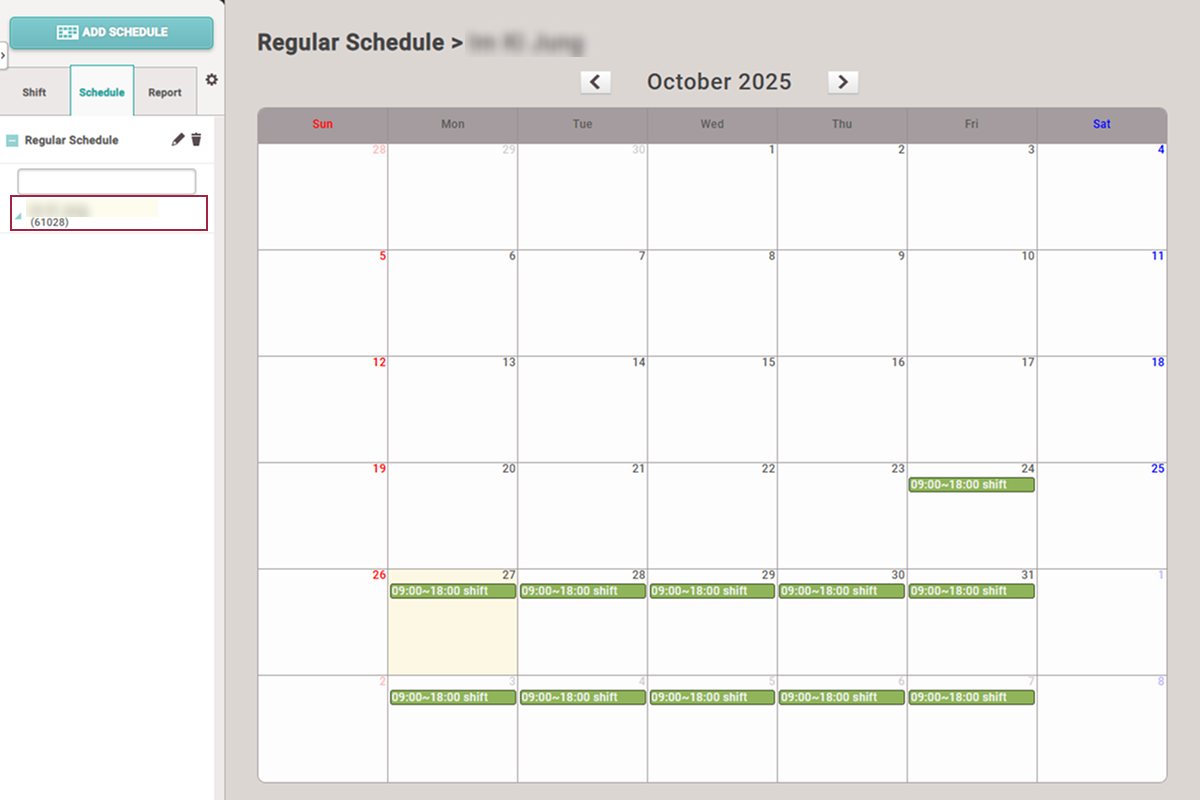
Click the button for the desired schedule from the list on the left side of the screen.
-
A list of users assigned to the schedule will appear, and selecting a user to apply a temporary schedule will show the calendar.
-
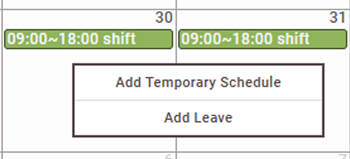
Click the date to which you want to add a temporary schedule on the calendar.
-
Click Add Temporary Schedule in the popup menu.
-
When the Add Temporary Schedule settings window appears, set each item.
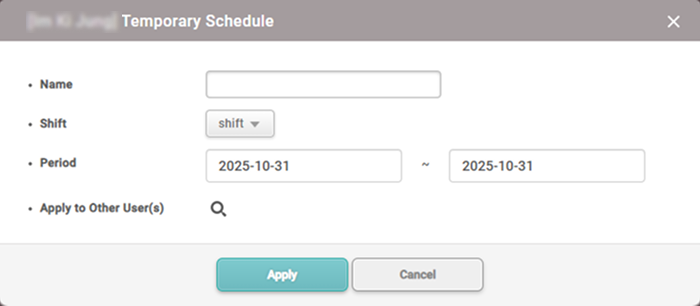
To apply the same work schedule to other users, click the button and select the users.
-
Click the Apply button to apply the set work rules.
To delete the temporary schedule applied to the user, click the set temporary schedule on the calendar. Click the Yes button when the confirmation message window appears.
Add and remove a leave
You can add a user’s personal leave schedule.
-
Click T&A on the Launcher page.
-
Click Schedule tab on the left sidebar of the screen.
-
Click the button for the desired schedule from the list on the left side of the screen.
-
A list of users assigned to the schedule will appear, and selecting a user to apply the absence schedule will show the calendar.
-
Click the date on the calendar to add the user's absence schedule.
-
Click Add Leave in the popup menu.
-
When the Edit Leave settings window appears, set each item.
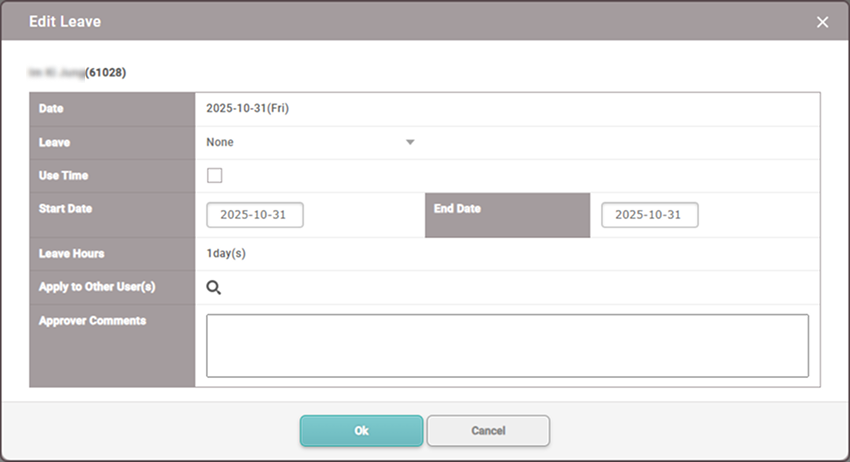
To apply the same absence schedule to other users, click the button and select the users.
-
Click the Apply button to apply the set absence schedule.
-
If the desired absence management time rules are not available, you can add them. For more information on adding time rules, see Set Time Code.
-
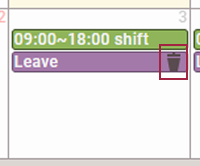
To delete the absence schedule applied to the user, click the button for the set absence schedule on the calendar. Click the Yes button when the confirmation message window appears.