Apply to Visit
This guides how external visitors who are not internal users apply for entry using the visitor application PC.
-
The visitor application PC must be configured separately, and visitor settings must precede it. For more information on visitor settings, refer to Visitor Settings.
-
If there is no shortcut icon for the visitor application page on the visitor application PC, see Visitor Settings to create a shortcut icon.
New visitor application
This guides how first-time visitors apply for entry using the visitor application PC.
-
Run the visitor application page on the visitor application PC. The URL address for the visitor application page is in the format
https://{biostar_x_server_ip}/#/register-welcome.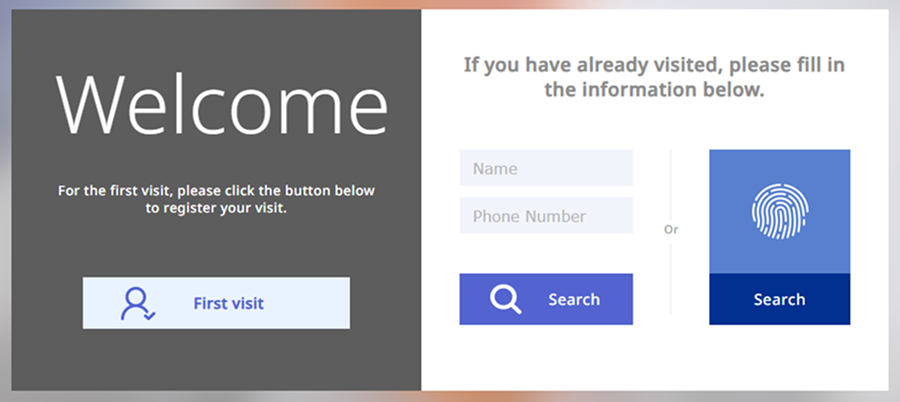
-
Click First visit in the center of the screen.
-
After agreeing to the terms and privacy policy regarding access to the visiting department, click the Next button in the lower right corner of the screen.
-
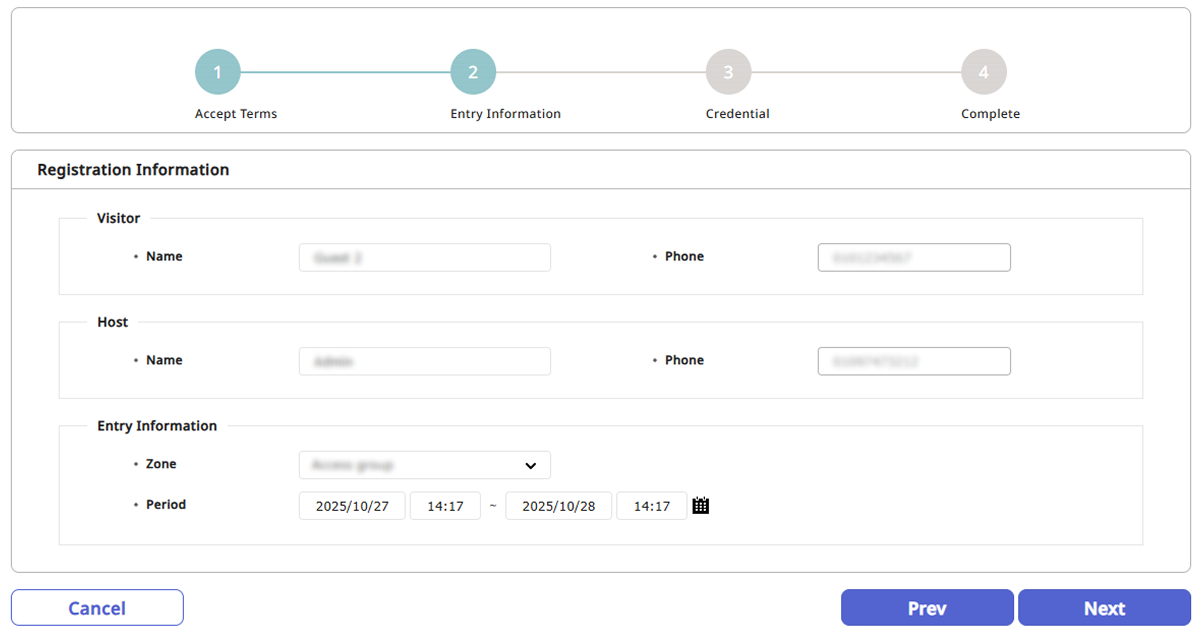
Enter the information required for the visit application.

-
Visitor: Enter the visitor's name and phone number.
-
Host: Enter the name and phone number of the person responsible for the visit destination.
-
Entry Information: Set the access area and visit duration.
-
-
After entering the information, click the Next button in the lower right corner of the screen.
-
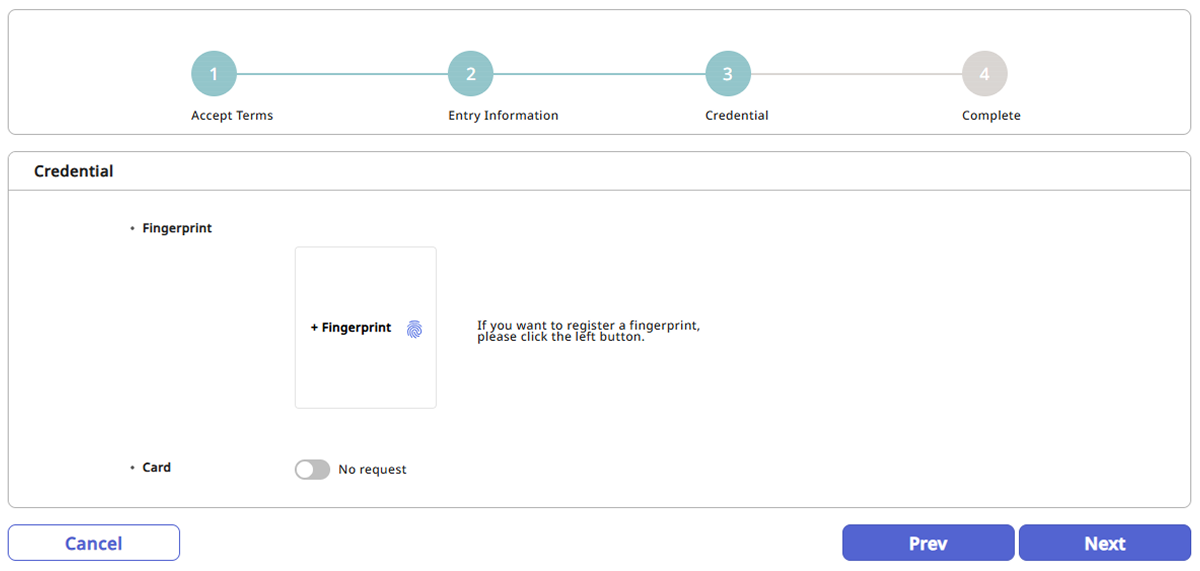
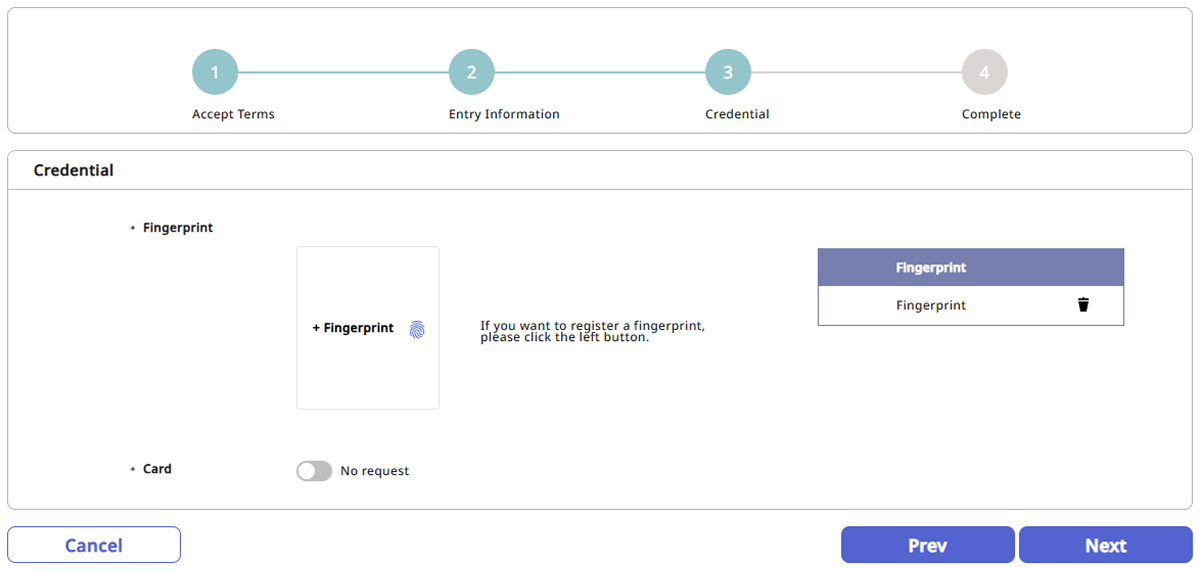
Set the means of entry.
-
Fingerprint: To use fingerprint authentication, click the + Fingerprint button and then enroll your fingerprint.
-
Card: To use card authentication, set it up with Request and receive a card from the administrator.
-
-
After completing the settings, click the Next button in the lower right corner of the screen.
-
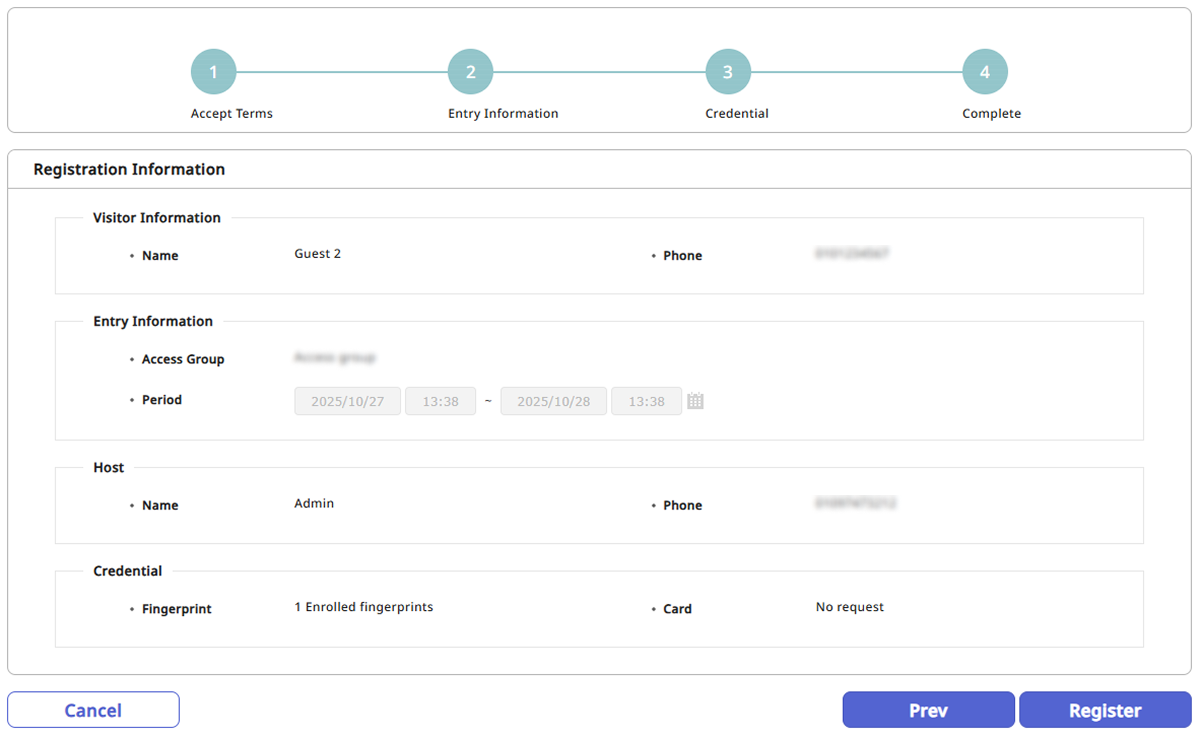
After confirming all the information provided, click the Register button in the lower right corner of the screen.
-
For more information on creating terms of use and a privacy policy for visitor access, see Visitor Settings.
-
The name can be entered up to 48 characters long.
-
For more information on adding custom fields to visitor information, see Visitor Settings.
-
You can only select access groups assigned to the visiting department for the visit PC. For more information, see Visitor Settings.
-
For more information on access groups, see Manage Access Groups.
-
To return to the previous step and modify the visit information, click the Prev button.
-
To scan fingerprints, a fingerprint registration device must be connected to the visitor application PC.
Apply using existing information
If a fingerprint is enrolled at the visiting location, you can search for the fingerprint and apply for a visit using the existing visit information.
-
Run the visitor application page on the visitor application PC. The URL address for the visitor application page is in the format
https://{biostar_x_server_ip}/#/register-welcome. -
Click Search below the fingerprint icon in the center of the screen.
-
Scan your fingerprint on the fingerprint scanning device. Use the scanned fingerprint to search for registered users.
-
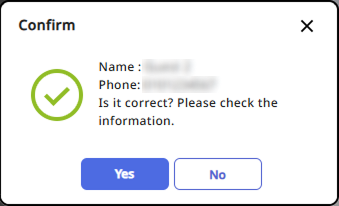
If a fingerprint matches a previously enrolled visitor, a confirmation message will appear.
-
If the searched visitor is correct, click the Yes button.
-
After agreeing to the terms and privacy policy regarding access to the visiting department, click the Next button in the lower right corner of the screen.
-
Confirm the visit information set during the previous visit. To modify existing information, edit each item and then click the Next button in the lower right corner of the screen.
-
Confirm the means of entry set during the previous visit. To change the existing means of entry, edit the item to be changed and then click the Next button in the lower right corner of the screen.
-
After confirming all the information provided, click the Register button in the lower right corner of the screen.